Jira Cloud

The Jira Cloud integration connects your StackHawk organization to Atlassian Jira, enabling you to create and track issues directly from scan findings. You can associate vulnerabilities with new or existing Jira issues without leaving the StackHawk platform.
This integration works alongside the Security in Jira integration and uses the same Atlassian Marketplace add-on. Enabling this integration also enables Security in Jira.
Features
- Issue creation: Create new Jira issues from scan findings with pre-populated vulnerability details
- Issue linking: Associate findings with existing Jira issues for ongoing tracking
- Multiple workspaces: Connect multiple Jira workspaces to a single StackHawk organization
- Default configuration: Set default project and issue type per workspace
Requirements
StackHawk:
- You must have a StackHawk account.
- Your StackHawk Organization must belong to a plan with Jira Cloud support enabled. Reach out to StackHawk Support to enable it.
Jira:
- You must have login permissions to the Jira workspace you wish to add the integration to.
- You must have sufficient administration permissions to install add-ons to your Jira Cloud workspace.
Scopes
This integration requires the following Jira Cloud permissions:
- Read access: View projects, issues, and issue types in your Jira workspace
- Write access: Create and update issues, add comments
- Delete access: Remove issue associations when findings are cleared
Setup
Install the StackHawk for Jira add-on from the Atlassian Marketplace, then connect it to your StackHawk organization.
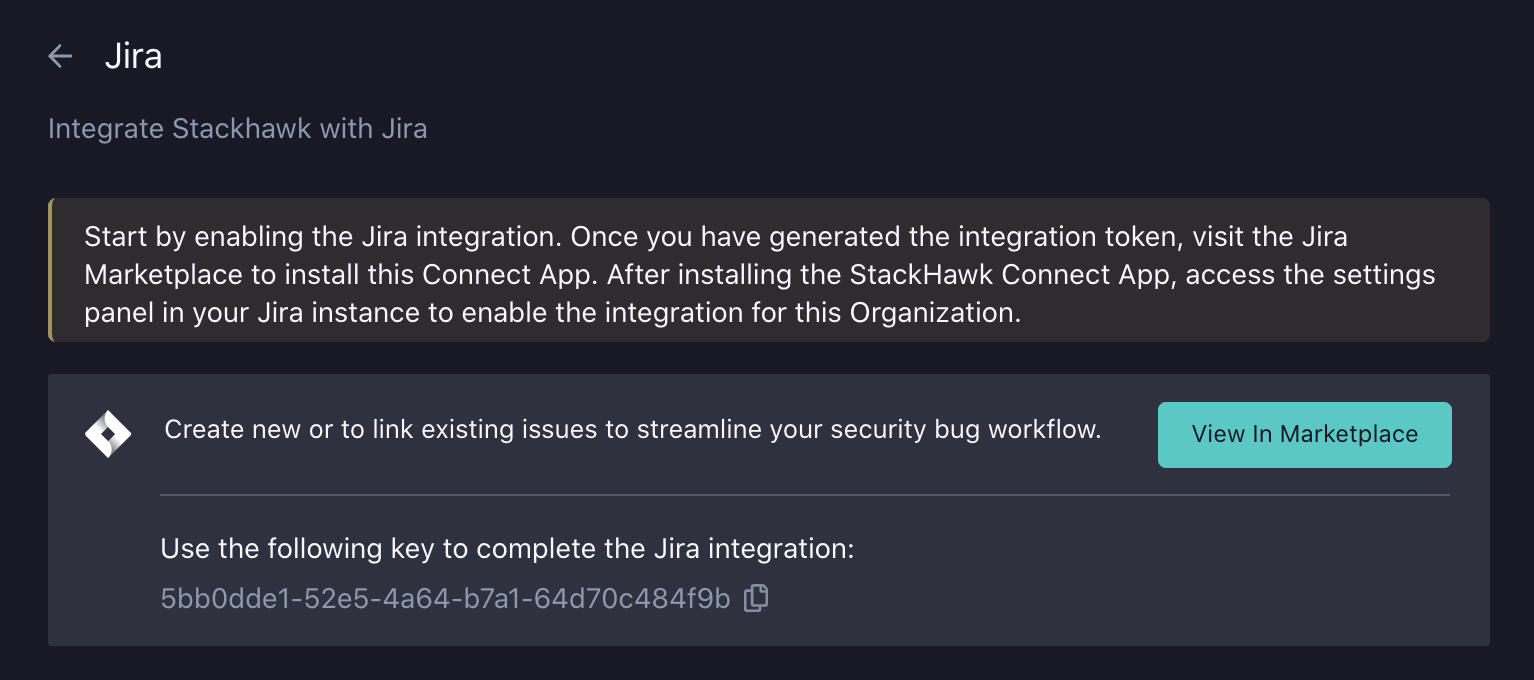
- Log into StackHawk and go to the Jira Cloud Integration page.
- Click Enable Jira to generate a temporary integration token.
- Click View In Marketplace to open the Atlassian Marketplace in a new tab.
- Click Install and complete the installation process. Once finished, click Get Started to authorize the add-on.
Token Authorization
After installing the add-on, connect it to your StackHawk organization using a one-time token:
- Go to the Jira Integration page in StackHawk.
- Copy the integration token. This token expires after one hour.
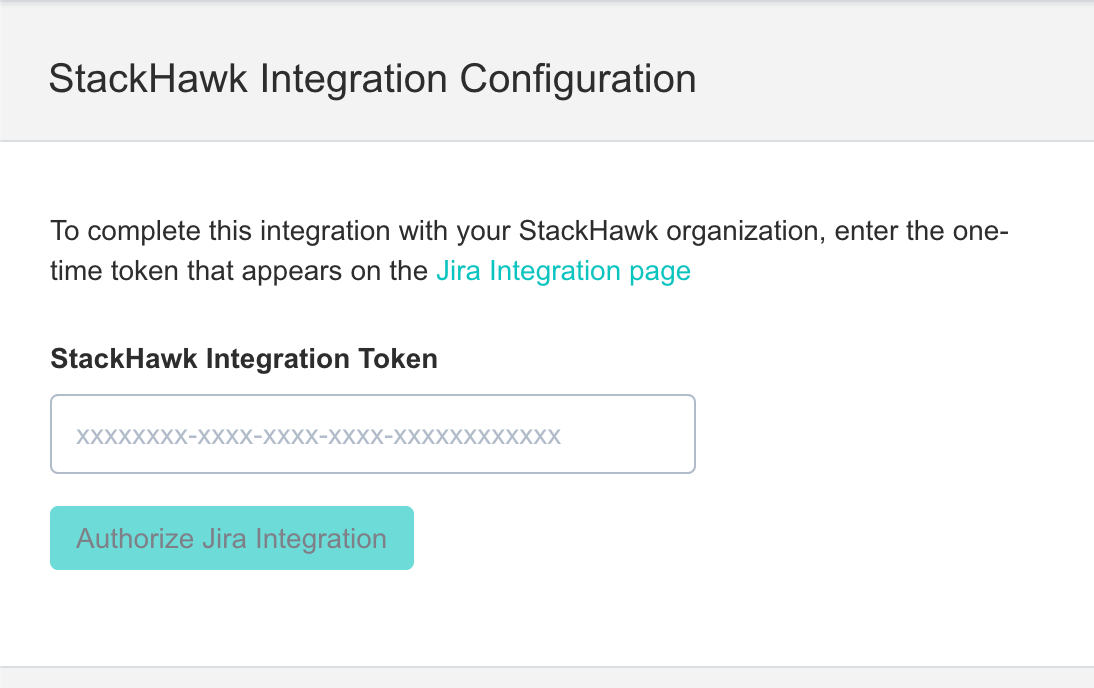
- In Jira Cloud, navigate to Apps > Manage Your Apps > StackHawk for Jira > Get Started.
- Paste the token into the StackHawk Integration Token field.
- Your Jira workspace is now connected to your StackHawk organization.
You can connect additional Jira workspaces to StackHawk. Each workspace can have its own default project and issue type for creating issues from findings.
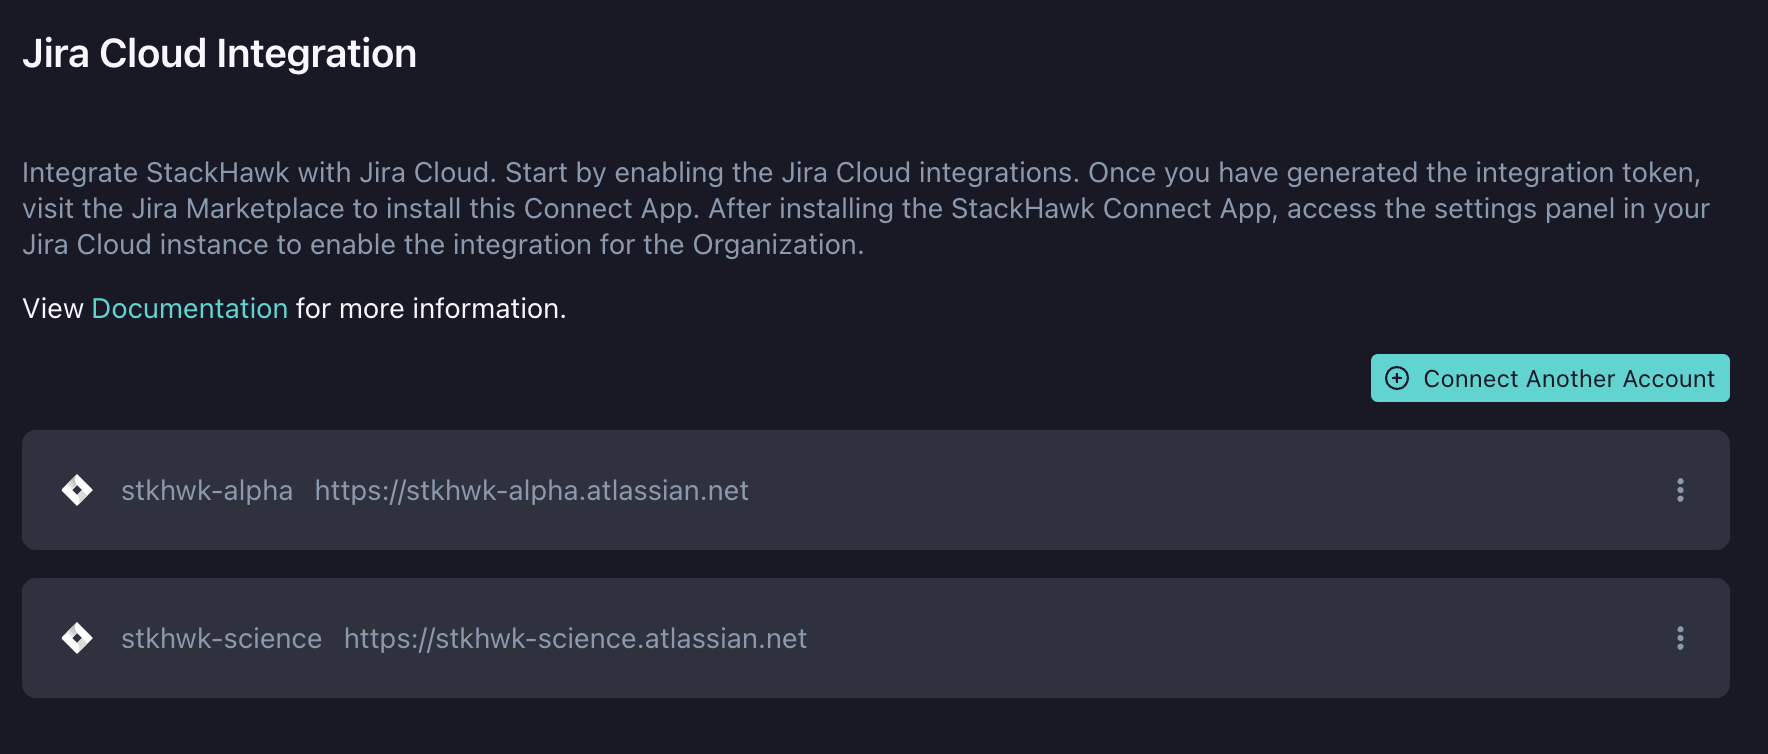
Verify Installation
To verify the integration is working:
- Go to the Jira Cloud Integration page.
- Look for Connected to: [your workspace URL], which confirms the integration is linked.
Usage
Send to Jira Cloud
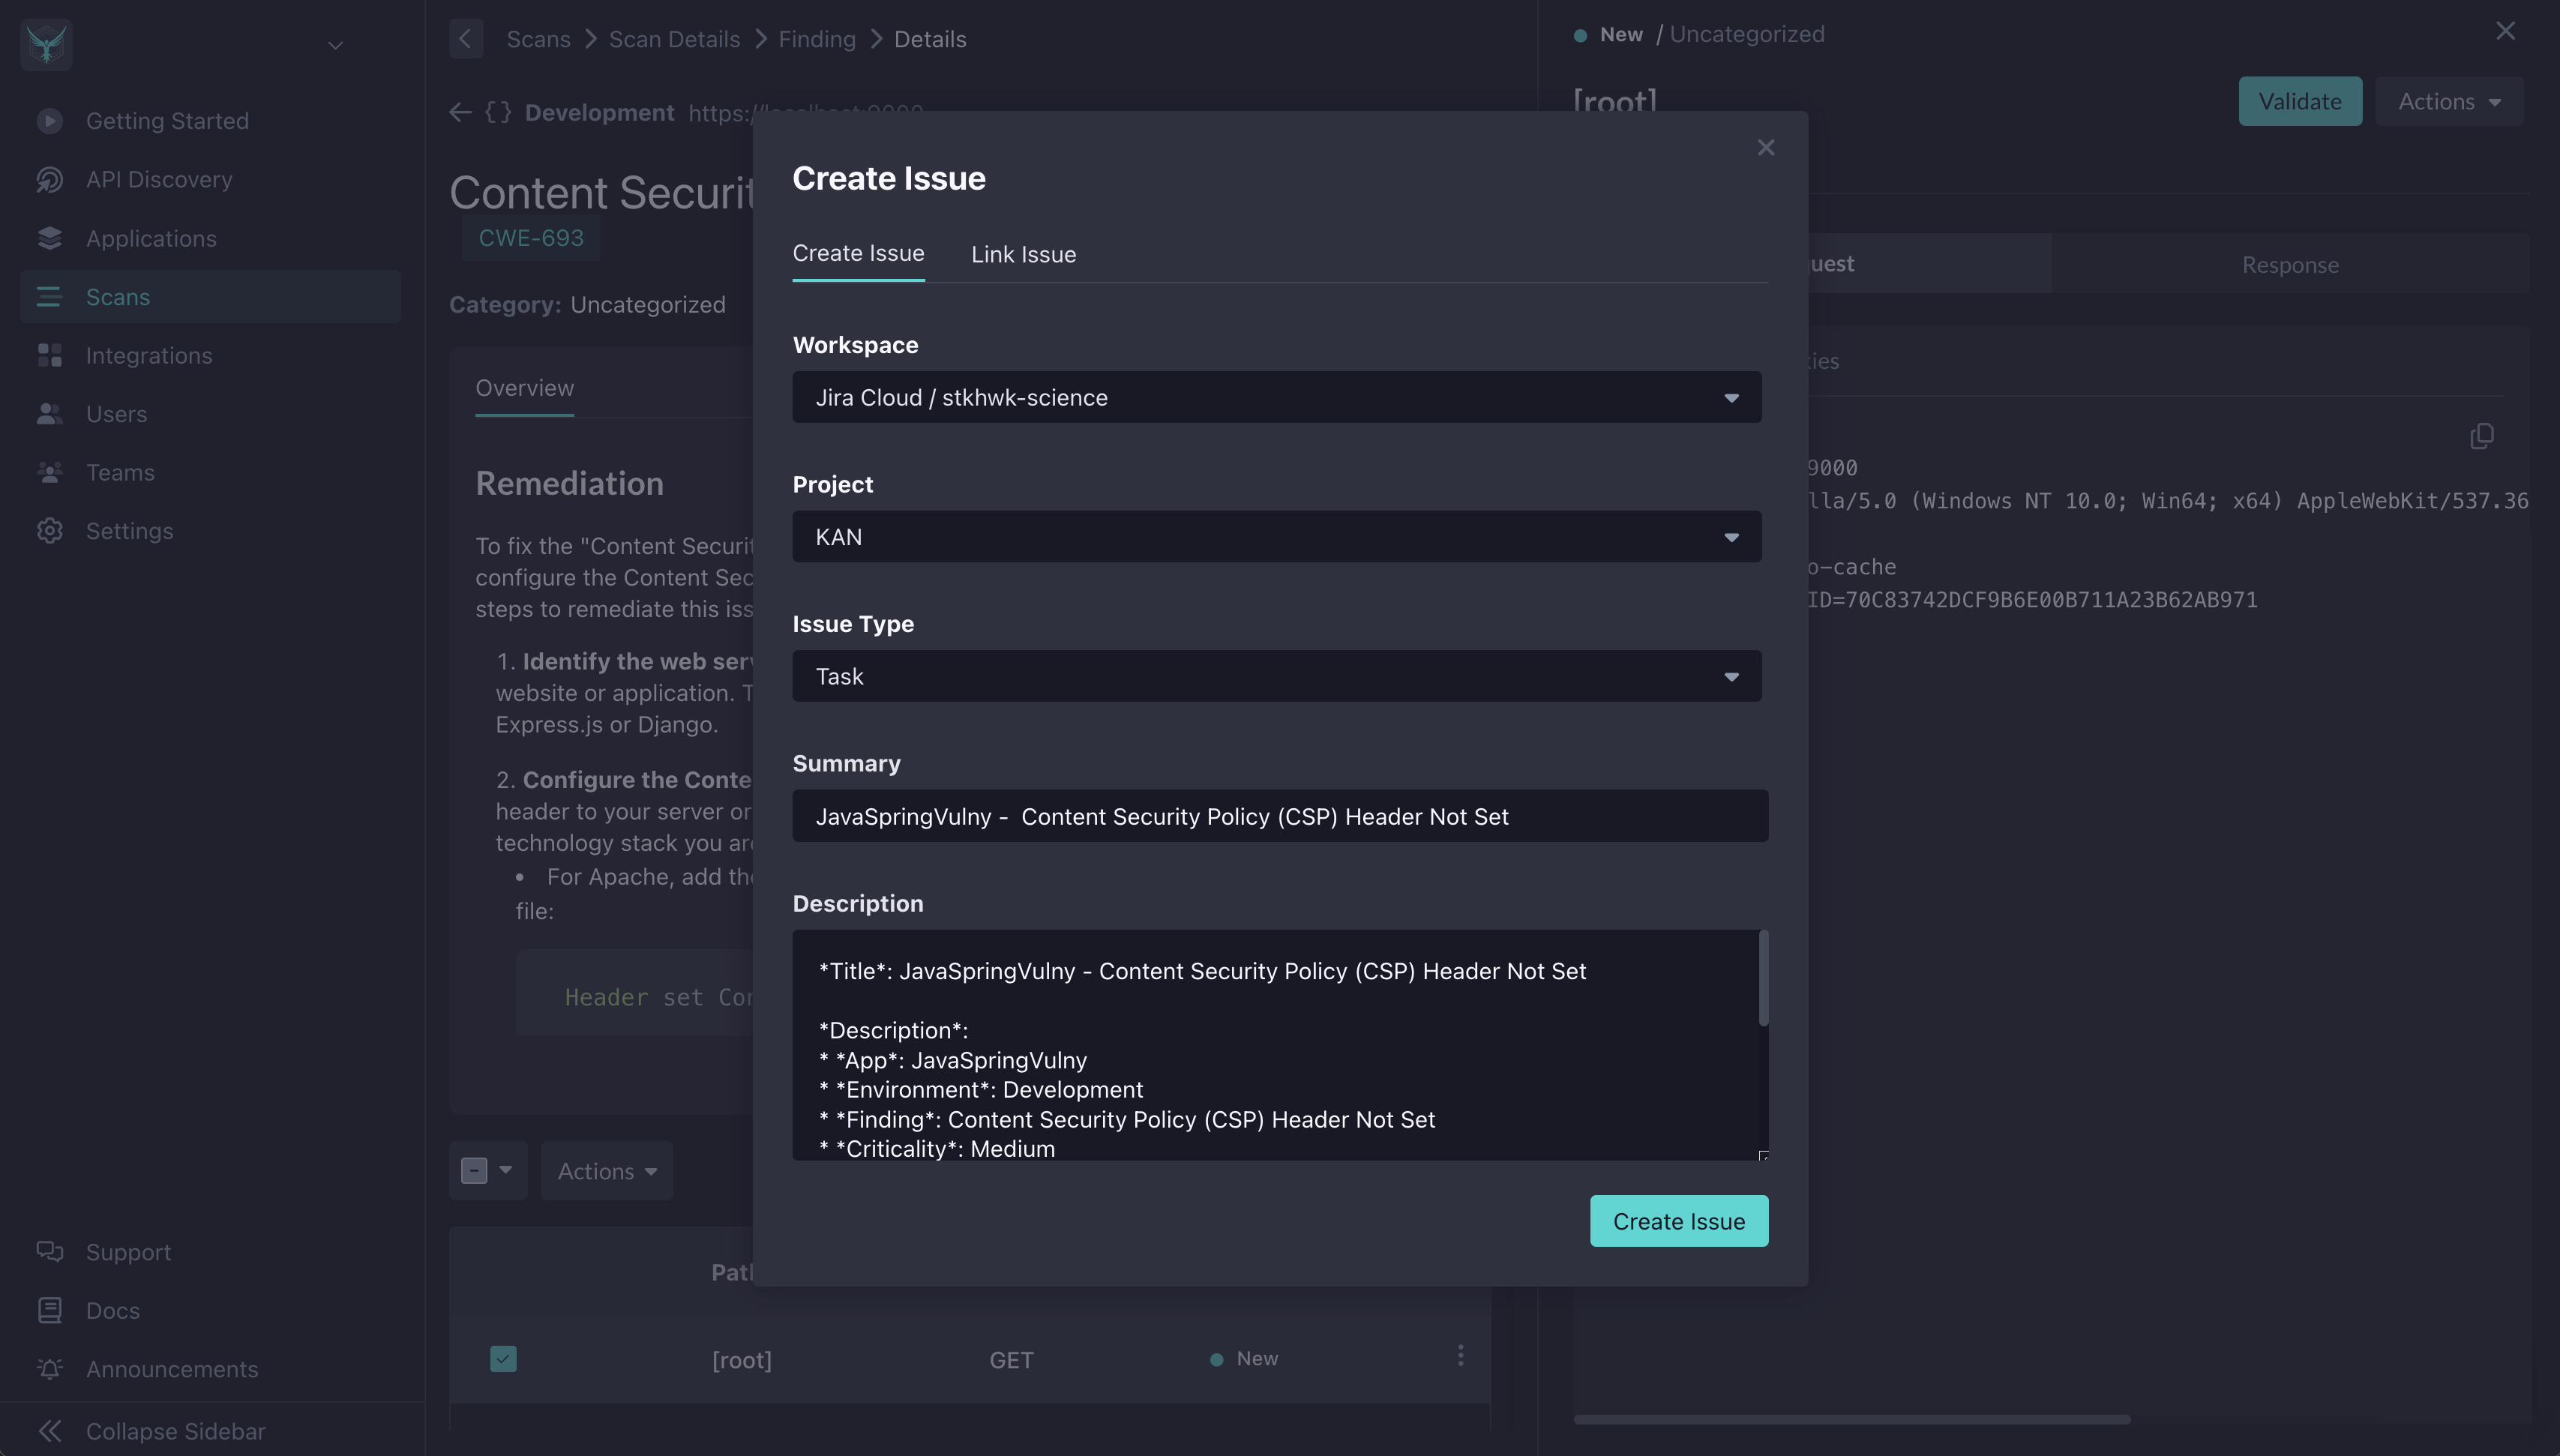
To create or link a Jira issue from a scan finding:
- Navigate to Scans > Scan Details > Findings in StackHawk.
- Select the checkbox for a finding (Path, Status, Method).
- Click Actions > Send to Jira.
- Choose to create a new issue or link to an existing one.
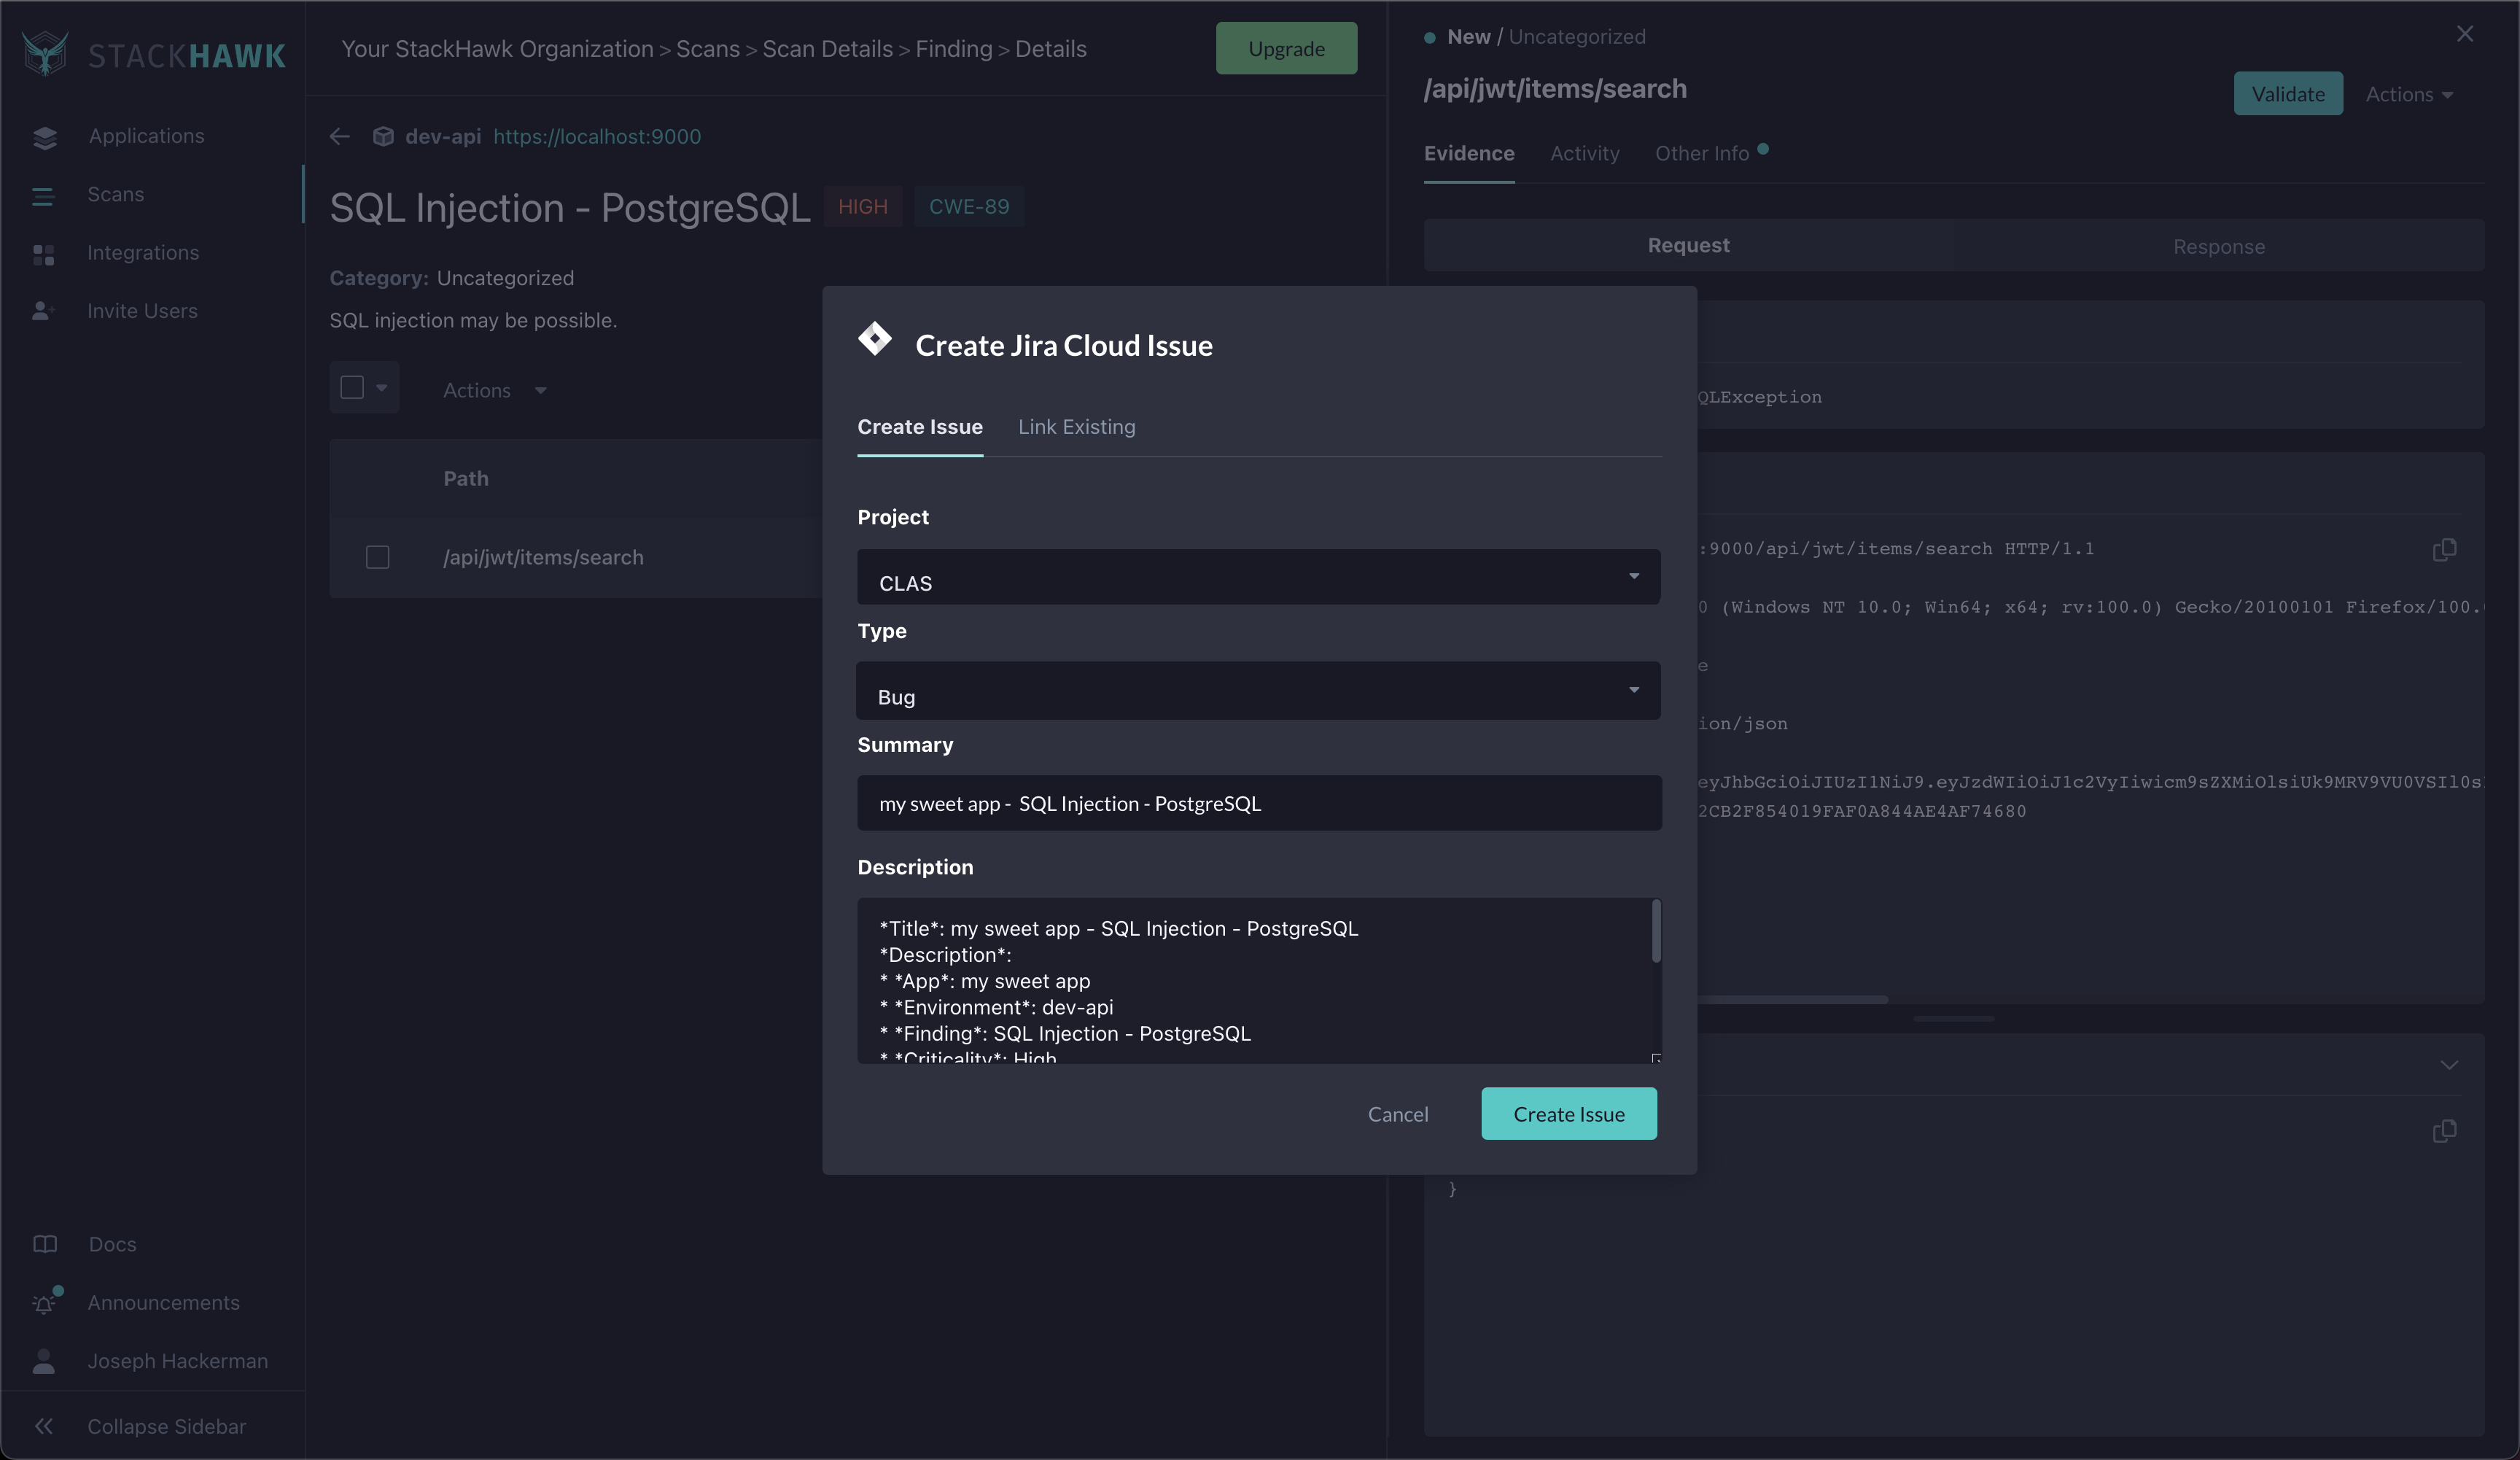
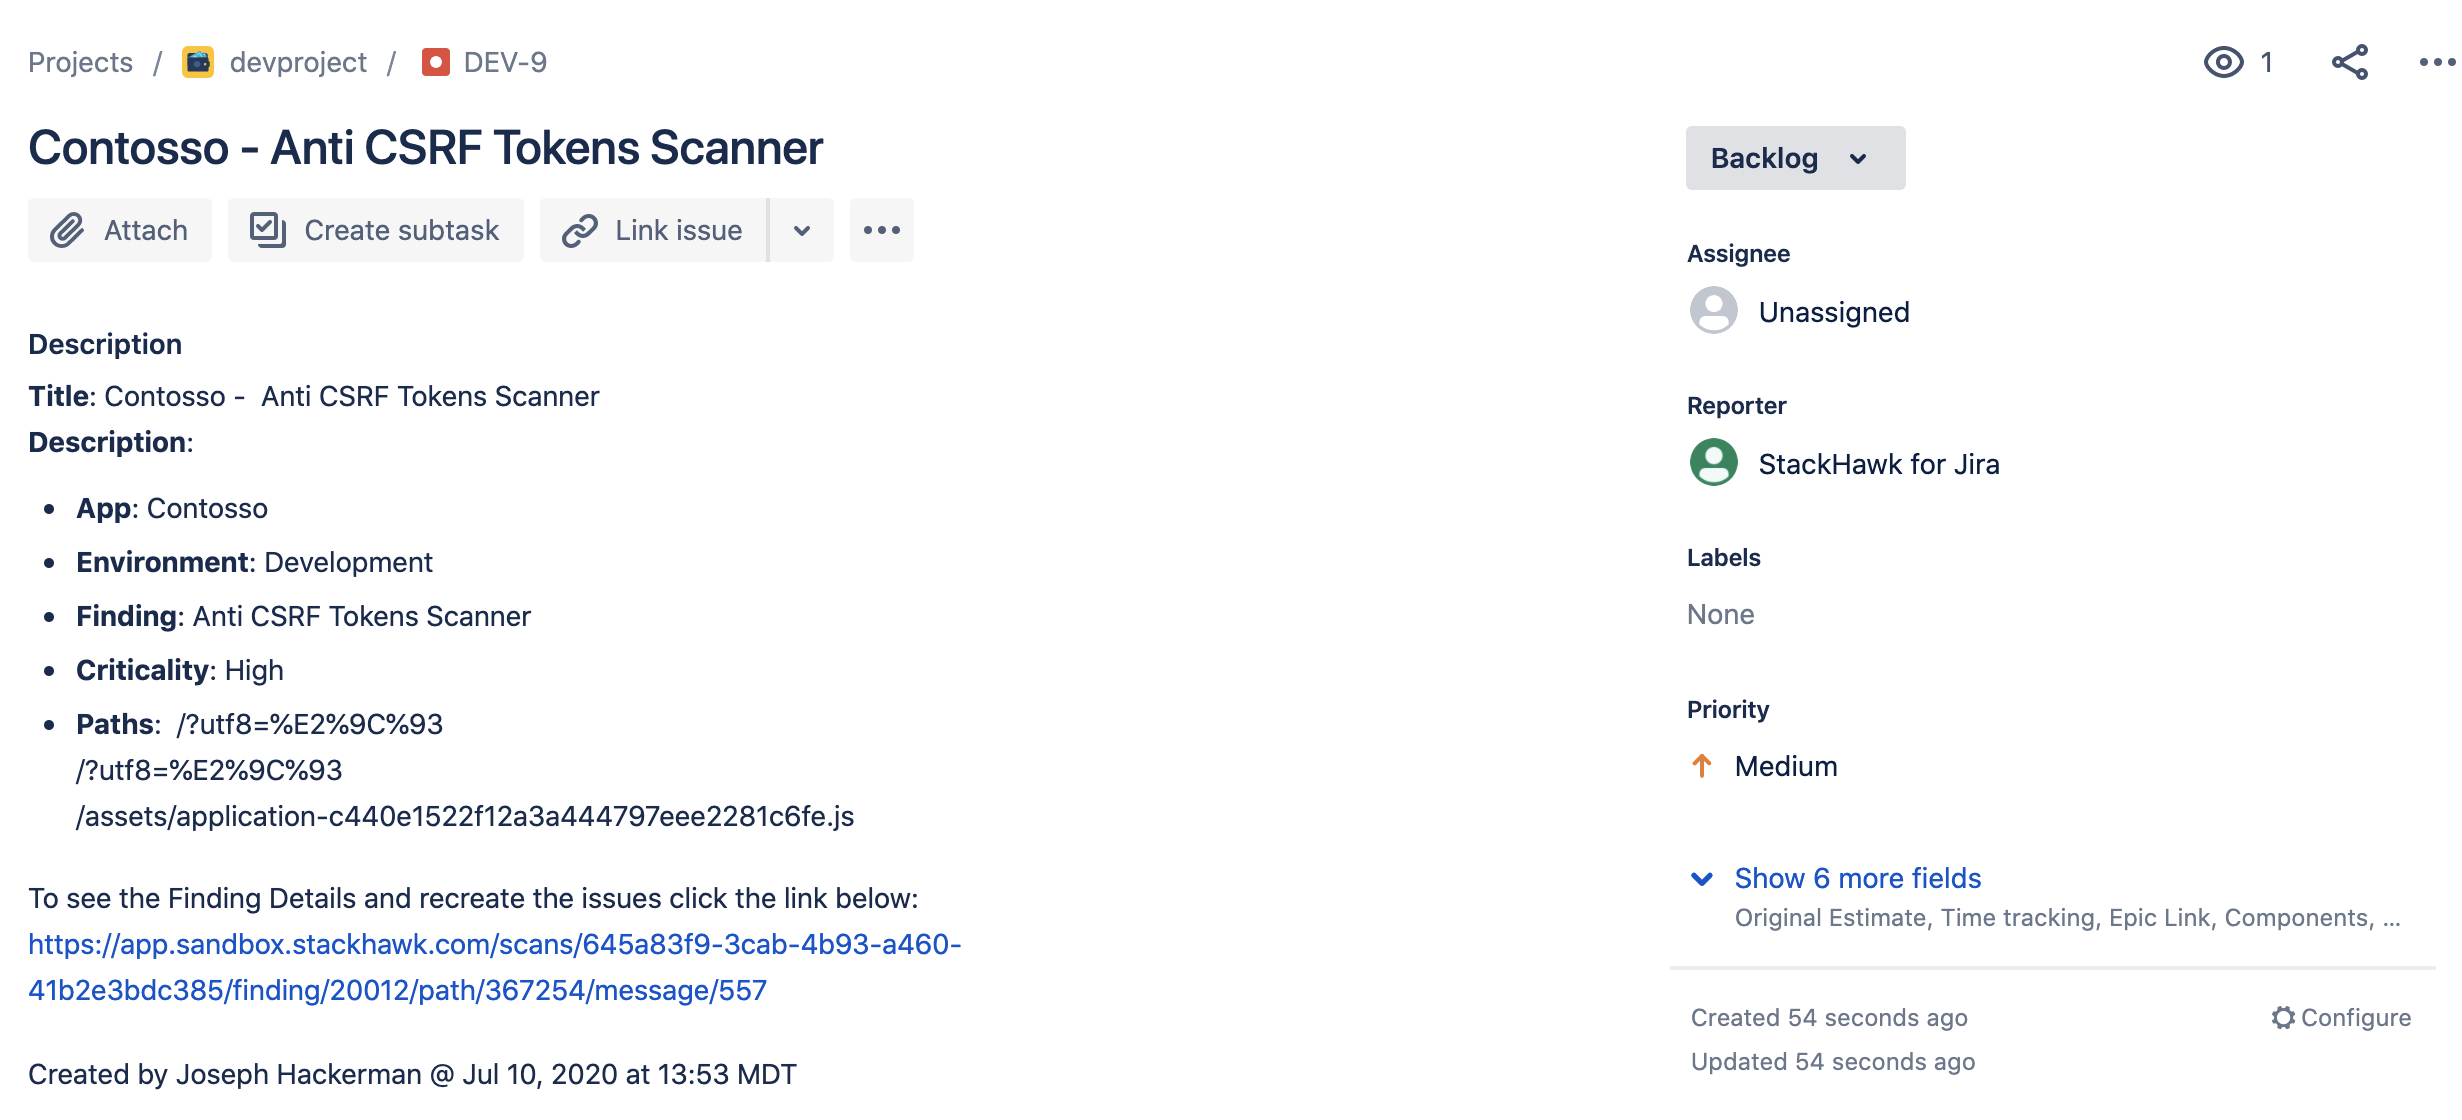
Creating a new issue: Select the project and issue type. The issue will include vulnerability details from the finding. Click Create Issue to complete.
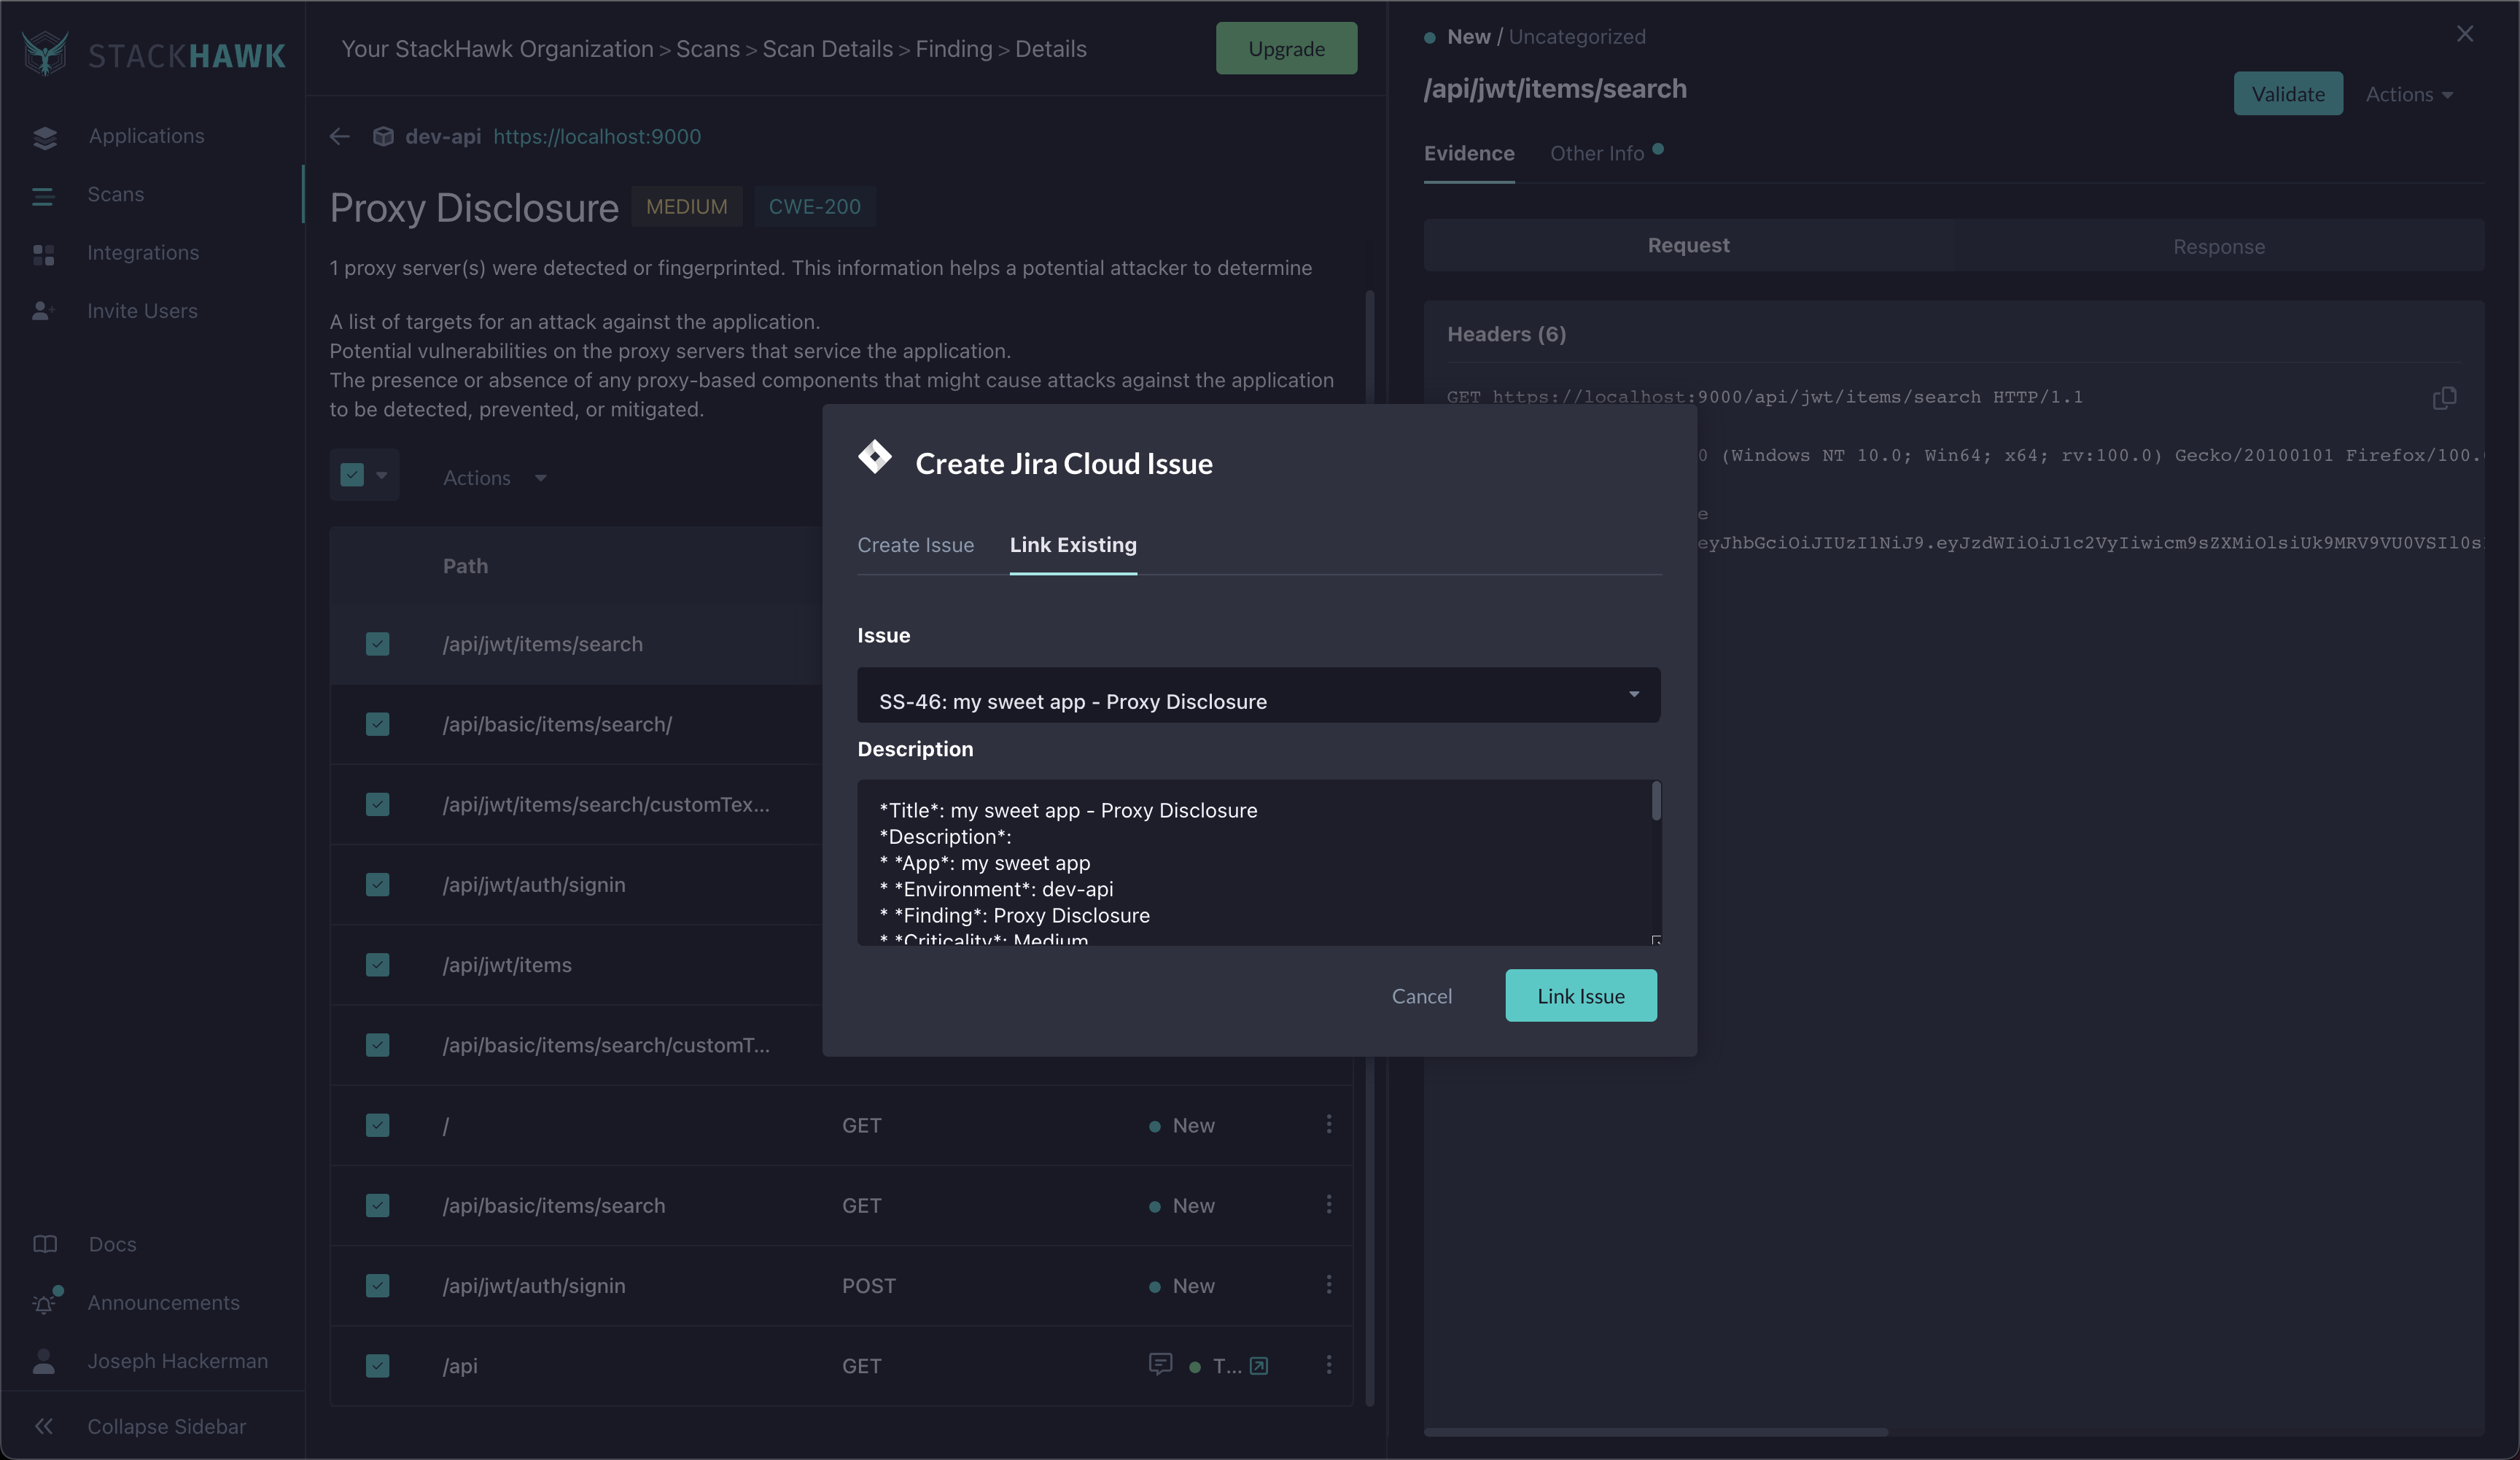
Linking an existing issue: Search for and select an existing issue. A comment with the vulnerability details will be added to that issue. Click Link Issue to complete.
Multiple workspaces: If you have multiple Jira workspaces connected, select the target workspace from the dropdown before creating or linking issues.
Other Actions
You can also change the triage status of findings (such as marking them as false positives or risk accepted) using the same selection workflow: select findings, then choose a different action from the Actions menu.
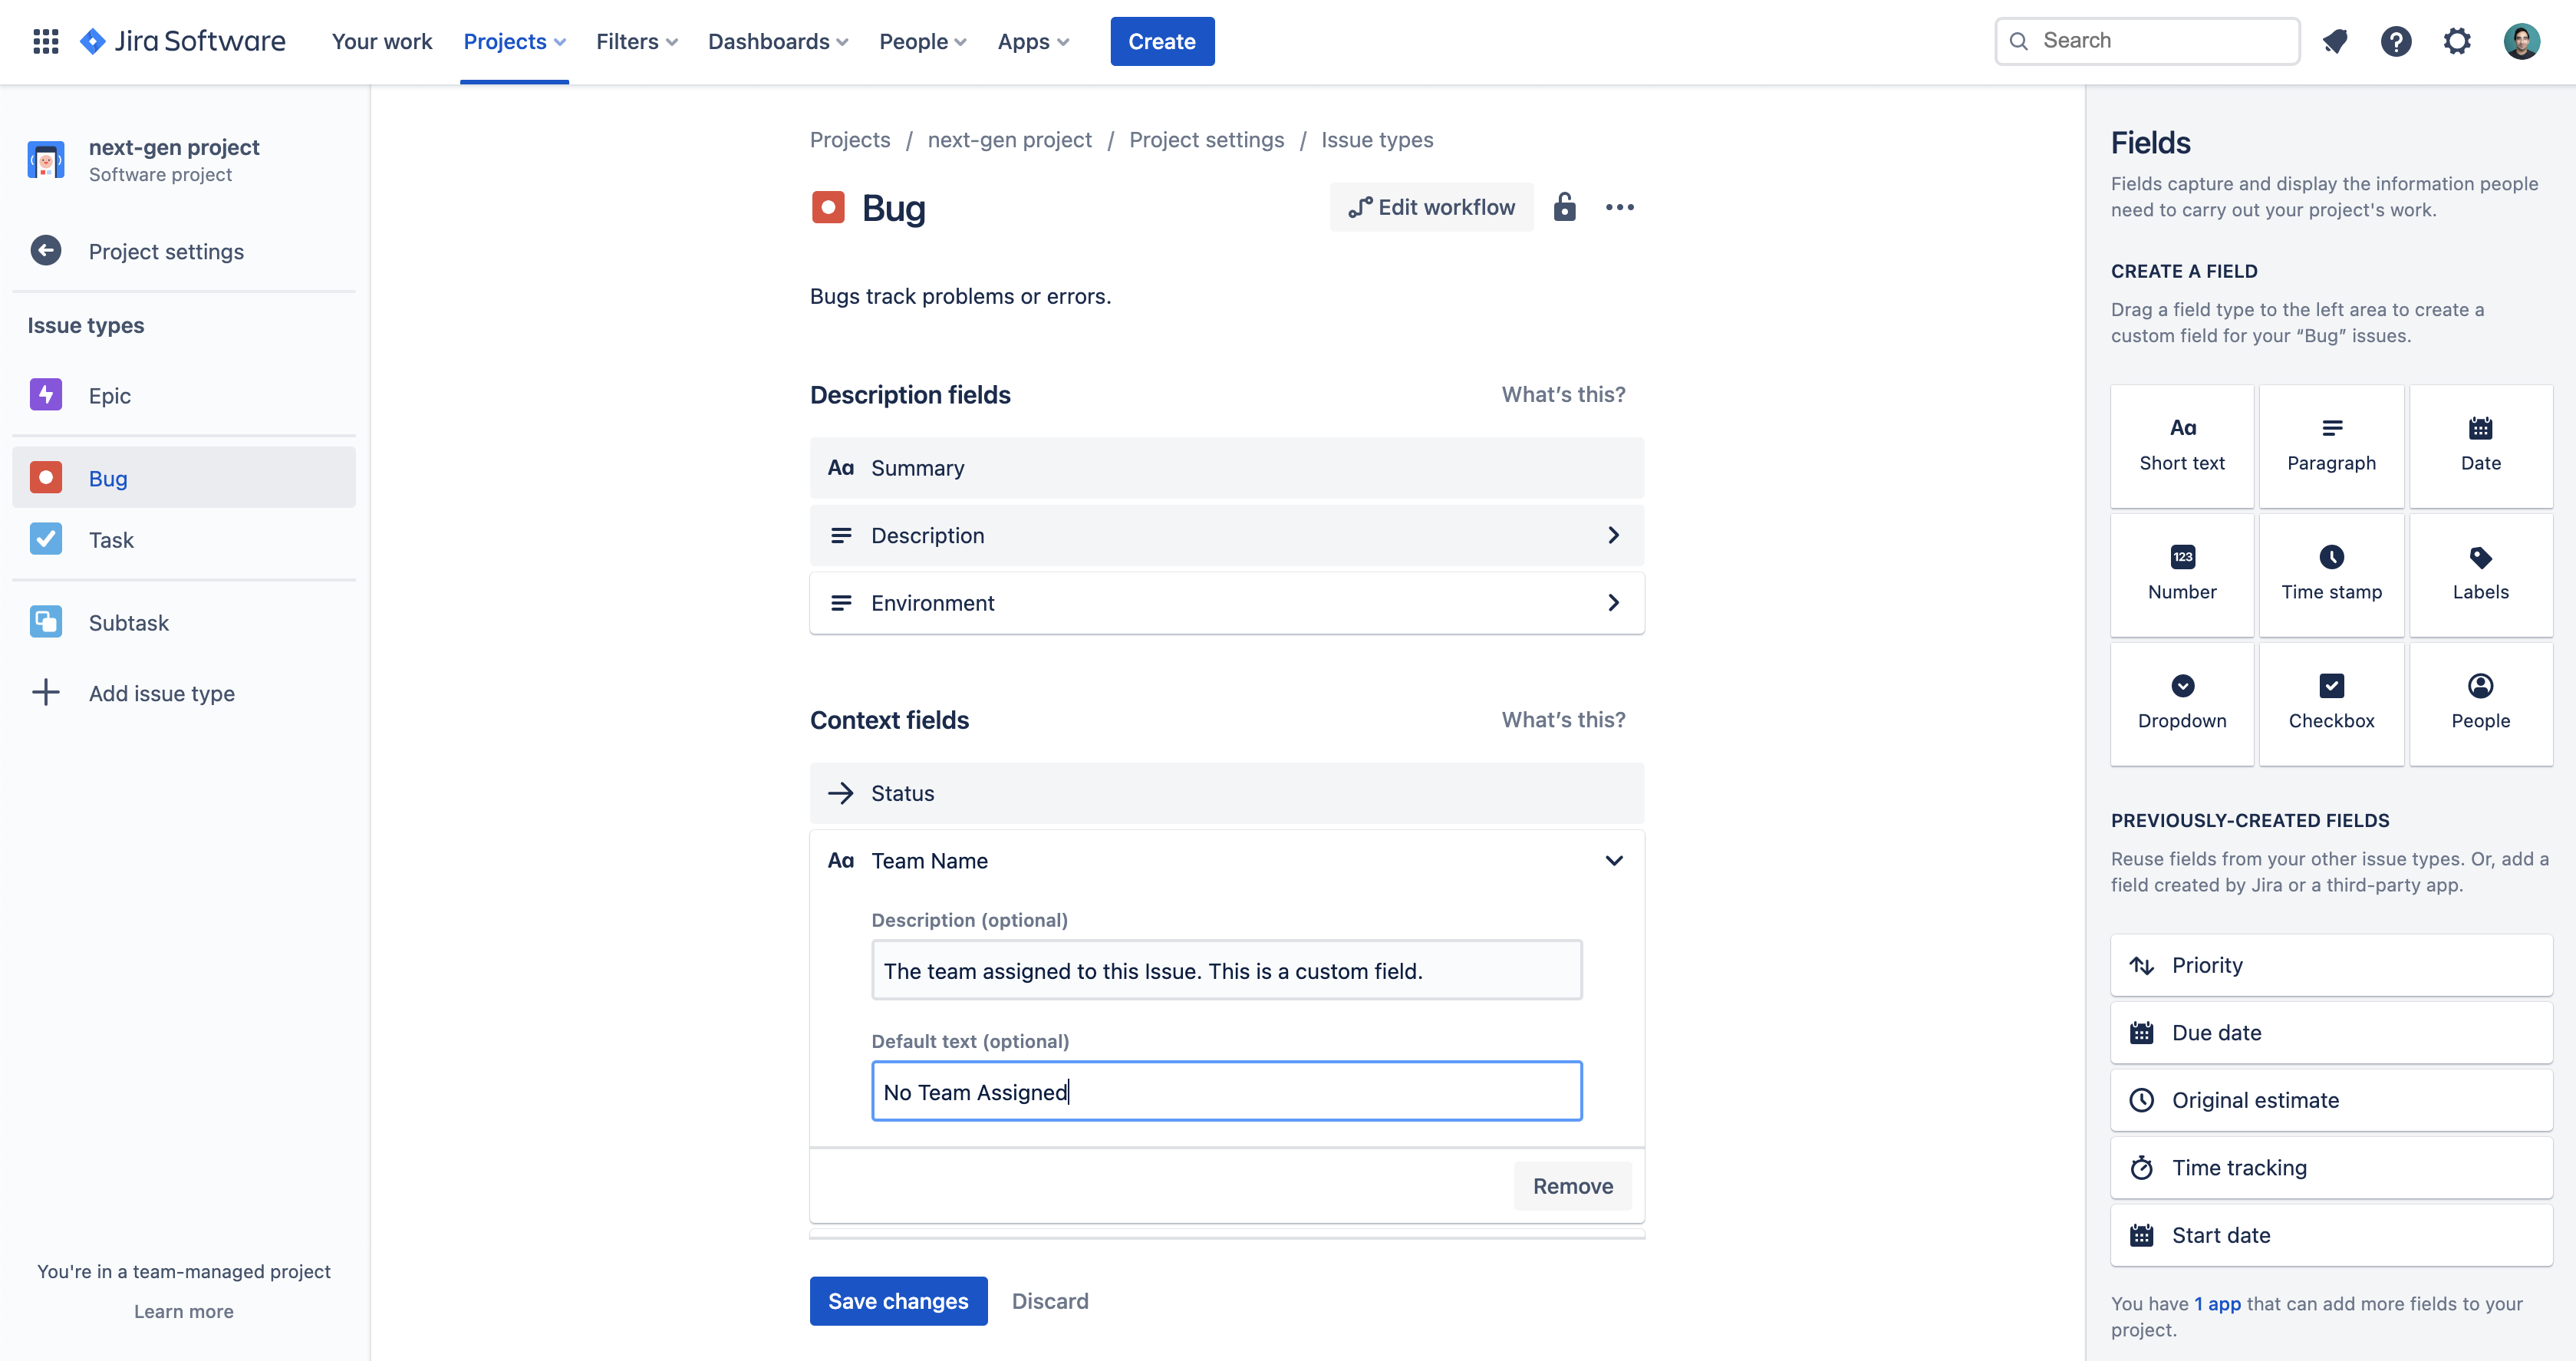
Populating Additional Fields in Jira
To automatically populate additional fields (such as Components or Assignee) on issues created from StackHawk, create a Jira Automation Rule. This requires Jira project administration permissions.
Basic rule (same values for all issues):
- In your Jira project, go to Project settings > Automation.
- Click Rules, then Create rule.
- For the trigger, select Issue created > Save.
- Add a condition: New condition > Issue fields condition.
- Configure the condition: Field: Creator, Condition: equals, Value: StackHawk for Jira.
- Add an action: New action > Edit issue and set the fields you want to populate.
Advanced rule (different values per StackHawk application):
- Complete steps 1-5 above.
- Add a branch: New branch > Branch rule / related issues > Current issue > Save.
- Add a condition: Issue fields condition with Field: Description, Condition: contains, Value:
App: <your app name>. - Add an action: Edit issue and set the fields for this application.
- Repeat steps 2-4 for additional applications.
See the Jira Automation documentation for more details.
Troubleshooting
Custom Fields on Jira Issue Types
It is not uncommon for a Jira Cloud project to have custom fields on their issuetypes. This is a feature provided by Atlassian, but may affect StackHawk ticket creation. If your project’s IssueType has additional custom fields, make sure they also have an acceptable default field value defined. Without defaults, issue creation from StackHawk may fail.
StackHawk does support custom fields for a Jira workspace, once it has been installed and configured with the preferred default project and default issuetype. Specific custom field values can be set statically for tickets created from that workspace with strictly required custom fields. If this is desired, please reach out to StackHawk Support for assistance.
Removing the Integration
To disconnect the Jira Cloud integration:
- Go to the Jira Cloud Integration page in StackHawk.
- Click Remove Integration.
- In Jira, go to Apps > Manage Your Apps > StackHawk for Jira.
- Click Uninstall.
Feedback
Have suggestions, feature requests, or feedback? Contact StackHawk Support.