Add an Application
Every scan in StackHawk runs against an application record, a lightweight object that holds your app’s identity, environment, and configuration. This guide walks through adding an application, configuring it, and running your first scan.
See Applications to manage existing apps, or jump to Install & Run HawkScan to run a scan against one you've already created.
Step 1: Enter Application Details
- Log into the StackHawk Platform.
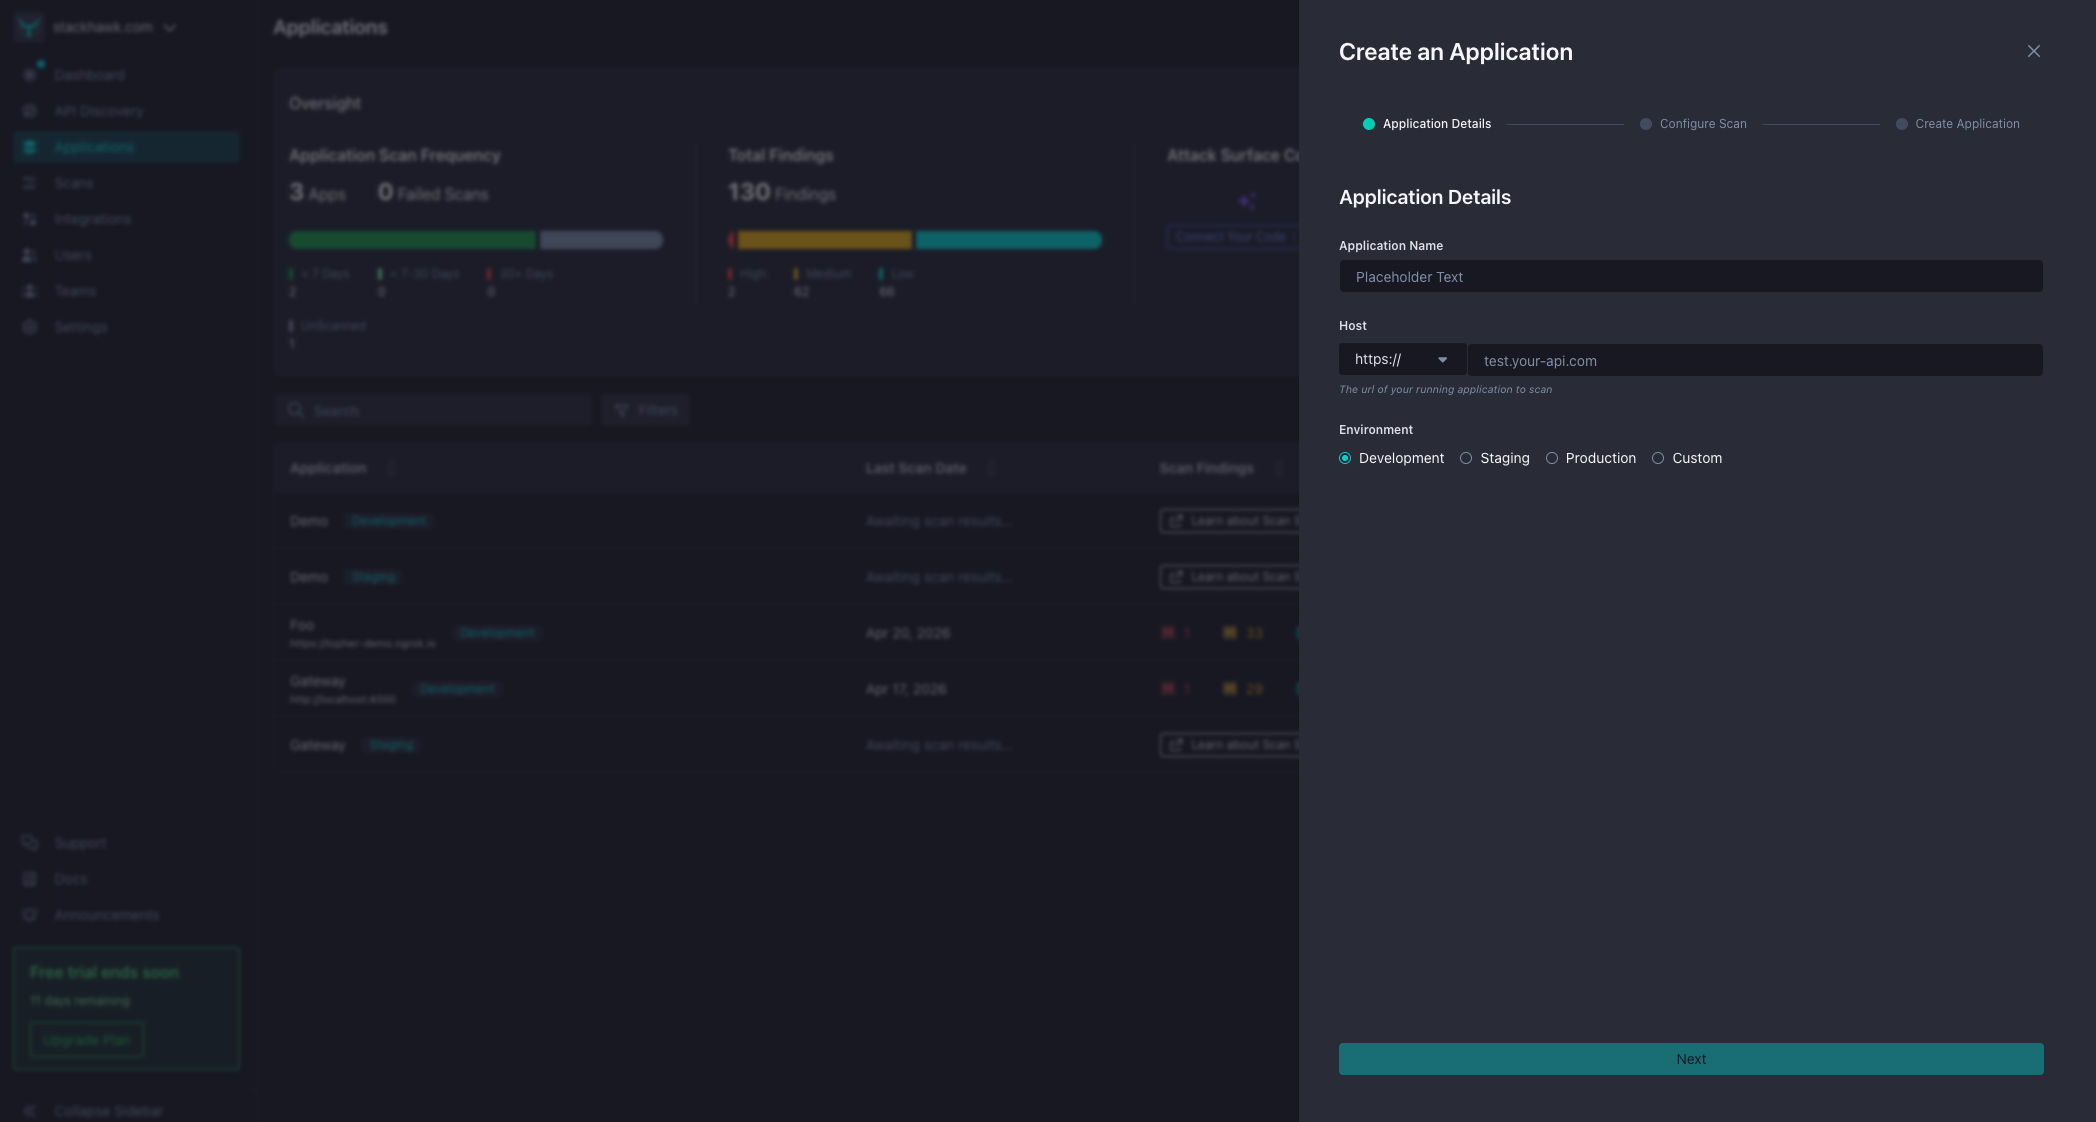
- Click Add an App to open the Create an Application panel.
- Enter your application details:
- Application Name — a recognizable name (e.g., repo name, service name).
- Host — the base URL where your app runs. Pick
https://orhttp://from the protocol dropdown and enter the host (e.g.,test.your-api.com). - Environment —
Development,Staging,Production, orCustom(with a custom environment name).
- Click Next to move on to configuration.
Step 2: Configure Your Scan
Next, choose how you want to configure your scan. Pick the path that fits your workflow. You can always change it later.
Configure with StackHawk Agent
Log in to your app in a secure browser session. We'll create your app and build your scan configuration for you. Your app must be publicly reachable from the internet.
Configure with Guided Fields
Set up your scan using guided fields. Best for when you already know your app's endpoints and auth details.
Configure with StackHawk Agent
The StackHawk Agent launches a secure browser session against your running app and generates a tailored scan configuration from your real traffic, including routes, parameters, and auth flows. This is powered by FlightPath, and it’s the fastest way to get high-fidelity coverage without hand-writing any YAML.
A few things to know:
- Your app must be publicly reachable from the internet for the Agent to connect.
- FlightPath is available on paid plans. Free-trial accounts will see an Upgrade prompt on this option.
See FlightPath documentation for setup instructions.
Configure with Guided Fields
The guided Config Form lets you set up your scan directly in the StackHawk platform through a step-by-step form. Best for when you already know your app’s endpoints and auth details, or when your app isn’t publicly reachable. Common options include:
- Authentication — configure login so the scanner can test protected routes
- API Specifications — upload OpenAPI, GraphQL, or SOAP specs to expand coverage
- Environment Variables — pass secrets and runtime values to the scanner
- Scan Policy — select which plugins and tests run
Changes save directly to your application record and apply to every scan unless overridden locally in a stackhawk.yml file.
stackhawk.yml directly. See HawkScan Configuration for the full reference. Step 3: Run a Scan
With your application created and configured, you’re ready to scan. StackHawk supports three scan targets. Pick whichever fits where your app runs.
Local Scan
Run HawkScan from your machine against a locally-running app. Best for development and quick iteration.
CI/CD
Run HawkScan in your pipeline on every PR or merge. Best for automated, continuous coverage.
Hosted Scanner
Run scans from StackHawk's infrastructure, with no local install or CI/CD wiring. Best for production and staged environments reachable from the internet.
Quick Local Scan
If you want to try a local scan right now, install HawkScan and run the following from your project root with a stackhawk.yml file containing your applicationId:
$ hawk scanSee Install & Run HawkScan for full setup.
What’s Next
- Optimize your scans with API specs and seed paths
- Set up authenticated scanning to test protected routes
- Manage your applications in the platform