Atlassian Jira Cloud
StackHawk’s official Jira Cloud integration.
Overview
The StackHawk Jira Cloud integration lets you identify and track scan findings within your Atlassian Jira workspace. The integration consists of a Jira Addon that is first installed from the Atlassian Marketplace (admin privileges required), and then connected back to a StackHawk Organization.
This integration works alongside the new StackHawk Security in Jira integration, and uses the same Atlassian marketplace addon. Enabling this integration also enables the Security in Jira integration.
Features
- StackHawk can connect to a Jira Cloud Workspace, and HawkScan findings can be associated to new or existing Jira Cloud Issues from the StackHawk Platform.
Requirements
StackHawk:
- You must have a StackHawk account.
- Your StackHawk Organization must belong to a plan with Jira Cloud support enabled. Reach out to StackHawk Support to enable it.
Jira:
- You must have login permissions to the Jira workspace you wish to add the integration to.
- You must have sufficient administration permissions to install add-ons to your Jira Cloud workspace.
Scopes
With this integration you authorize StackHawk with the following Jira Cloud scopes:
- Read access to the connected Jira Cloud workspace
- Write access to the connected Jira Cloud workspace
- Delete access to the connected Jira Cloud workspace
Setup
Click here to install the StackHawk for Jira Cloud add-on from the Atlassian Marketplace
The StackHawk for Jira App will first need to be installed from the Atlassian marketplace, before it can be connected to a StackHawk organization.
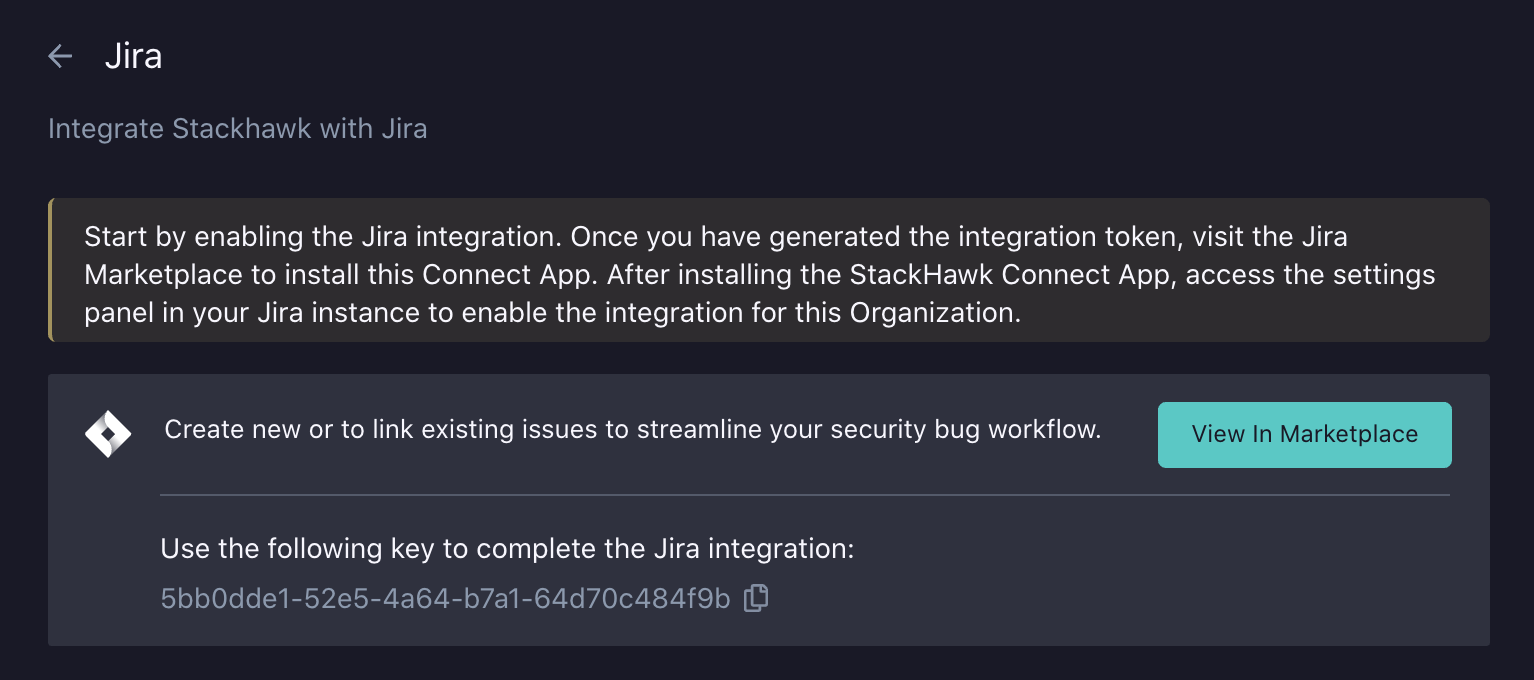
- Log into StackHawk and visit the Jira Cloud Integration page in StackHawk
- Click
Enable Jira. This will generate the temporary integration token. - Click the
View In Marketplacebutton. This will open a new tab to add the StackHawk add-on from the Atlassian Marketplace. - In the new tab, click
Installto add the app in your Jira Cloud workspace and go through installation process. Once completed, you can pressGet Startedto authorize the add-on with your Jira Cloud workspace.
Token Authorization
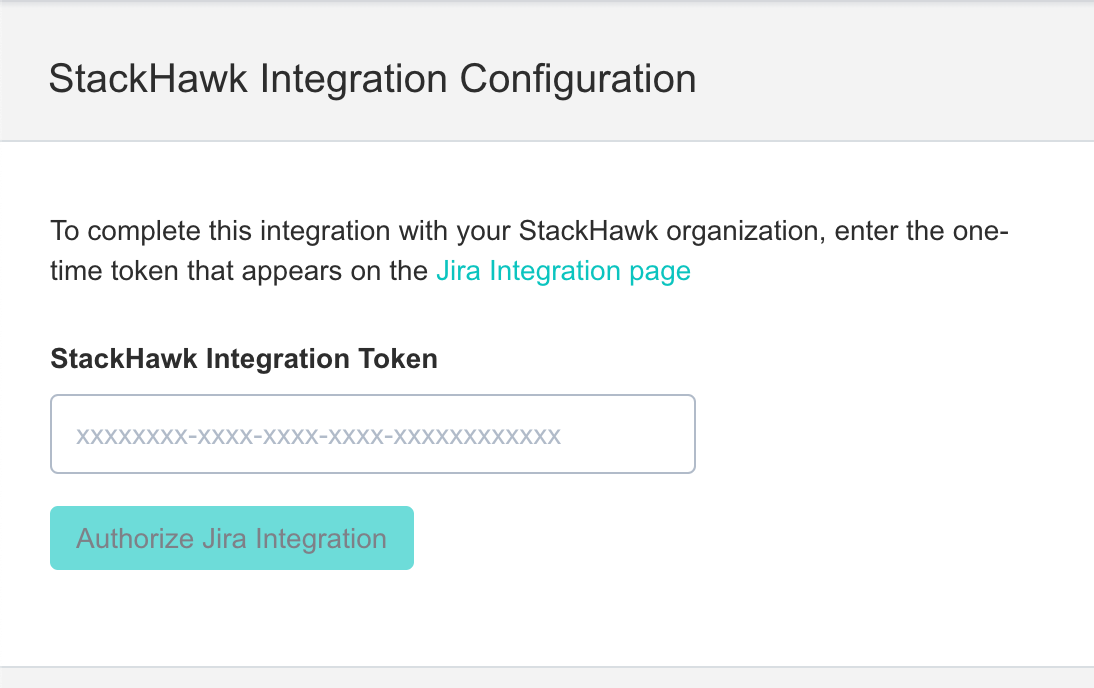
Once the StackHawk add-on has been installed in Jira Cloud, a one-time integration token from StackHawk needs to be copied into Jira Cloud to connect the Jira Cloud Workspace with your StackHawk organization.
- After installing the app from the Marketplace, go to the Jira page in StackHawk.
- Copy the UUID integration token. Note: this key is time-sensitive, and will expire after one hour.
- In Jira Cloud, go to
Apps > Manage Your Apps > StackHawk for Jira > Get Started. - Paste the integration token into the
StackHawk Integration Tokenfield. - If successful, your Jira Cloud workspace will now be connected to your StackHawk organization, and the integration completed.
 |
 |
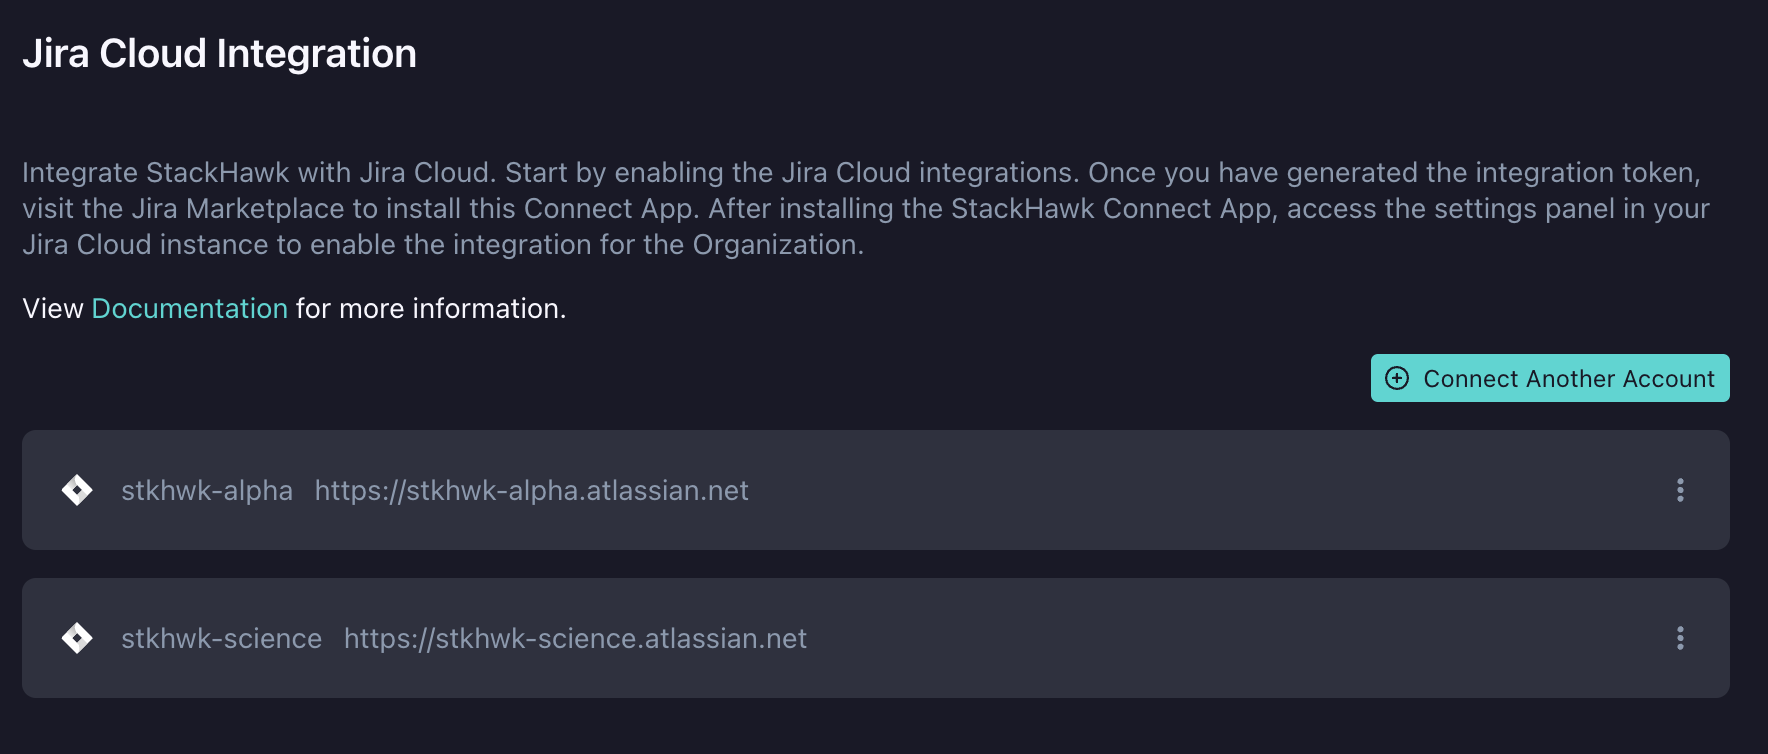
Additional Jira Workspaces can be connected to the StackHawk Platform. Each connected workspace can be configured with a default project and issuetype, that will be defaulted to when triaging findings into Jira issues from the StackHawk platform.
 |
Verify Installation
You can verify the Jira Cloud App installation at any time after configuring a integration token.
- Go to the Jira Cloud page in StackHawk.
- You should see a
Connected to: <your workspace URL>, which indicates the integration has been linked to that Jira Cloud Workspace.
Usage
Send to Jira Cloud
With the Jira Cloud App installation verified, you can send a finding to Jira Cloud by creating a Jira Cloud Issue and associating it with a StackHawk scanner finding.
- Go to a finding detail in StackHawk
Scans > Scan Details > Findings - Click on the checkbox for a given Path, Status, Method
- Click on
Actions > Send to Jira - Fill out the Jira ticket details. Findings can be promoted with either a new Jira issue, or linked to an existing Jira issue.
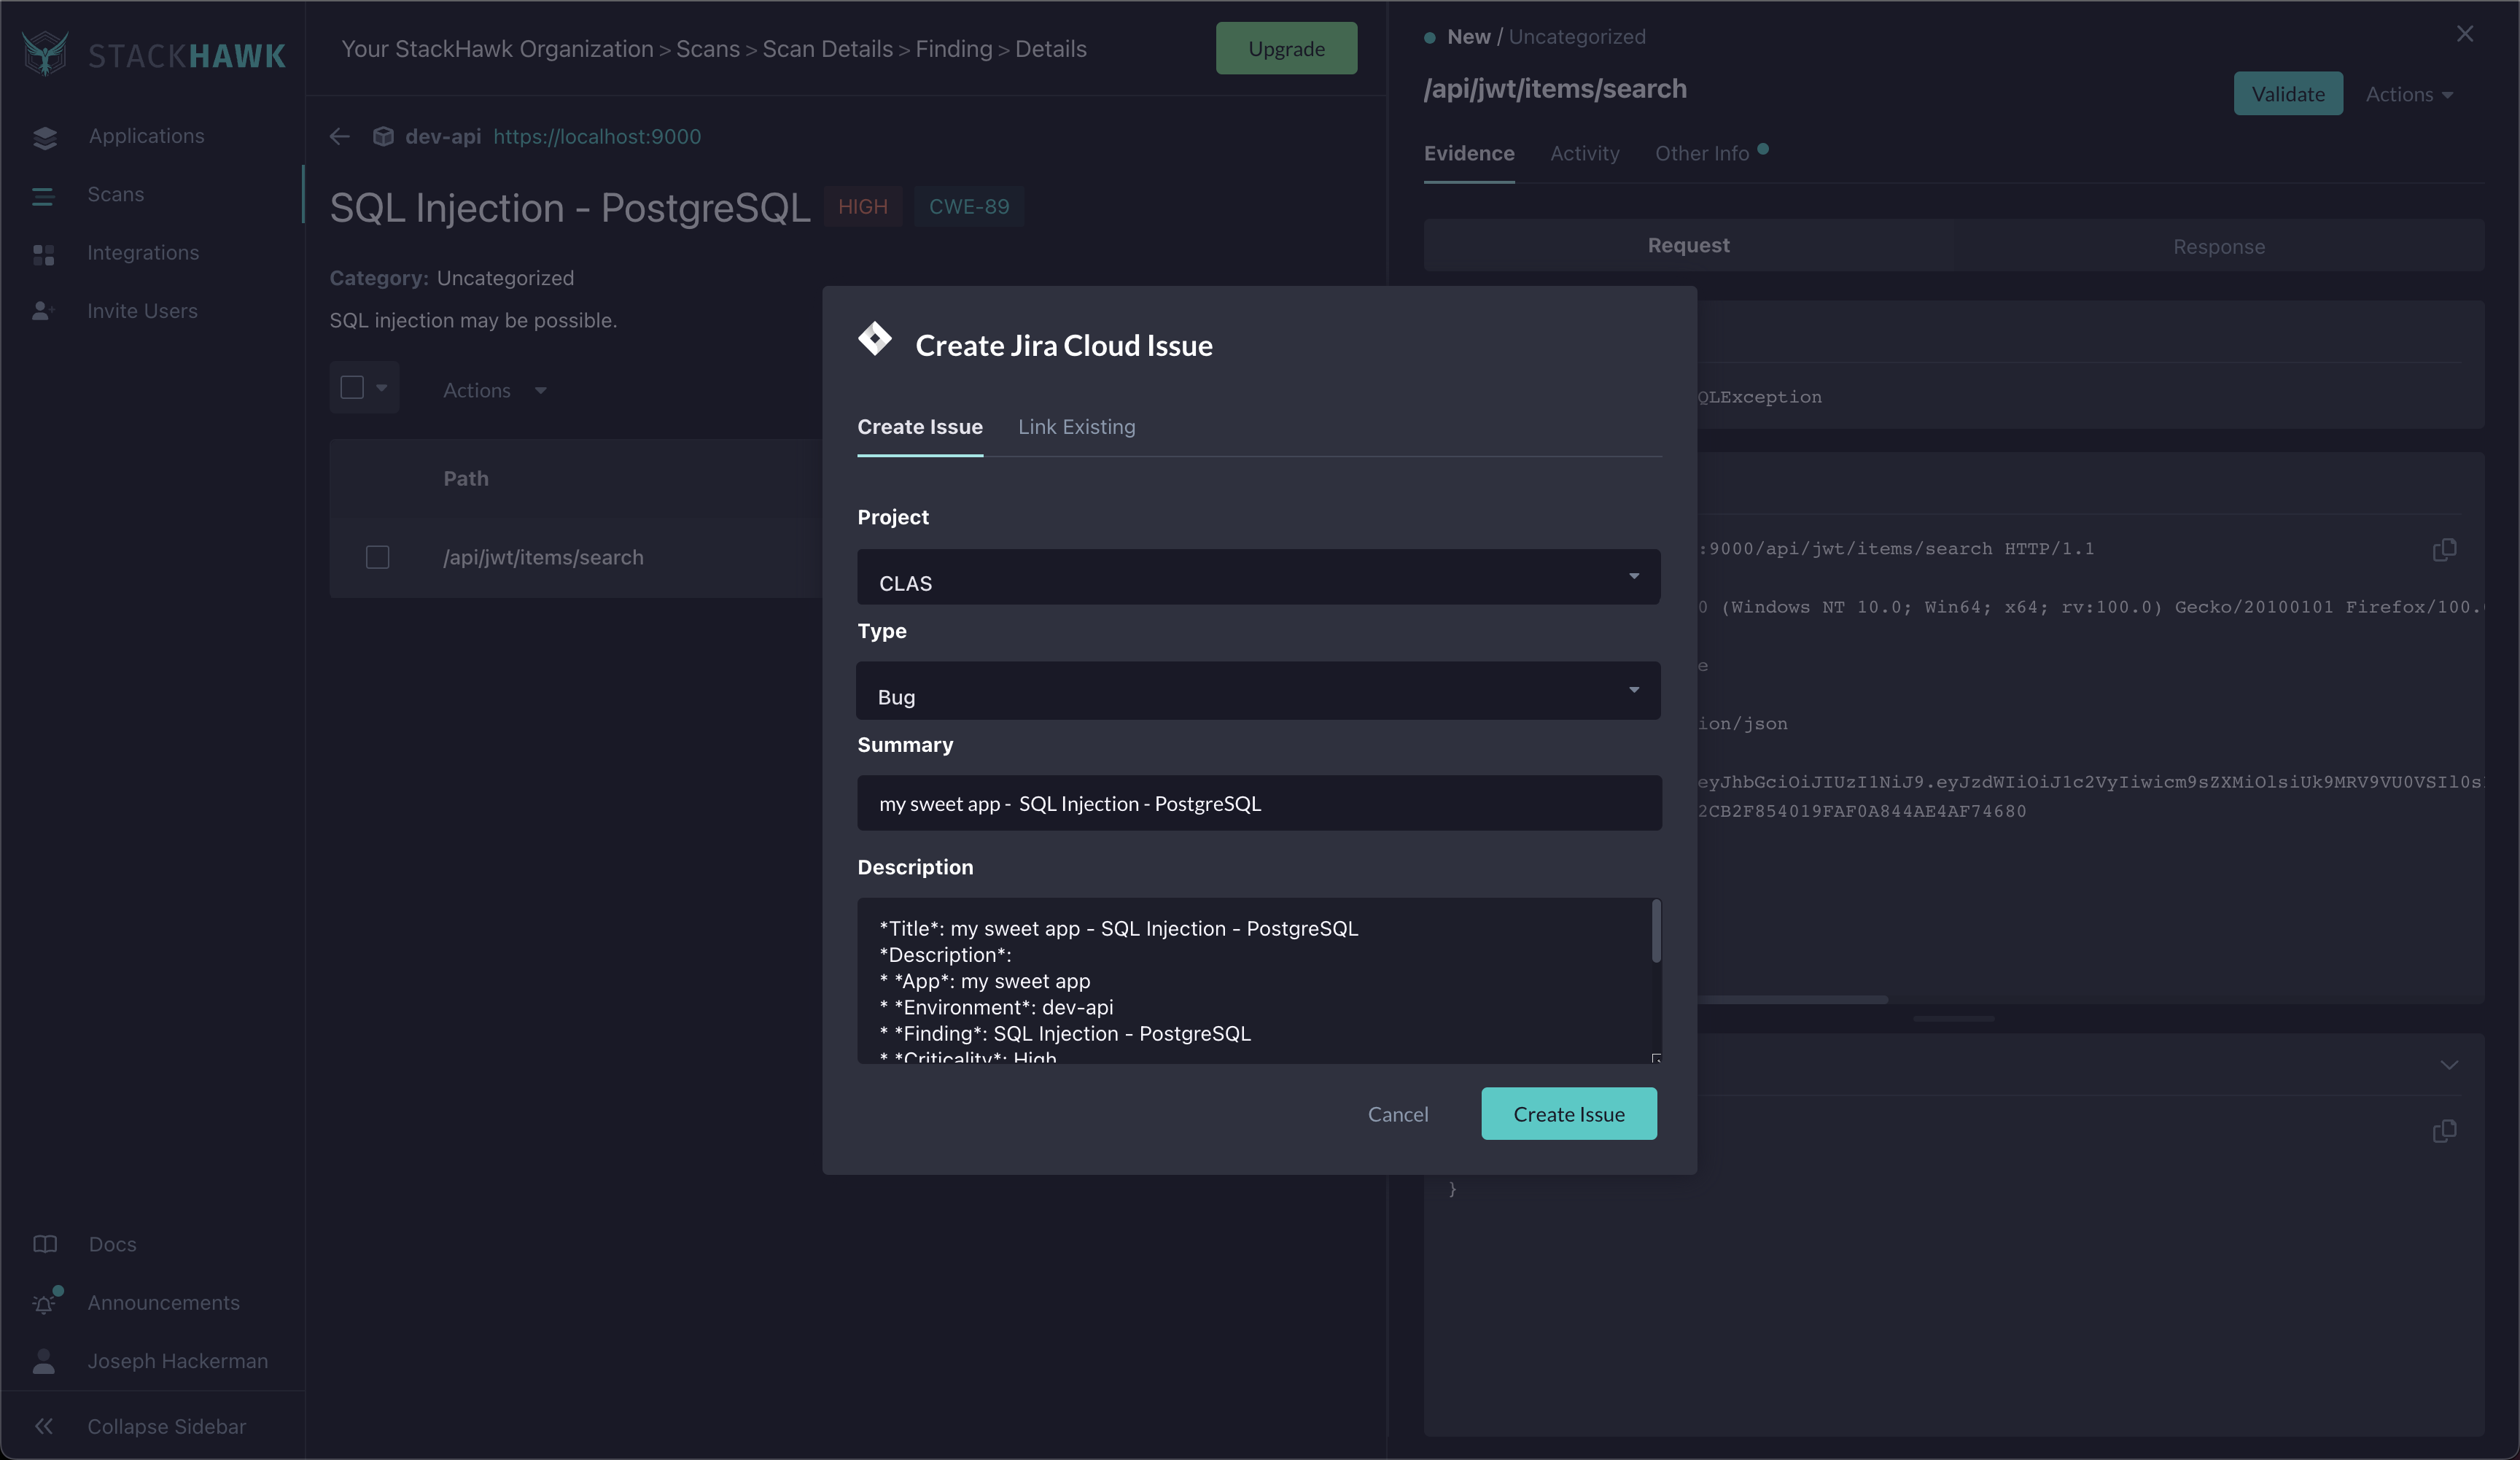
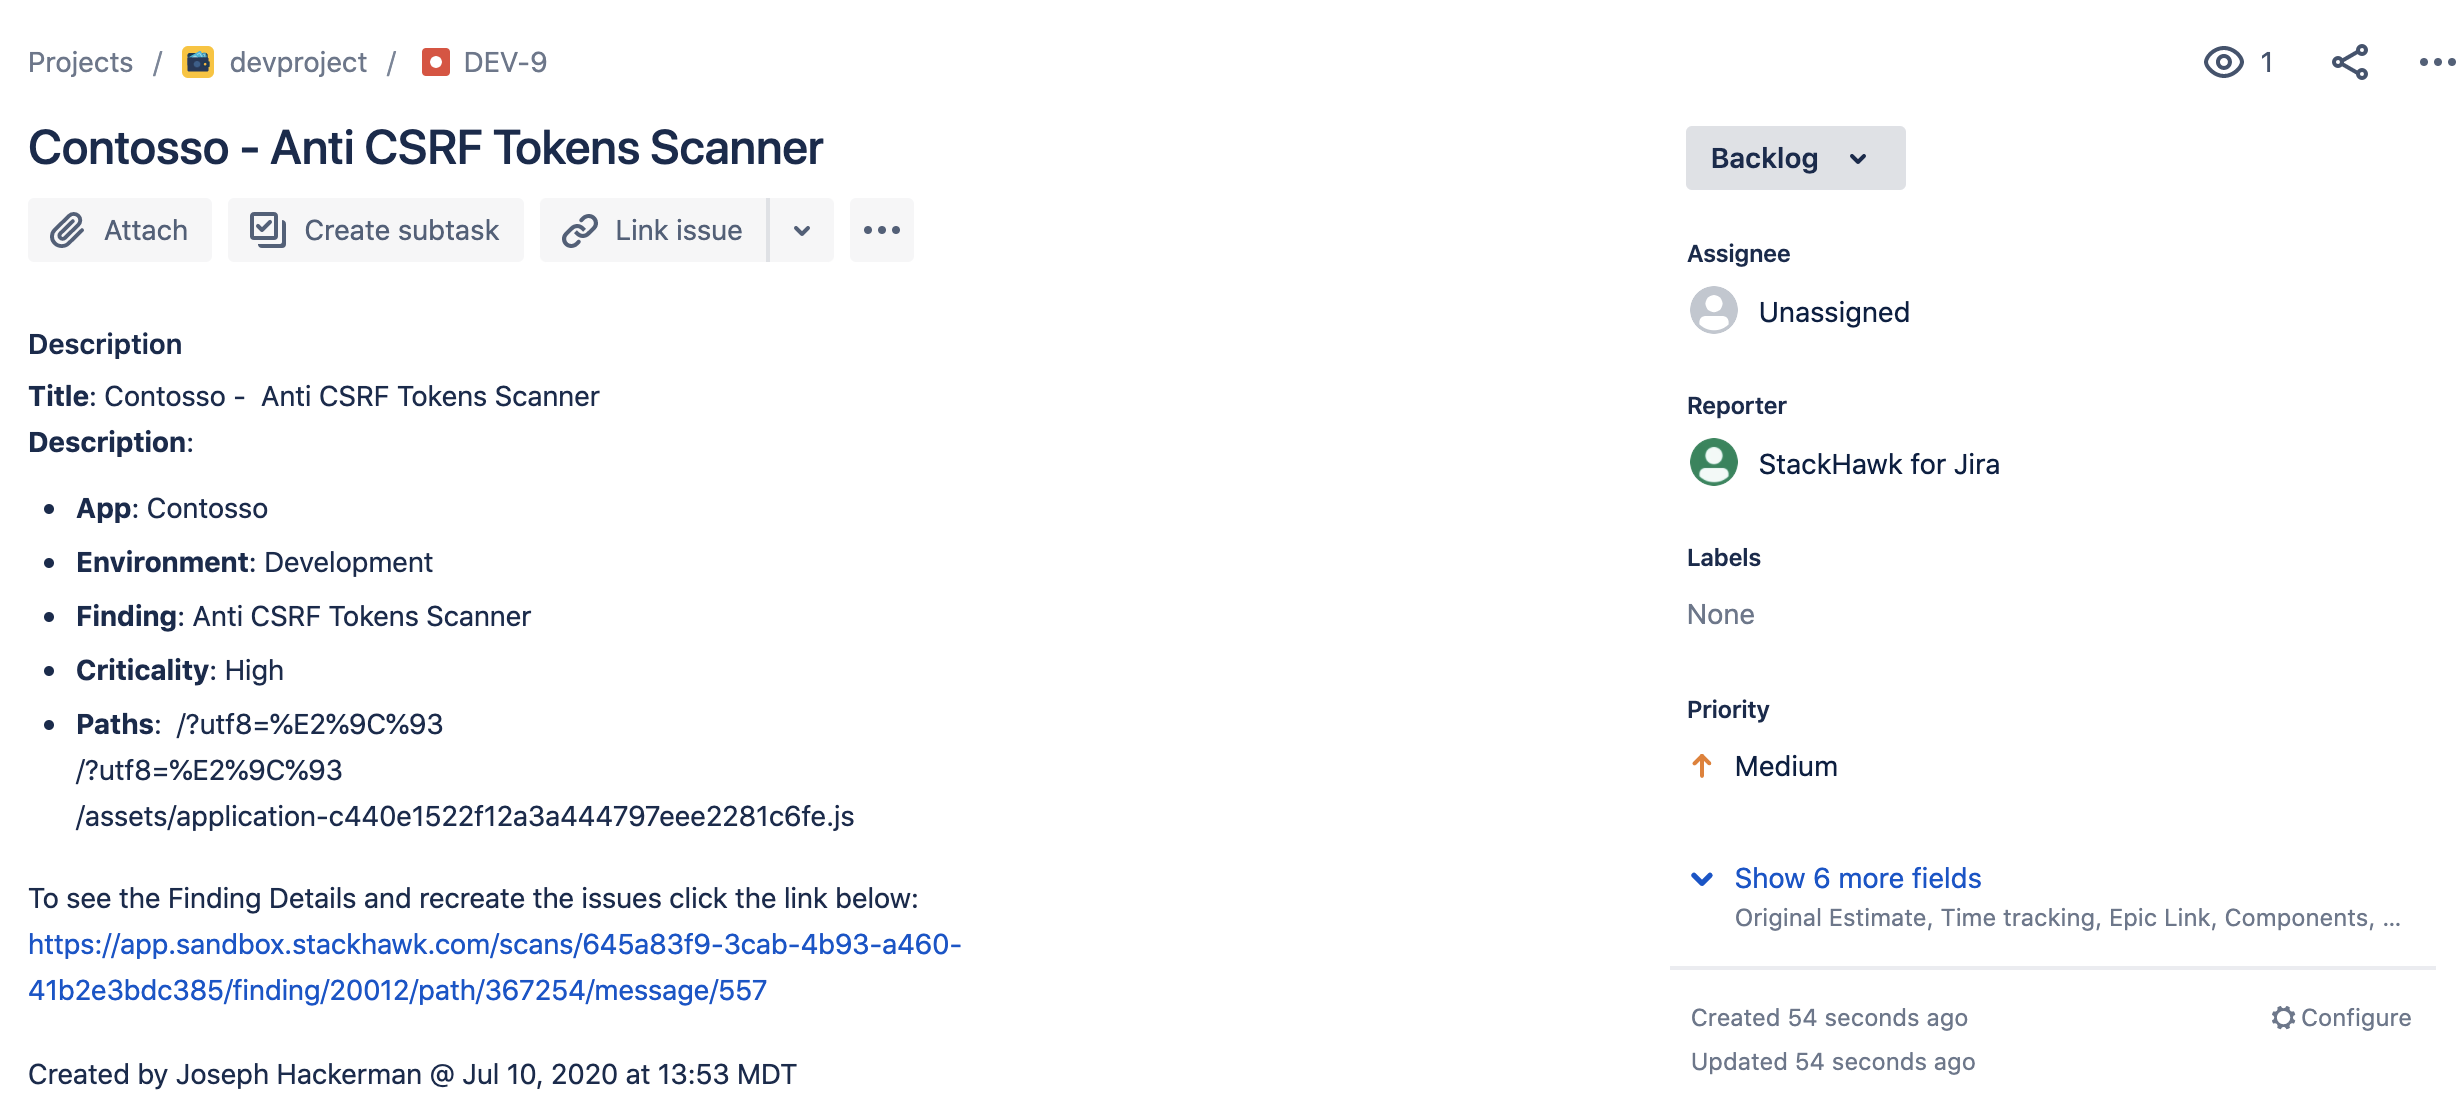
Creating a New Issue: Select the project and issue type you want the created ticket to be associated with. The created issue will have details about those findings. Click Create Issue, and the Jira issue will be created and associated with the scan findings.
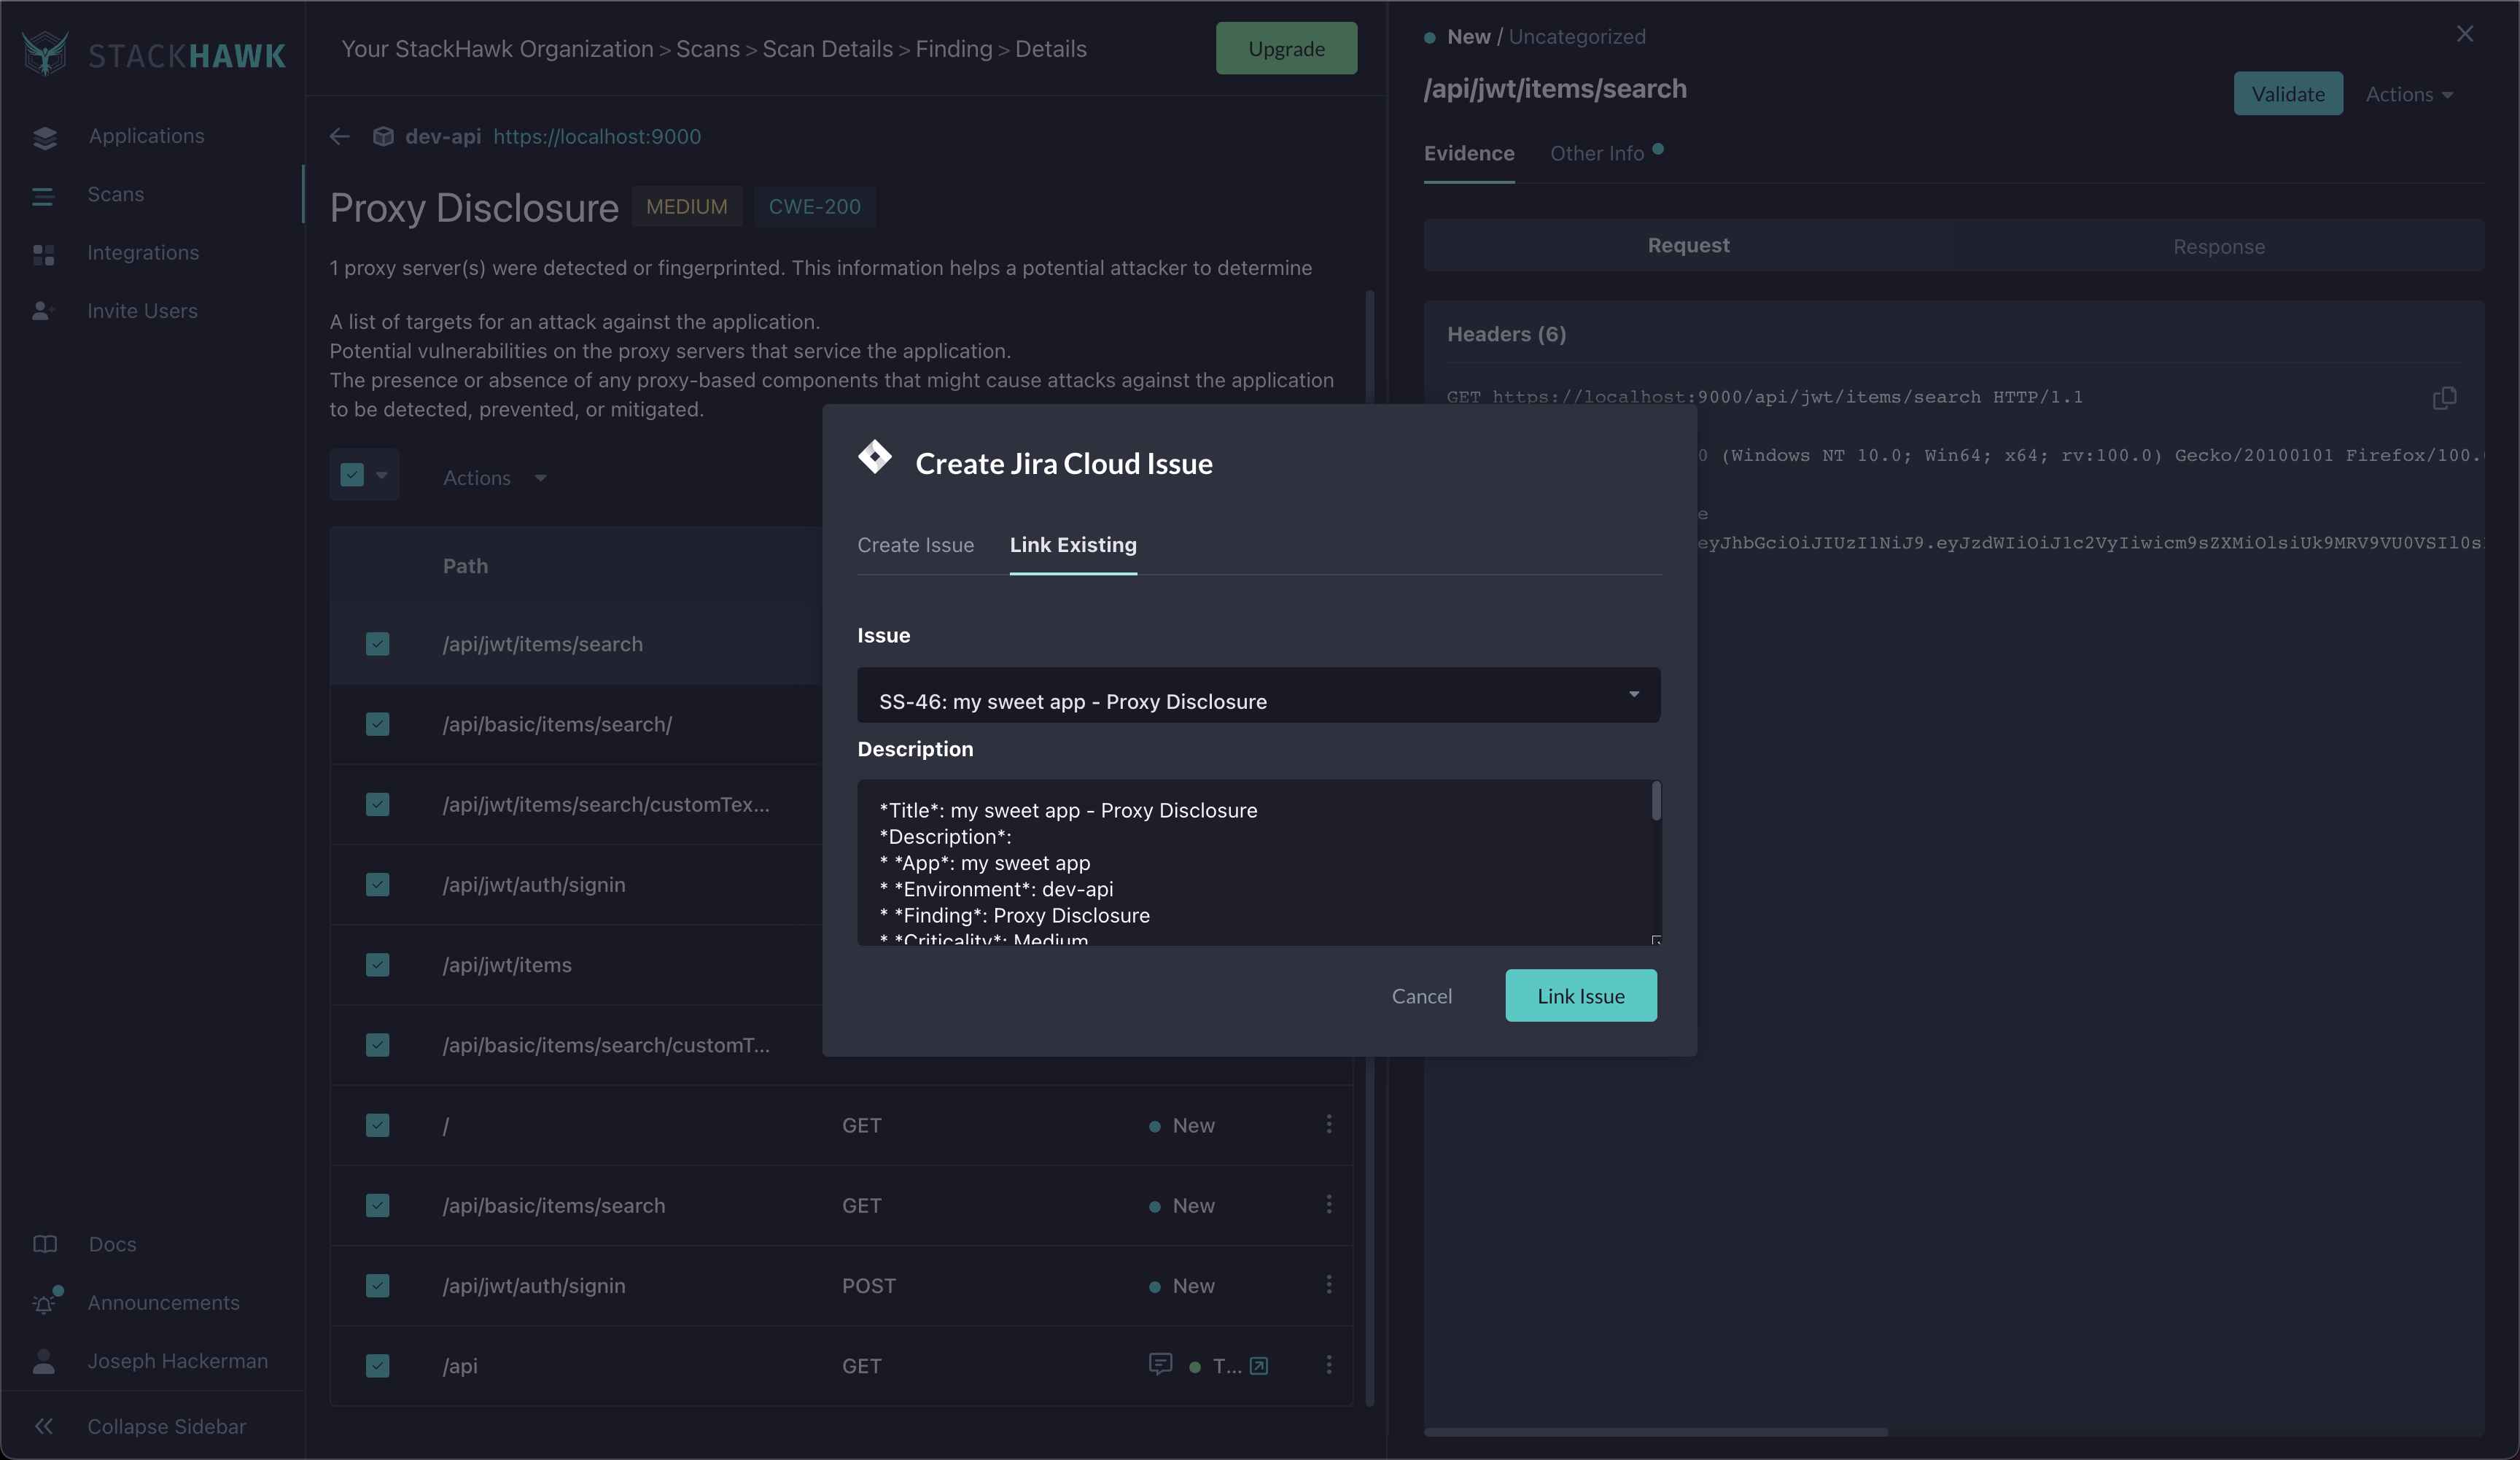
Linking an Existing Issue: Select the issue from the query search you want associated with your Jira ticket. The linked issue will receive a comment with the details of the vulnerability findings. Click Link Issue, and the Jira issue will be created and associated with the scan findings.
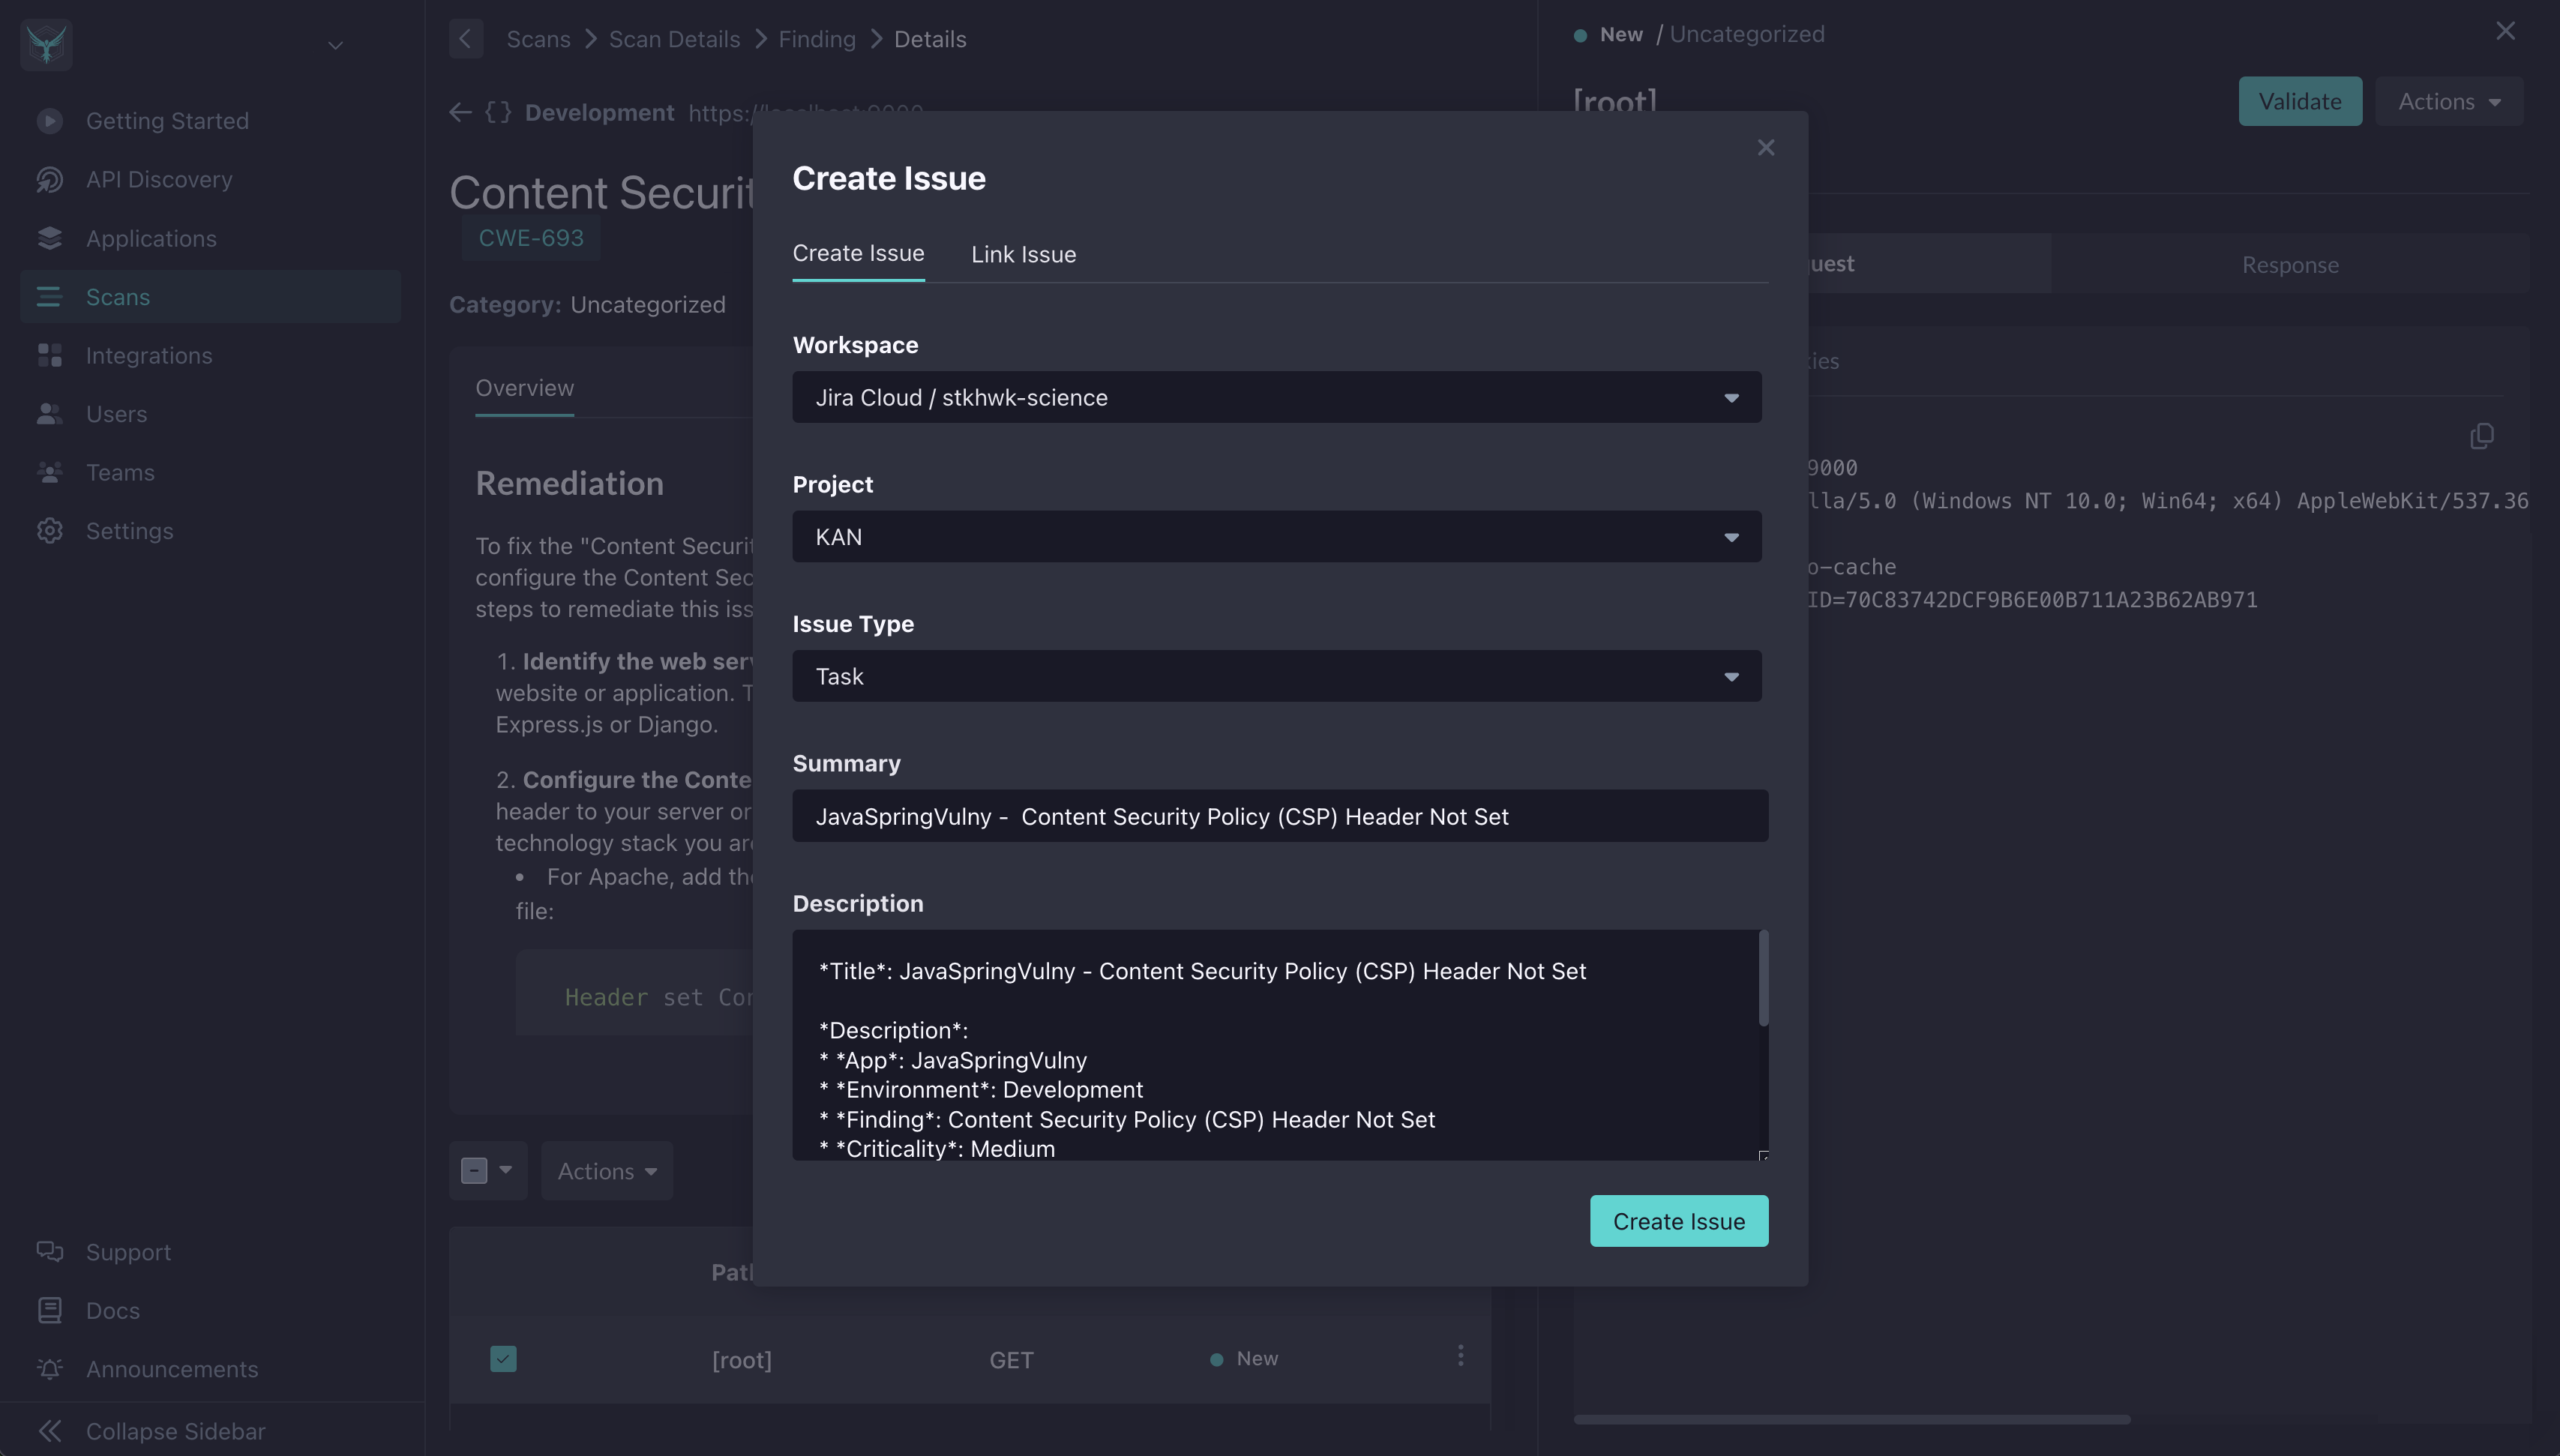
Multiple Integrations: If you have multiple Jira workspaces connected, or if you have different ticket promotion integrations installed, a dropdown to select the desired workspace will be visible, and must be first selected.
Other actions
Similar to sending to Jira Cloud, you can clear the status of a finding or change it to another status by selecting the Path, Status, and Method and selecting a different action.
Populating Additional Fields in Jira
If you want to populate additional fields in Jira, such as Components or Assignee, you can create a Jira Automation Rule to do so. That way, whenever you select “Send to Jira” in StackHawk, these additional fields will be set by the Jira Automation Rule. Creating Automation Rules may require certain permissions from your Jira Administrator.
For a simple rule that populates the same fields/values for every issue:
- In your Jira Project, click on
Project settings > Automation - Navigate to
Rules, and click on theCreate rulebutton - For New trigger, select
Issue created > Save - For Add component, select
New condition > Issue fields condition - For the issue fields condition, enter
Field: Creator,Condition: equals,Value: StackHawk for Jira - Select
New action > Edit issueand set the field(s) you want to populate.
For a more complex rule that can set different fields/values for different apps:
- Follow steps 1-5 above.
- Select
New branch > Branch rule / related issues > Current issue > Save - Select
New condition > Issue fields condition - For the issue fields condition, enter
Field: Description,Condition: contains,Value: App: <app name> - Select
New action > Edit issueand set the field(s) you want to populate. - To add additional conditions, click on the
Add componentlink at the bottom of the tree and repeat steps 2-5 above.
Jira Automation Rules Documentation
TroubleShooting
Custom Fields on Jira Issue Types
It is not uncommon for a Jira Cloud project to have custom fields on their issuetypes. This is a feature provided by Atlassian, but may affect StackHawk ticket creation. If your project’s IssueType has additional custom fields, make sure they also have an acceptable default field value defined:
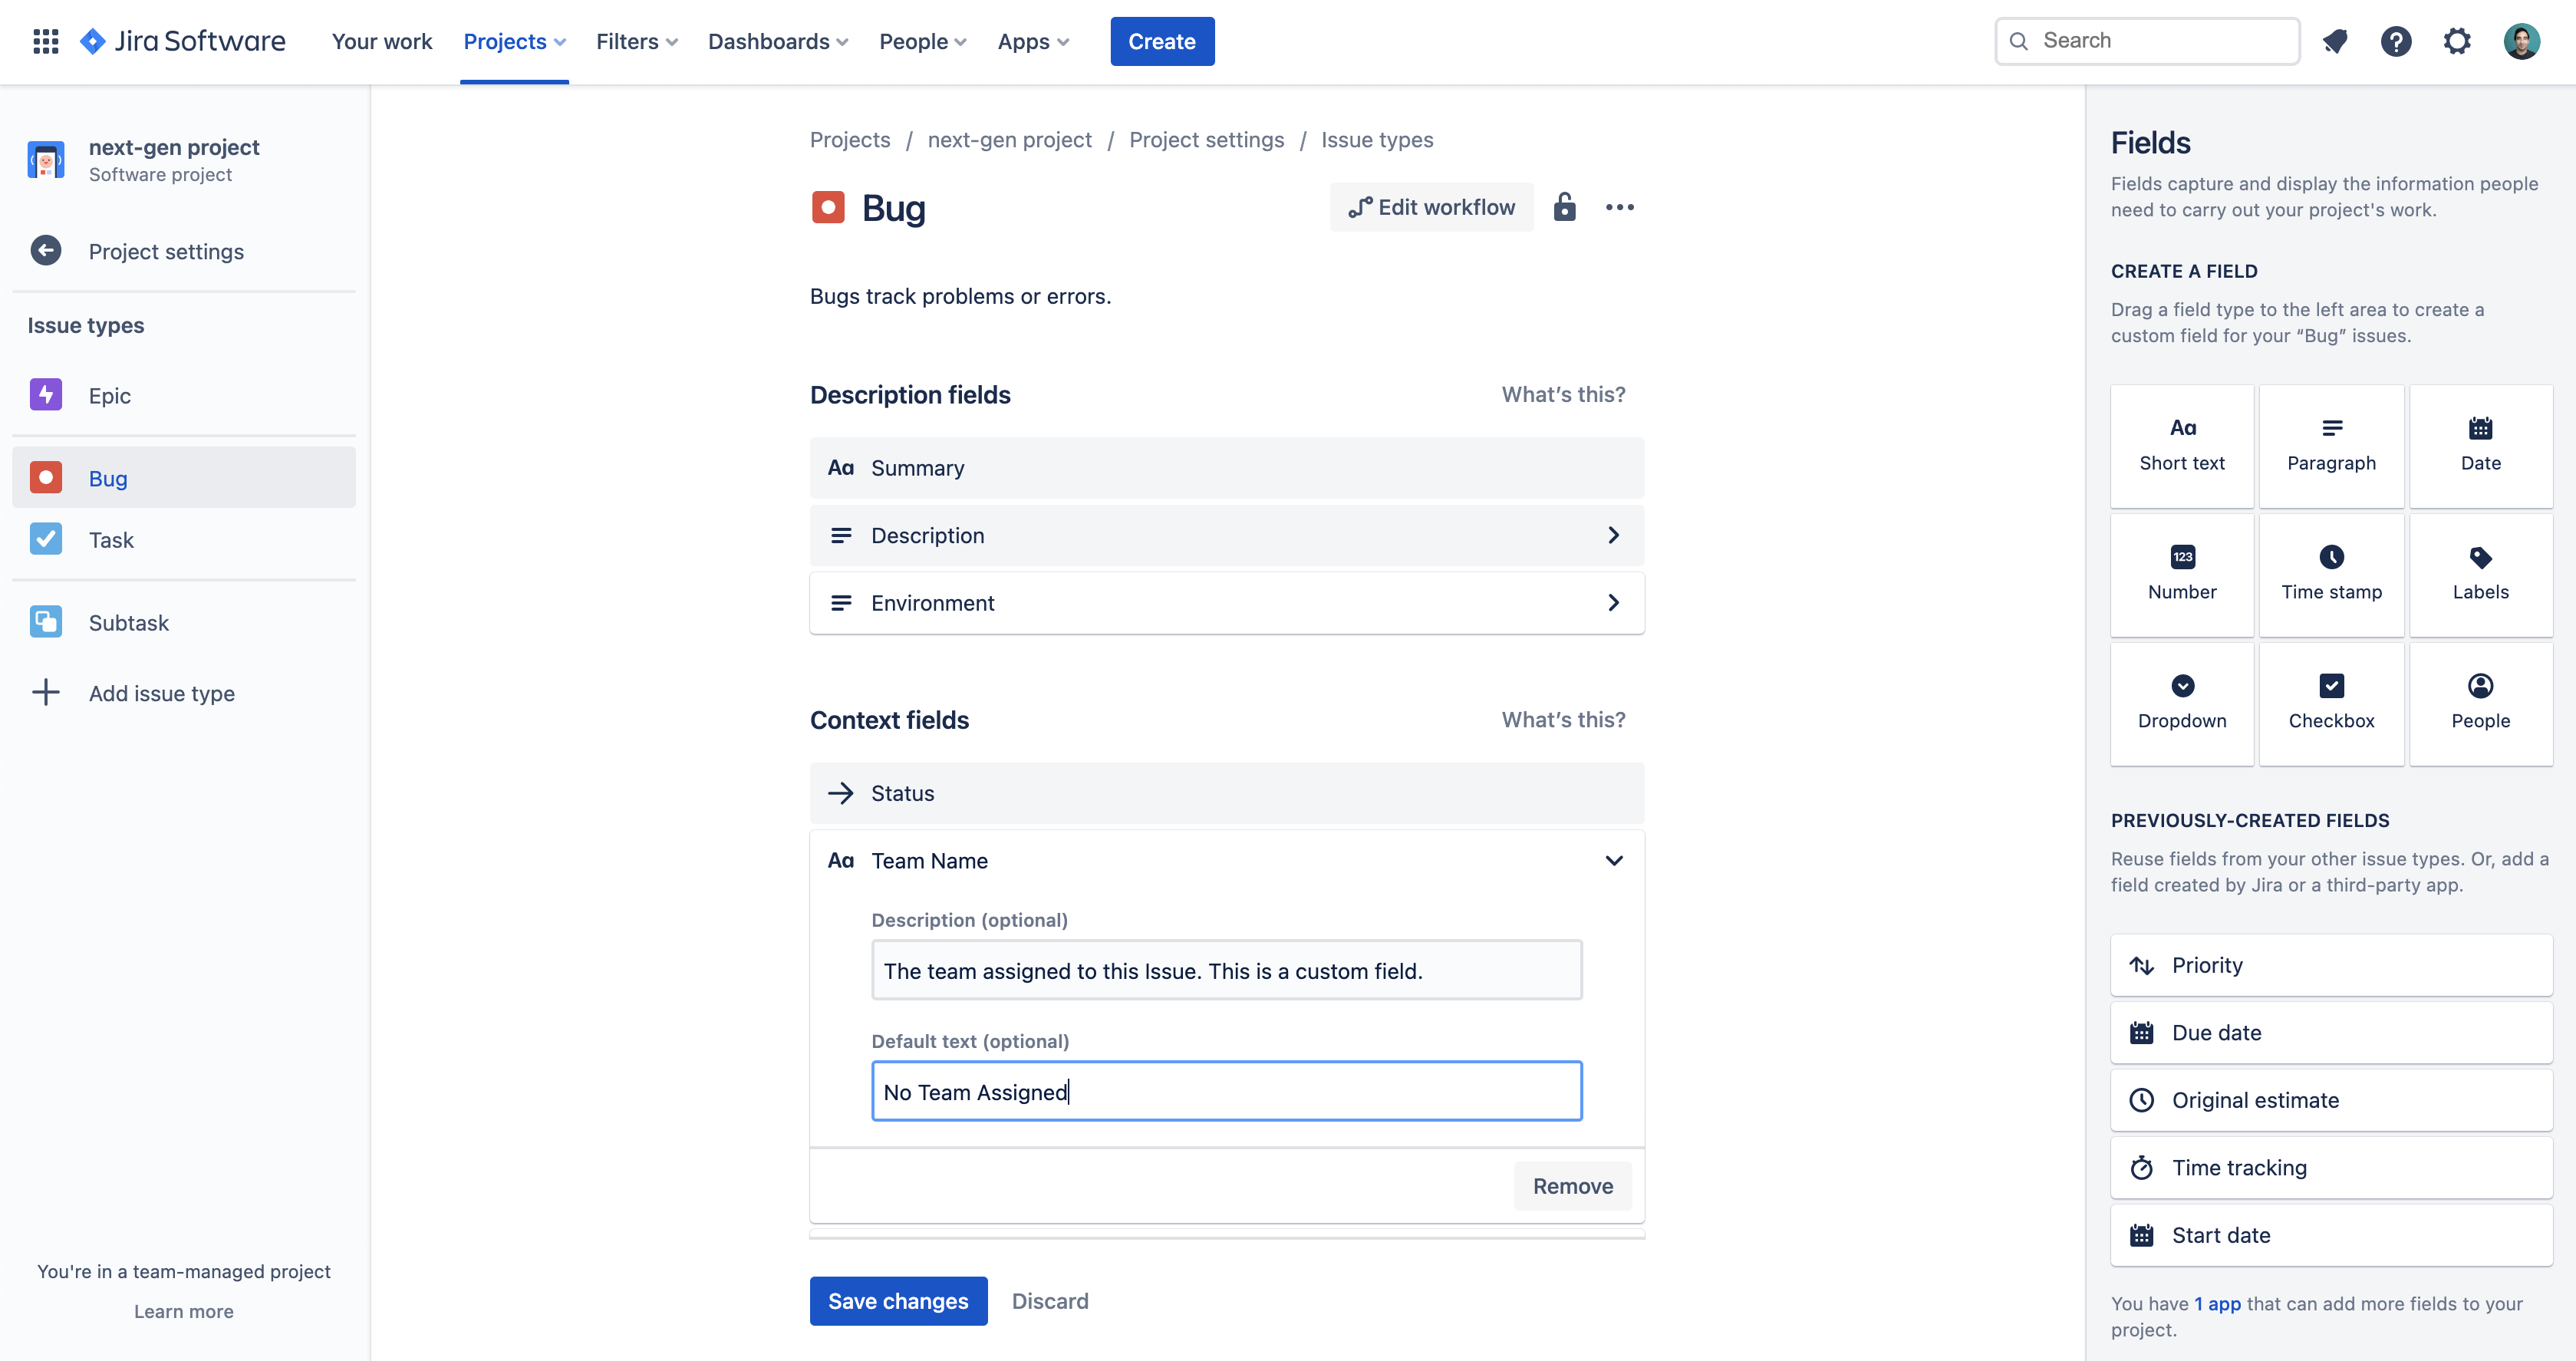
StackHawk does support custom fields for a Jira workspace, once it has been installed and configured with the preferred default project and default issuetype. Specific custom field values can be set statically for tickets created from that workspace with strictly required custom fields. If this is desired, please reach out to StackHawk Support for assistance.
Removing the Jira Cloud Integration
The Jira Cloud integration can be disconnected from the authorized StackHawk organization, or from the Jira Cloud Integration page.
- Go to the Jira Cloud Integration page in StackHawk.
- Click
Remove Integration - From your Jira Workspace, go to
Apps > Manage Your Apps > StackHawk for Jira - Click
Uninstall
Feedback
Have any suggestions, feature requests, or feedback to share? Contact StackHawk Support .

