Buildkite

Buildkite is a great platform for building, testing, and deploying software. The straightforward YAML pipeline configuration language makes it easy to add StackHawk application security scanning.
In this how-to, we will describe the simple scenario of scanning a publicly available example app, example.com. Then we will show how to scan a service running on the localhost address, and finally how to scan a service in a Docker Compose configuration.
Prerequisites
The pipeline examples in this document were tested on an Ubuntu 20.04 server with the following software installed.
Protect Your API Key
HawkScan will need your StackHawk API key to send results back to the platform. Take care to protect your API key from accidental disclosure by saving it as a secret and exposing it in your pipeline as an environment variable, API_KEY.
For details on how to do this in Buildkite, check out their documentation on managing pipeline secrets.
We recommend using a dedicated secrets management system like AWS Secrets Manager, or Hashicorp Vault. But for testing, you can stash your API key in a Buildkite environment hook script. On an Ubuntu Buildkite agent host, you can use the following script saved at /etc/buildkite-agent/hooks/environment.
#!/usr/bin/env bash
set -euo pipefail
export API_KEY="hawk.xxXXxXXxXxxxXXXxxXxx.xxxxXXxXXxXxxxXXXxxX"
Create a new pipeline
To follow along with these examples, set up a new repository in GitHub. Then create a new Buildkite pipeline, and connect it to your new repository.
In your New Pipeline setup, under build steps to run, add only:
buildkite-agent pipeline uploadYour New Pipeline configuration should look something like this.
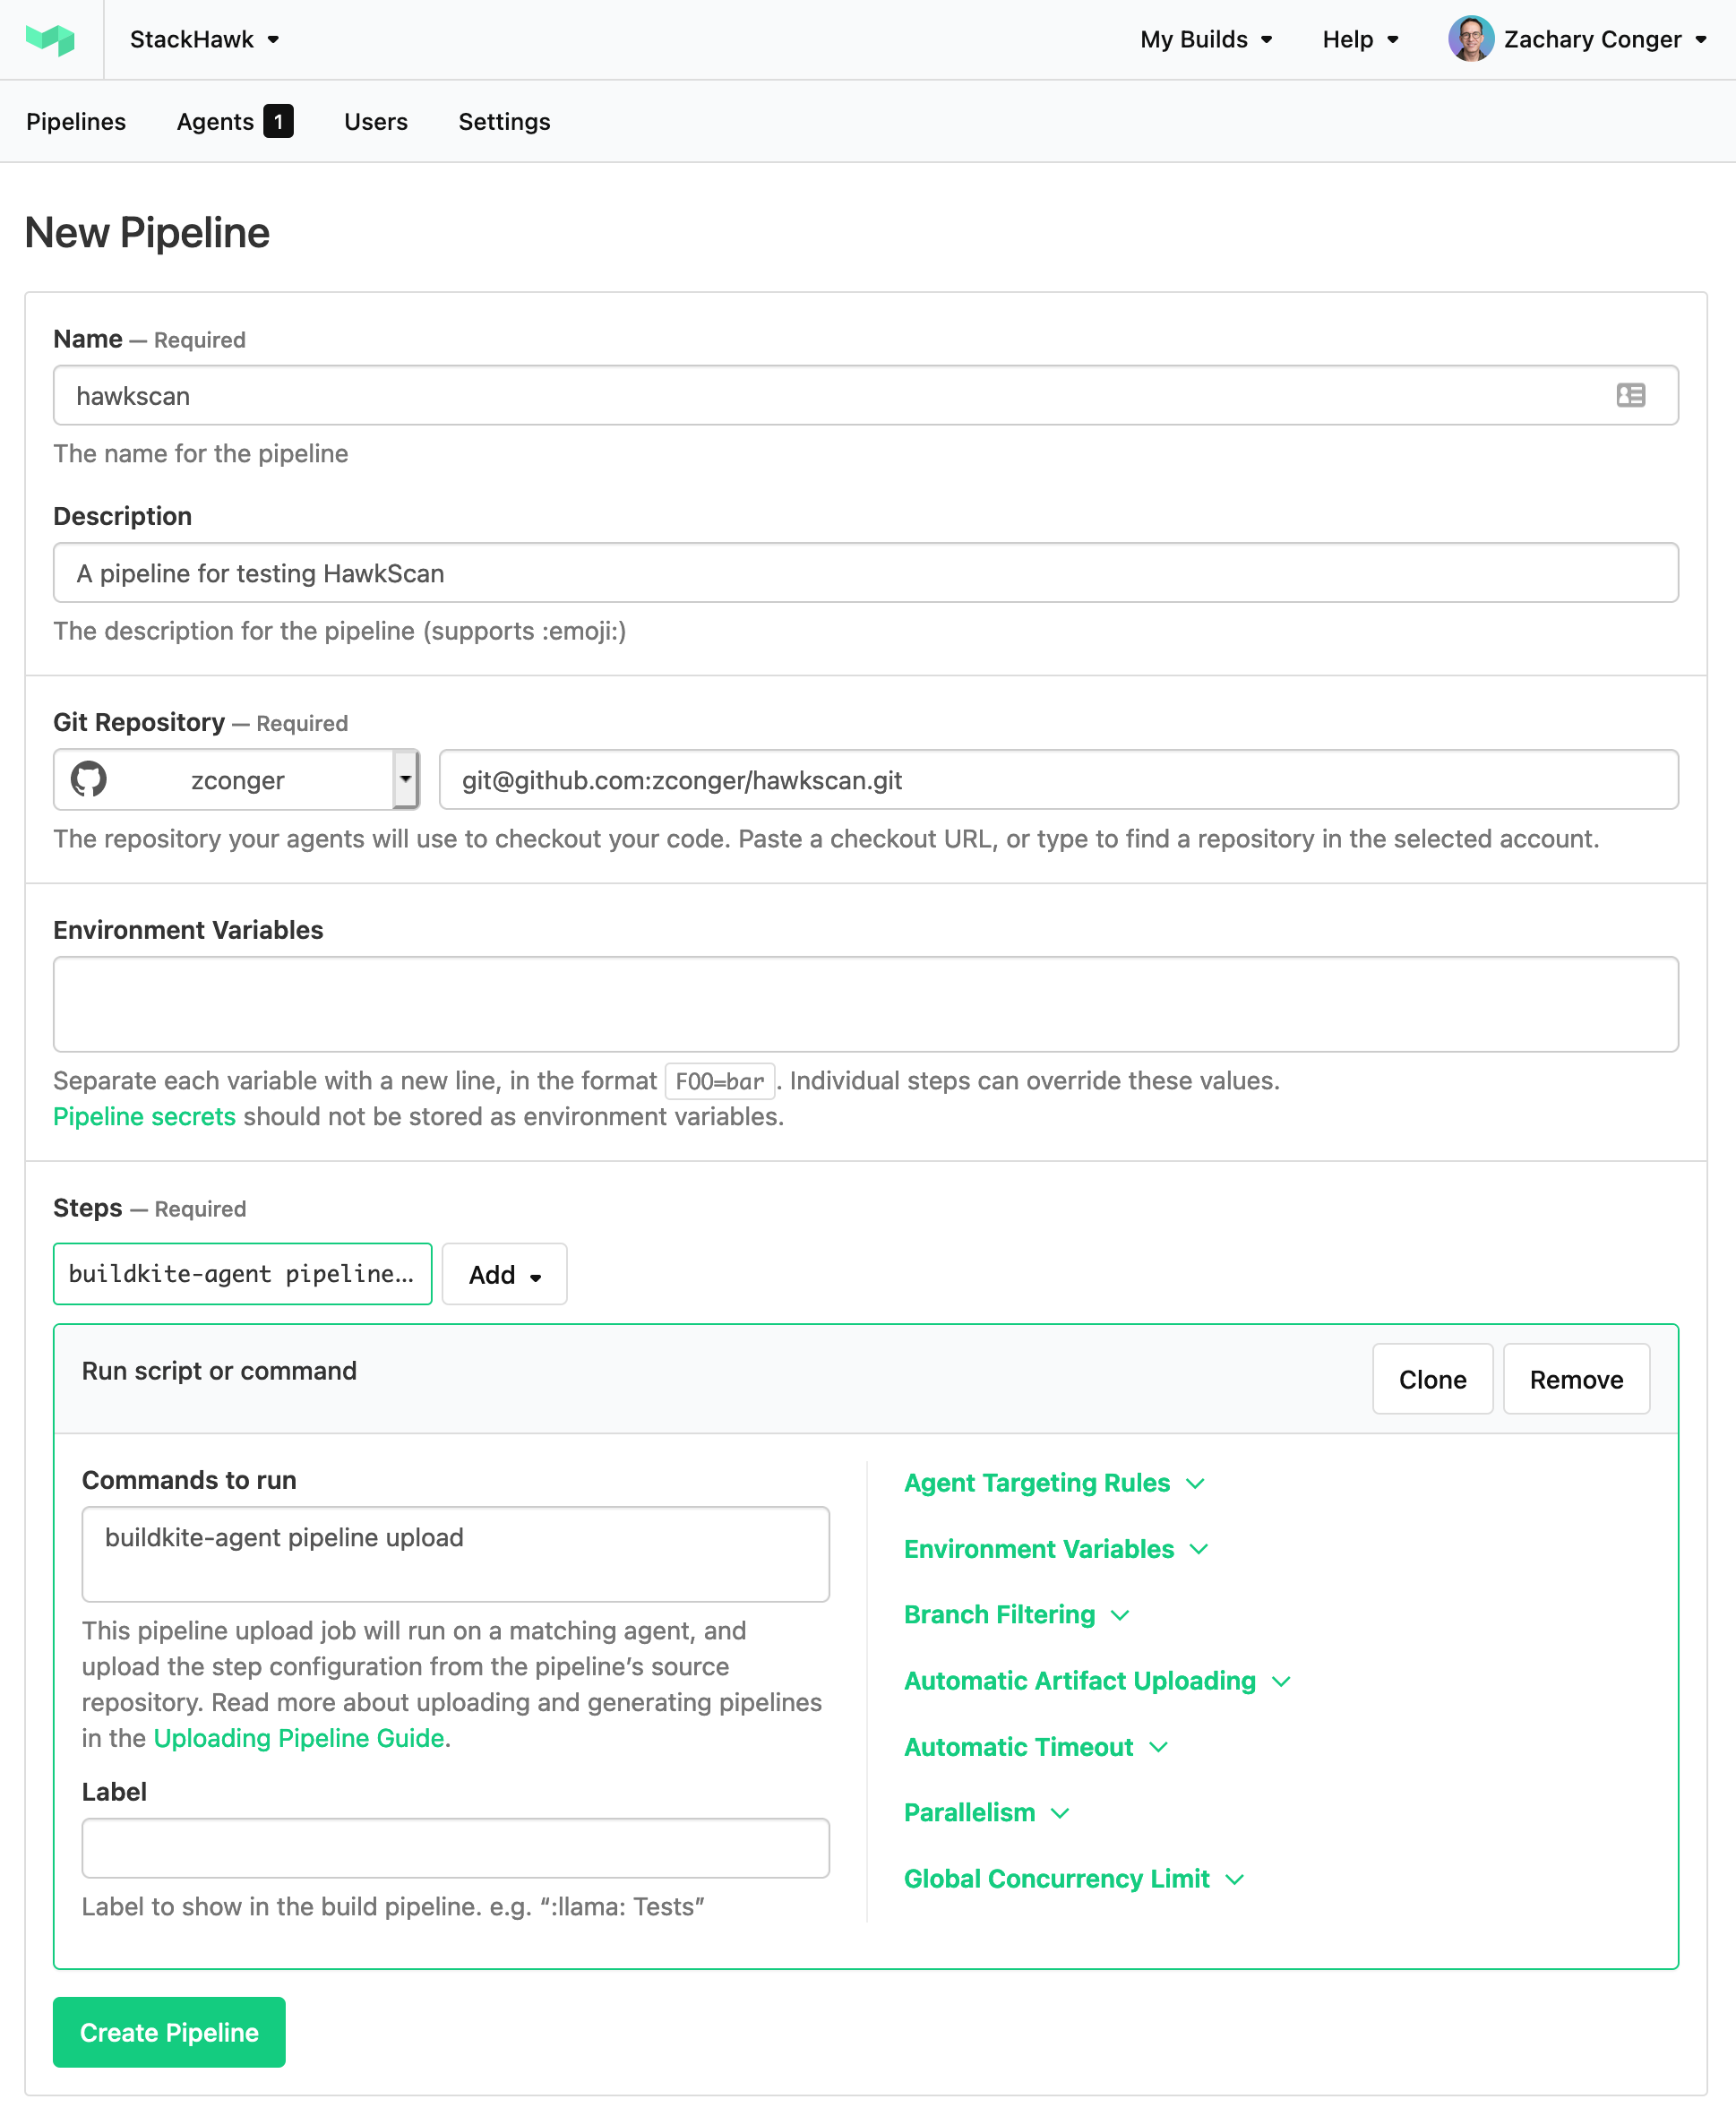
Click Create Pipeline to continue.
If prompted, follow the instructions to set up a webhook from GitHub to Buildkite.
Now that your pipeline has been configured in Buildkite, let’s move on to configuring your StackHawk configuration and Buildkite pipeline YAML in your repository.
Scanning Scenarios
In order to scan your application in a Buildkite pipeline, you will want to deploy it after building so that HawkScan can reach it.
You could deploy your app to a remote environment such as a server instance or Kubernetes cluster. Or you could run it locally, on the same machine as your Buildkite agent where the pipeline runs. Or you could run it locally in a Docker Compose configuration, to make it easy to add any required services such as a database.
Here is how you can scan in each of those scenarios.
Remote Integration Environment
If your application is deployed to a remote environment, the scanning portion of your pipeline is pretty simple. You just point HawkScan at the endpoint and scan. In our example, we will scan the public website example.com.
Create a StackHawk configuration file. At the root of your repository, create the file stackhawk.yml. Add the following contents, replacing the value for app.applicationId with your own application ID from the StackHawk Applications screen.
app:
  applicationId: xxXXXXXX-xXXX-xxXX-XXxX-xXXxxXXXXxXX
  env: Develop
  host: http://example.com
Now create your pipeline configuration file, .buildkite/pipeline.yml. It will pull the latest version of the stackhawk/hawkscan Docker image, and run it using the HawkScan configuration above.
steps:
  - command: "docker pull stackhawk/hawkscan"
    label: "Pull the latest version of HawkScan"

  - wait
  - label: "Run HawkScan"
    key: hawkscan-remote
    command: |
      docker run -v $(pwd):/hawk:rw -t \
        -e API_KEY \
        stackhawk/hawkscan
Check those two files into source control, and push them to GitHub. Head over to the Buildkite console to watch your pipeline run. When it is complete, check your account at StackHawk to review your scan details.
Localhost Environment
In this example we will deploy our application locally, on the Buildkite agent machine. In the Buildkite pipeline, we will simply point HawkScan at the localhost address and scan.
For our example app, we will use a Dockerized version of Nginx listening on port 8080. Your service doesn’t have to run in Docker. It only needs to be reachable at the localhost address for this method to work.
At the root of your repository, create a stackhawk.yml file with the following contents, replacing the value for app.applicationId with your own application ID from the StackHawk Applications screen.
app:
  applicationId: xxXXXXXX-xXXX-xxXX-XXxX-xXXxxXXXXxXX
  env: Develop
  host: http://localhost:8080
Create your pipeline file, .buildkite/pipeline.yml. Configure it to start your application in the background, pull the latest version of the stackhawk/hawkscan Docker image, and run it using the configuration above. It’s a good idea to shut the application down when the scan is done, so it’s not hanging around to interfere with future builds.
steps:
  - command: "docker stop nginx || echo Nevermind"
    label: "Stop Nginx if it's already running"

  - wait
  - command: "docker run --detach --rm --publish 8080:80 --name nginx nginx"
    label: "Run Nginx"
  - command: "docker pull stackhawk/hawkscan"
    label: "Pull the latest HawkScan image"

  - wait
  - label: "Run HawkScan"
    key: hawkscan-local
    command: |
      docker run -v $(pwd):/hawk:rw -t \
        --network host \
        -e API_KEY \
        stackhawk/hawkscan

  - wait
  - label: "Stop Nginx"
    command: docker stop nginx
Check those two files into source control, and push them to GitHub. Head over to the Buildkite console to watch your pipeline run. When it is complete, check your account at StackHawk to review your scan details.
Docker Compose Environment
Docker Compose is a great way to set up a fully containerized local integration testing environment. You can run your own containerized app, along with any other requisite services such as databases.
In Docker Compose, your app and any other required services run on a bridge network. You can run HawkScan on the same bridge network, and reach your app by its service name. In this example, we will scan an Nginx container named nginx, running on the named bridge network, nginet.
At the root of your repository, create a docker-compose.yml file with the following contents to define your bridge network and Nginx service.
version: '3.7'

services:
  nginx:
    image: nginx
    networks:
      nginet:

networks:
  nginet:
    name: nginet
Create a stackhawk.yml file with the following contents, replacing the value for app.applicationId with your own application ID from the StackHawk Applications screen.
app:
  applicationId: xxXXXXXX-xXXX-xxXX-XXxX-xXXxxXXXXxXX
  env: Develop
  host: http://nginx
Now create your Buildkite pipeline file, .buildkite/pipeline.yml. Configure it to start your Docker Compose configuration in the background, pull the latest version of the stackhawk/hawkscan Docker image, and run it using the configuration above.
steps:
  - command: "docker-compose down"
    label: "Stop service if it's already running"

  - wait
  - command: "docker-compose up --build --detach"
    label: "Service up"
  - command: "docker pull stackhawk/hawkscan"
    label: "Pull HawkScan image"

  - wait
  - label: "Run HawkScan"
    key: hawkscan-compose
    command: |
      docker run -v $(pwd):/hawk:rw -t \
        --network nginet \
        -e API_KEY \
        stackhawk/hawkscan

  - wait
  - label: "Service down"
    command: docker-compose down
Check those two files into source control, and push them to GitHub. Head over to the Buildkite console to watch your pipeline run. When it is complete, check your account at StackHawk to review your scan details.