Jenkins

Jenkins is a widely-used CI/CD system with a rich ecosystem of plugins and extensive flexibility. HawkScan integrates easily into Jenkins pipelines.
Let’s get started with a simple example.
Jenkins Server Requirements
You will need a recent version of Jenkins with the default recommended set of plugins. That should include the Pipeline and Credentials plugins.
Your Jenkins server or build node needs Docker. For our test, we installed Jenkins and Docker on the same server, and we added the jenkins user to the docker group so that Jenkins jobs could access the Docker daemon, like so:
$ sudo usermod -a -G docker jenkinsSecure Your API Key
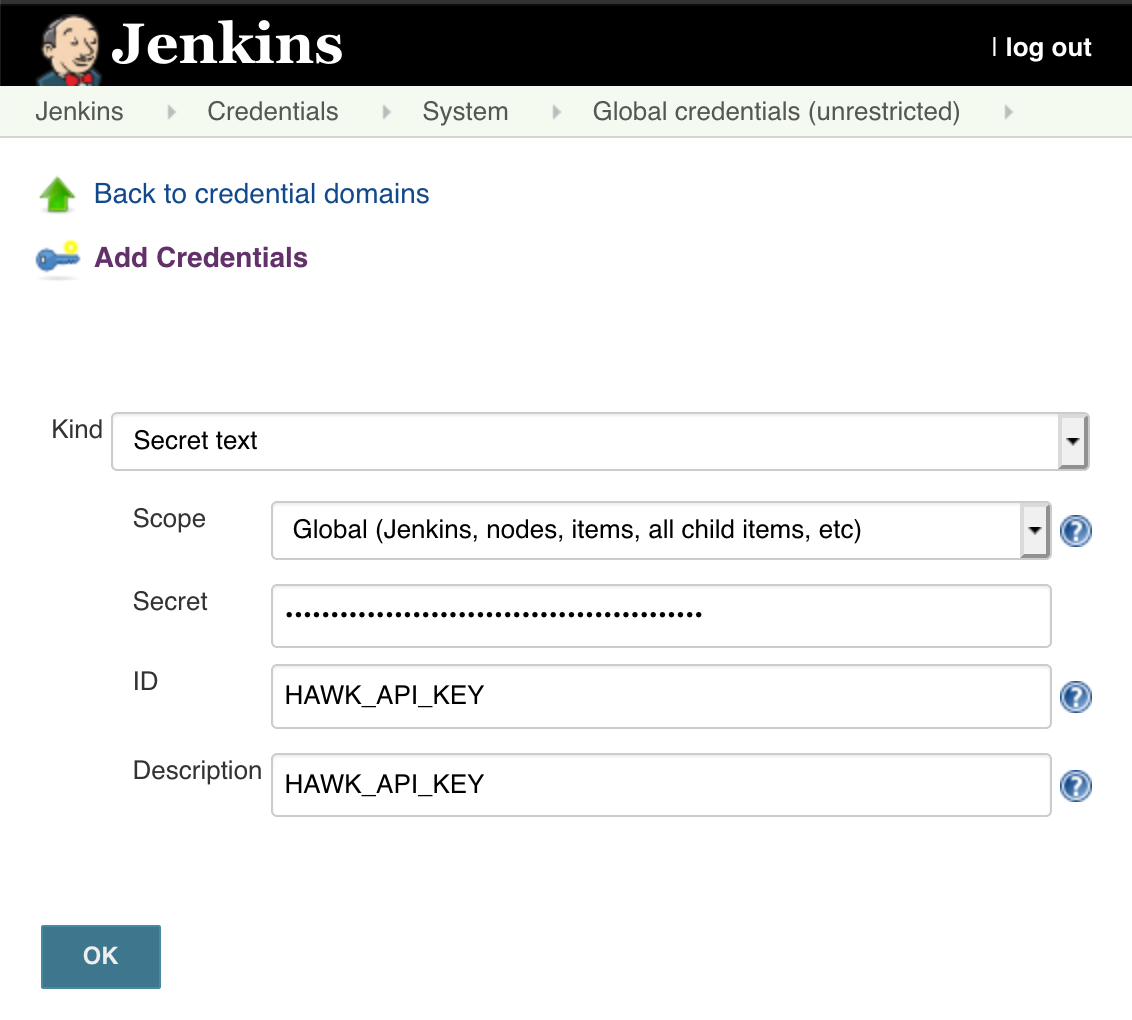
Save your StackHawk API key as a “Secret text” entry in Jenkins Credentials. You can later extract that secret as an environment variable, HAWK_API_KEY, in your pipeline script so that HawkScan can use it to send scan results to your StackHawk account.
Configure HawkScan
At the base directory of your code repository, create a minimal stackhawk.yml appropriate for scanning your application. For our example, we will create a minimal config pointing to our Development environment API endpoint. Just replace the host entry with your test endpoint, and replace applicationId with your App ID from StackHawk.
app:
  applicationId: xxXXXXXX-xXXX-xxXX-XXxX-xXXxxXXXXxXX
  host: http://example.com
  env: Development

hawk:
  startupTimeoutMinutes: 1
  spider:
    base: false
The configuration element, hawk.spider.base: false, limits the scan to the / URI, to speed up the scan. Once your scans are working consistently, you should remove that so that HawkScan will attempt to discover more routes in your app.
Configure Jenkins Pipeline
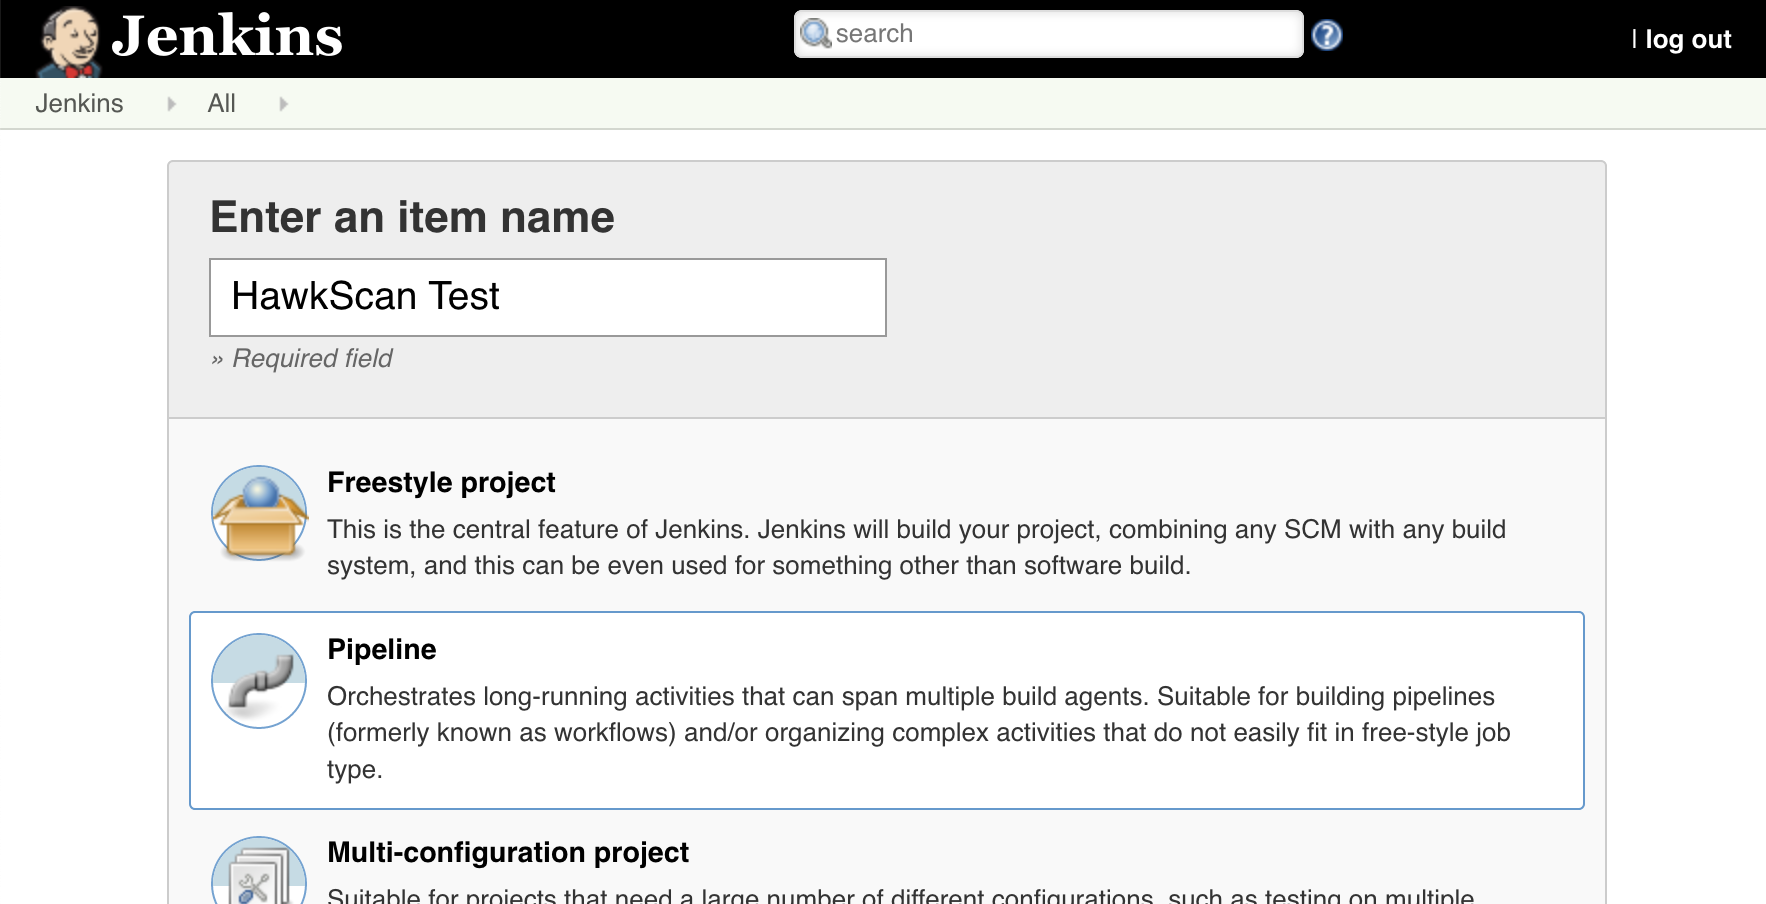
From the Jenkins web console, create a new Jenkins Pipeline job:
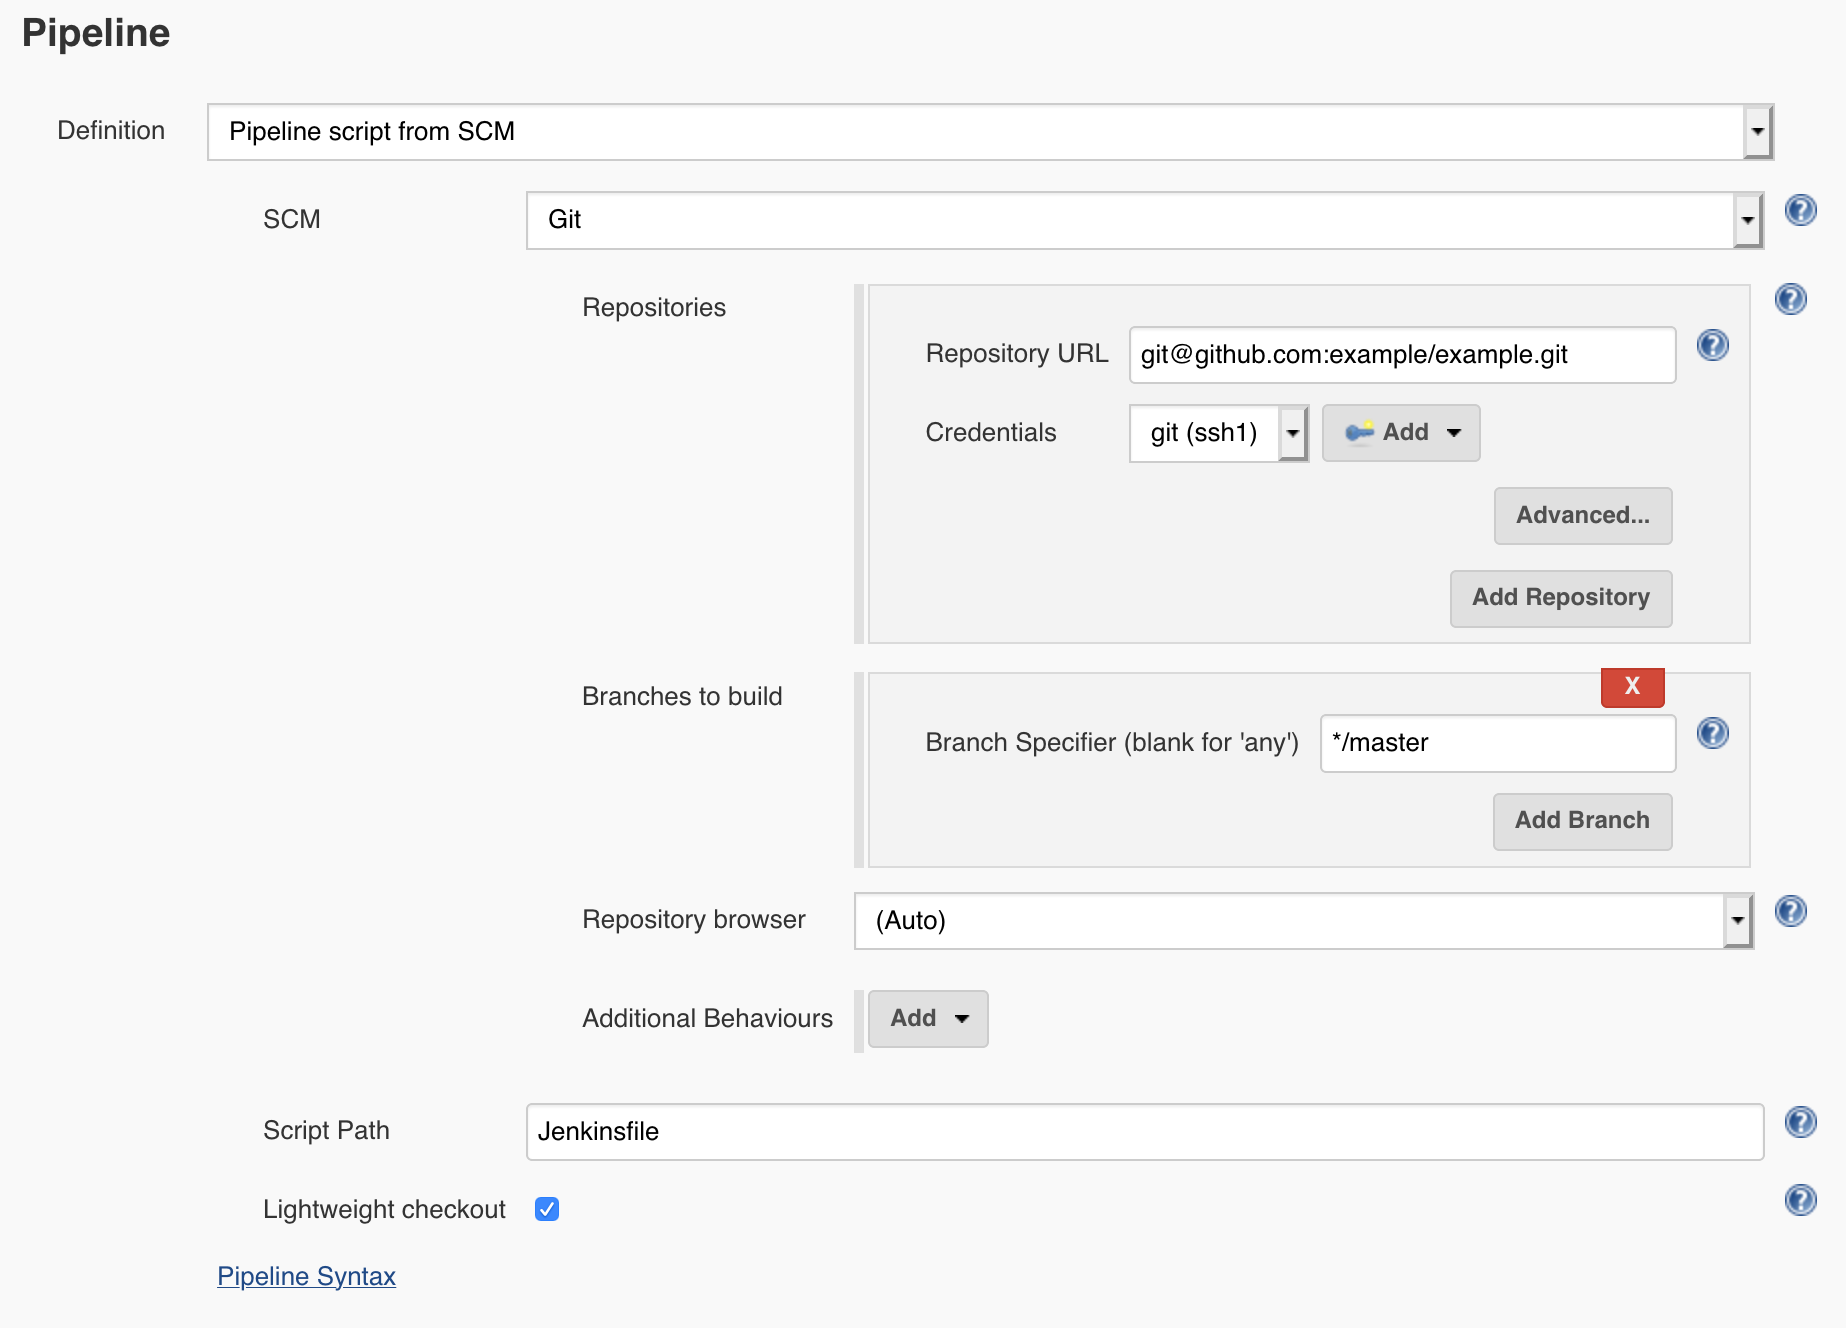
In the Job Configuration settings, configure the Pipeline section to point to a Jenkinsfile in your code repository:
Next, create a Jenkinsfile at the base of your code repository with the following contents:
pipeline {
  agent any
  stages {
    stage ("Checkout code") {
      steps {
        checkout scm
      }
    }
    stage ("Pull HawkScan Image") {
      steps {
        sh 'docker pull stackhawk/hawkscan'
      }
    }
    stage ("Run HawkScan Test") {
      environment {
        HAWK_API_KEY = credentials('HAWK_API_KEY')
      }
      steps {
        sh '''
          docker run -v ${WORKSPACE}:/hawk:rw -t \
            -e API_KEY=${HAWK_API_KEY} \
            -e NO_COLOR=true \
            stackhawk/hawkscan
        '''
      }
    }
  }
}
Notice that in the third build stage, “Run HawkScan Test,” your StackHawk API key is taken from the Credentials store and rendered as an environment variable, HAWK_API_KEY. That variable is used in the docker run command that follows to submit your scan results to your StackHawk account, where you may review them later.
Run It
Check those two files, stackhawk.yml, and Jenkinsfile, into source control. Start your job from Jenkins, and watch the job run from Console Output. You should see your scan initiate, run, and print a summary of results. Also check your account at StackHawk to review your scan details!