StackHawk Platform
The StackHawk Platform helps you get the most out of your scans. In the platform you can:
- Get Going with Your First Scan: Register for an account, generate an API key, and create an Application ID for your
stackhawk.yml - Dive Deeper into Scan Results: Find more information on each scan including findings details and links cheatsheets for different vulnerabilities.
- Recreate and Manage Findings: See the evidence supporting each finding including requests and responses. Get a curl command to recreate a finding in your environment.
- View Scan History: See previous scans, view scan results over time, and print findings reports to share with other team members.
- Configure Integrations: Integrate with CI/CD tools and workflow tools.
On this page we will walk through how to get going with your first scan.
Generate an API Key
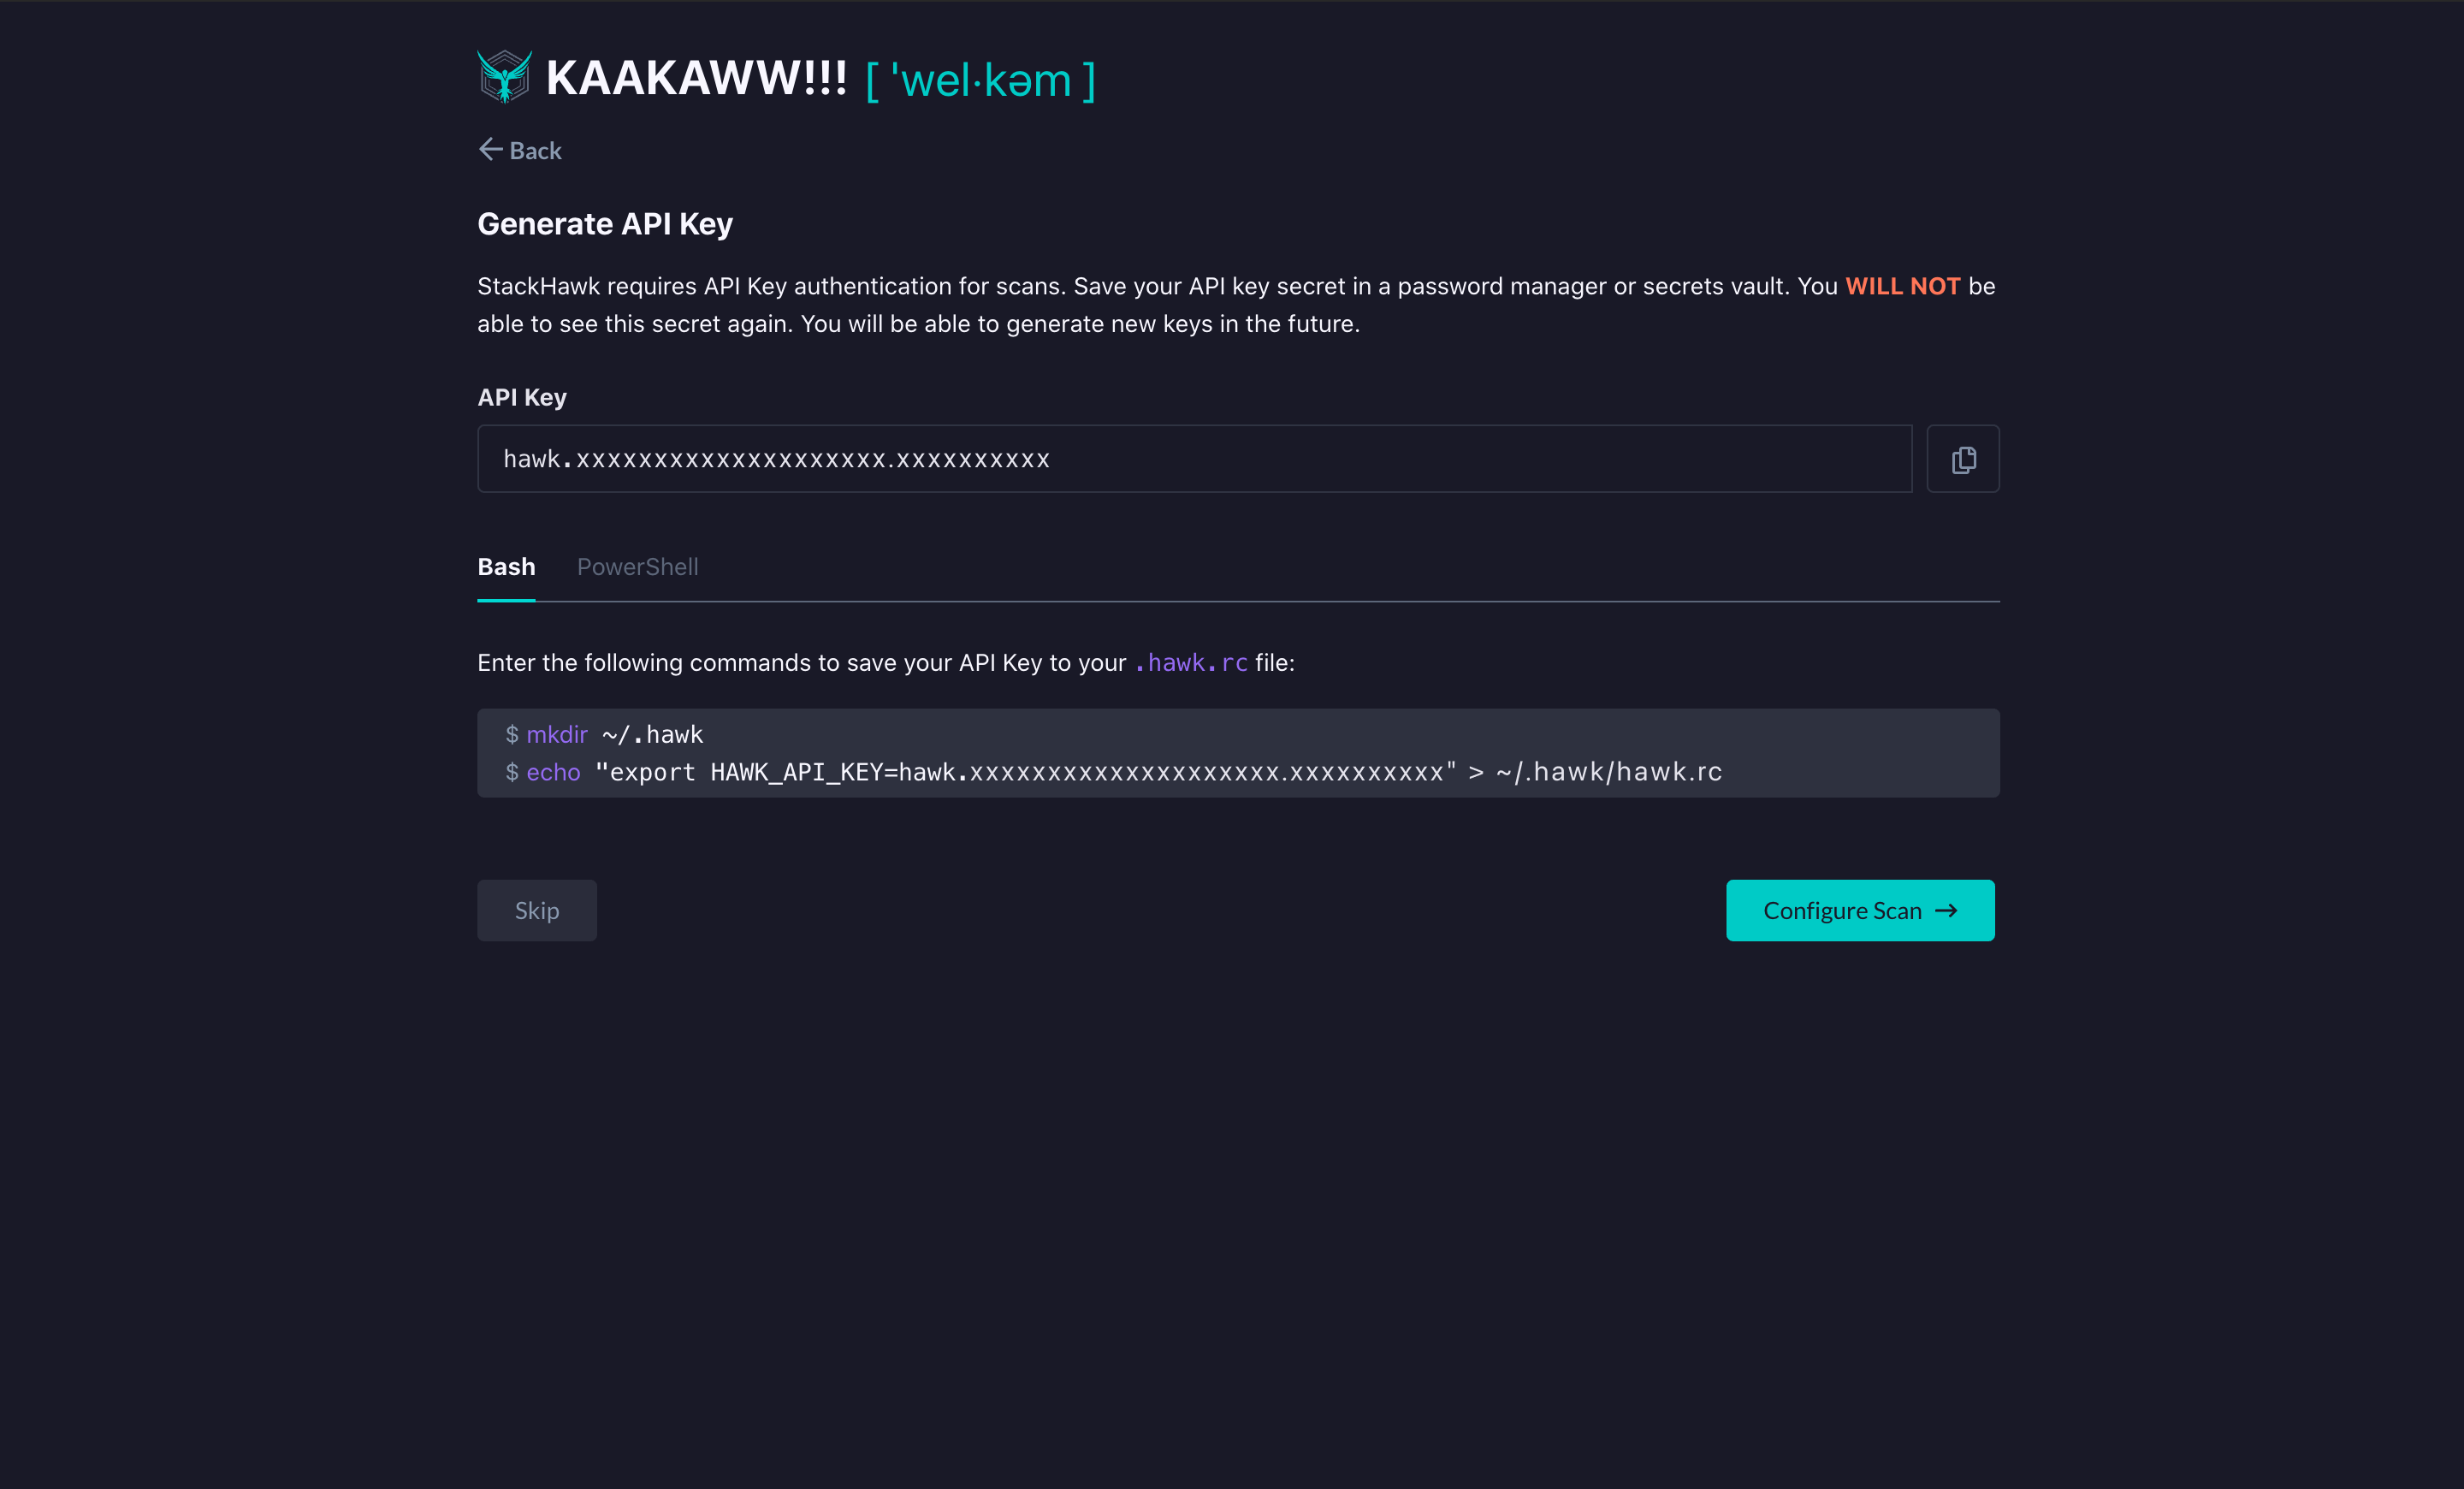
StackHawk requires an API key as the first step to start running scans. After creating an account and signing in, you will be prompted to copy and paste your initial API key.

To do so, create a directory for HawkScan and store your key as an environment variable by running the following command:
Bash
mkdir ~/.hawk
echo "export HAWK_API_KEY=hawk.xxxxxxxxxx.xxxxxxxxxx" > ~/.hawk/hawk.rc
PowerShell
mkdir "~\.hawk"
echo '$env:HAWK_API_KEY="hawk.xxxxxxxxxx.xxxxxxxxxx"' > $home\.hawk\hawk.ps1
Should you misplace or need to refresh your API key, key management can be found in Profile > Settings > API Keys.
Configure your App and Environment
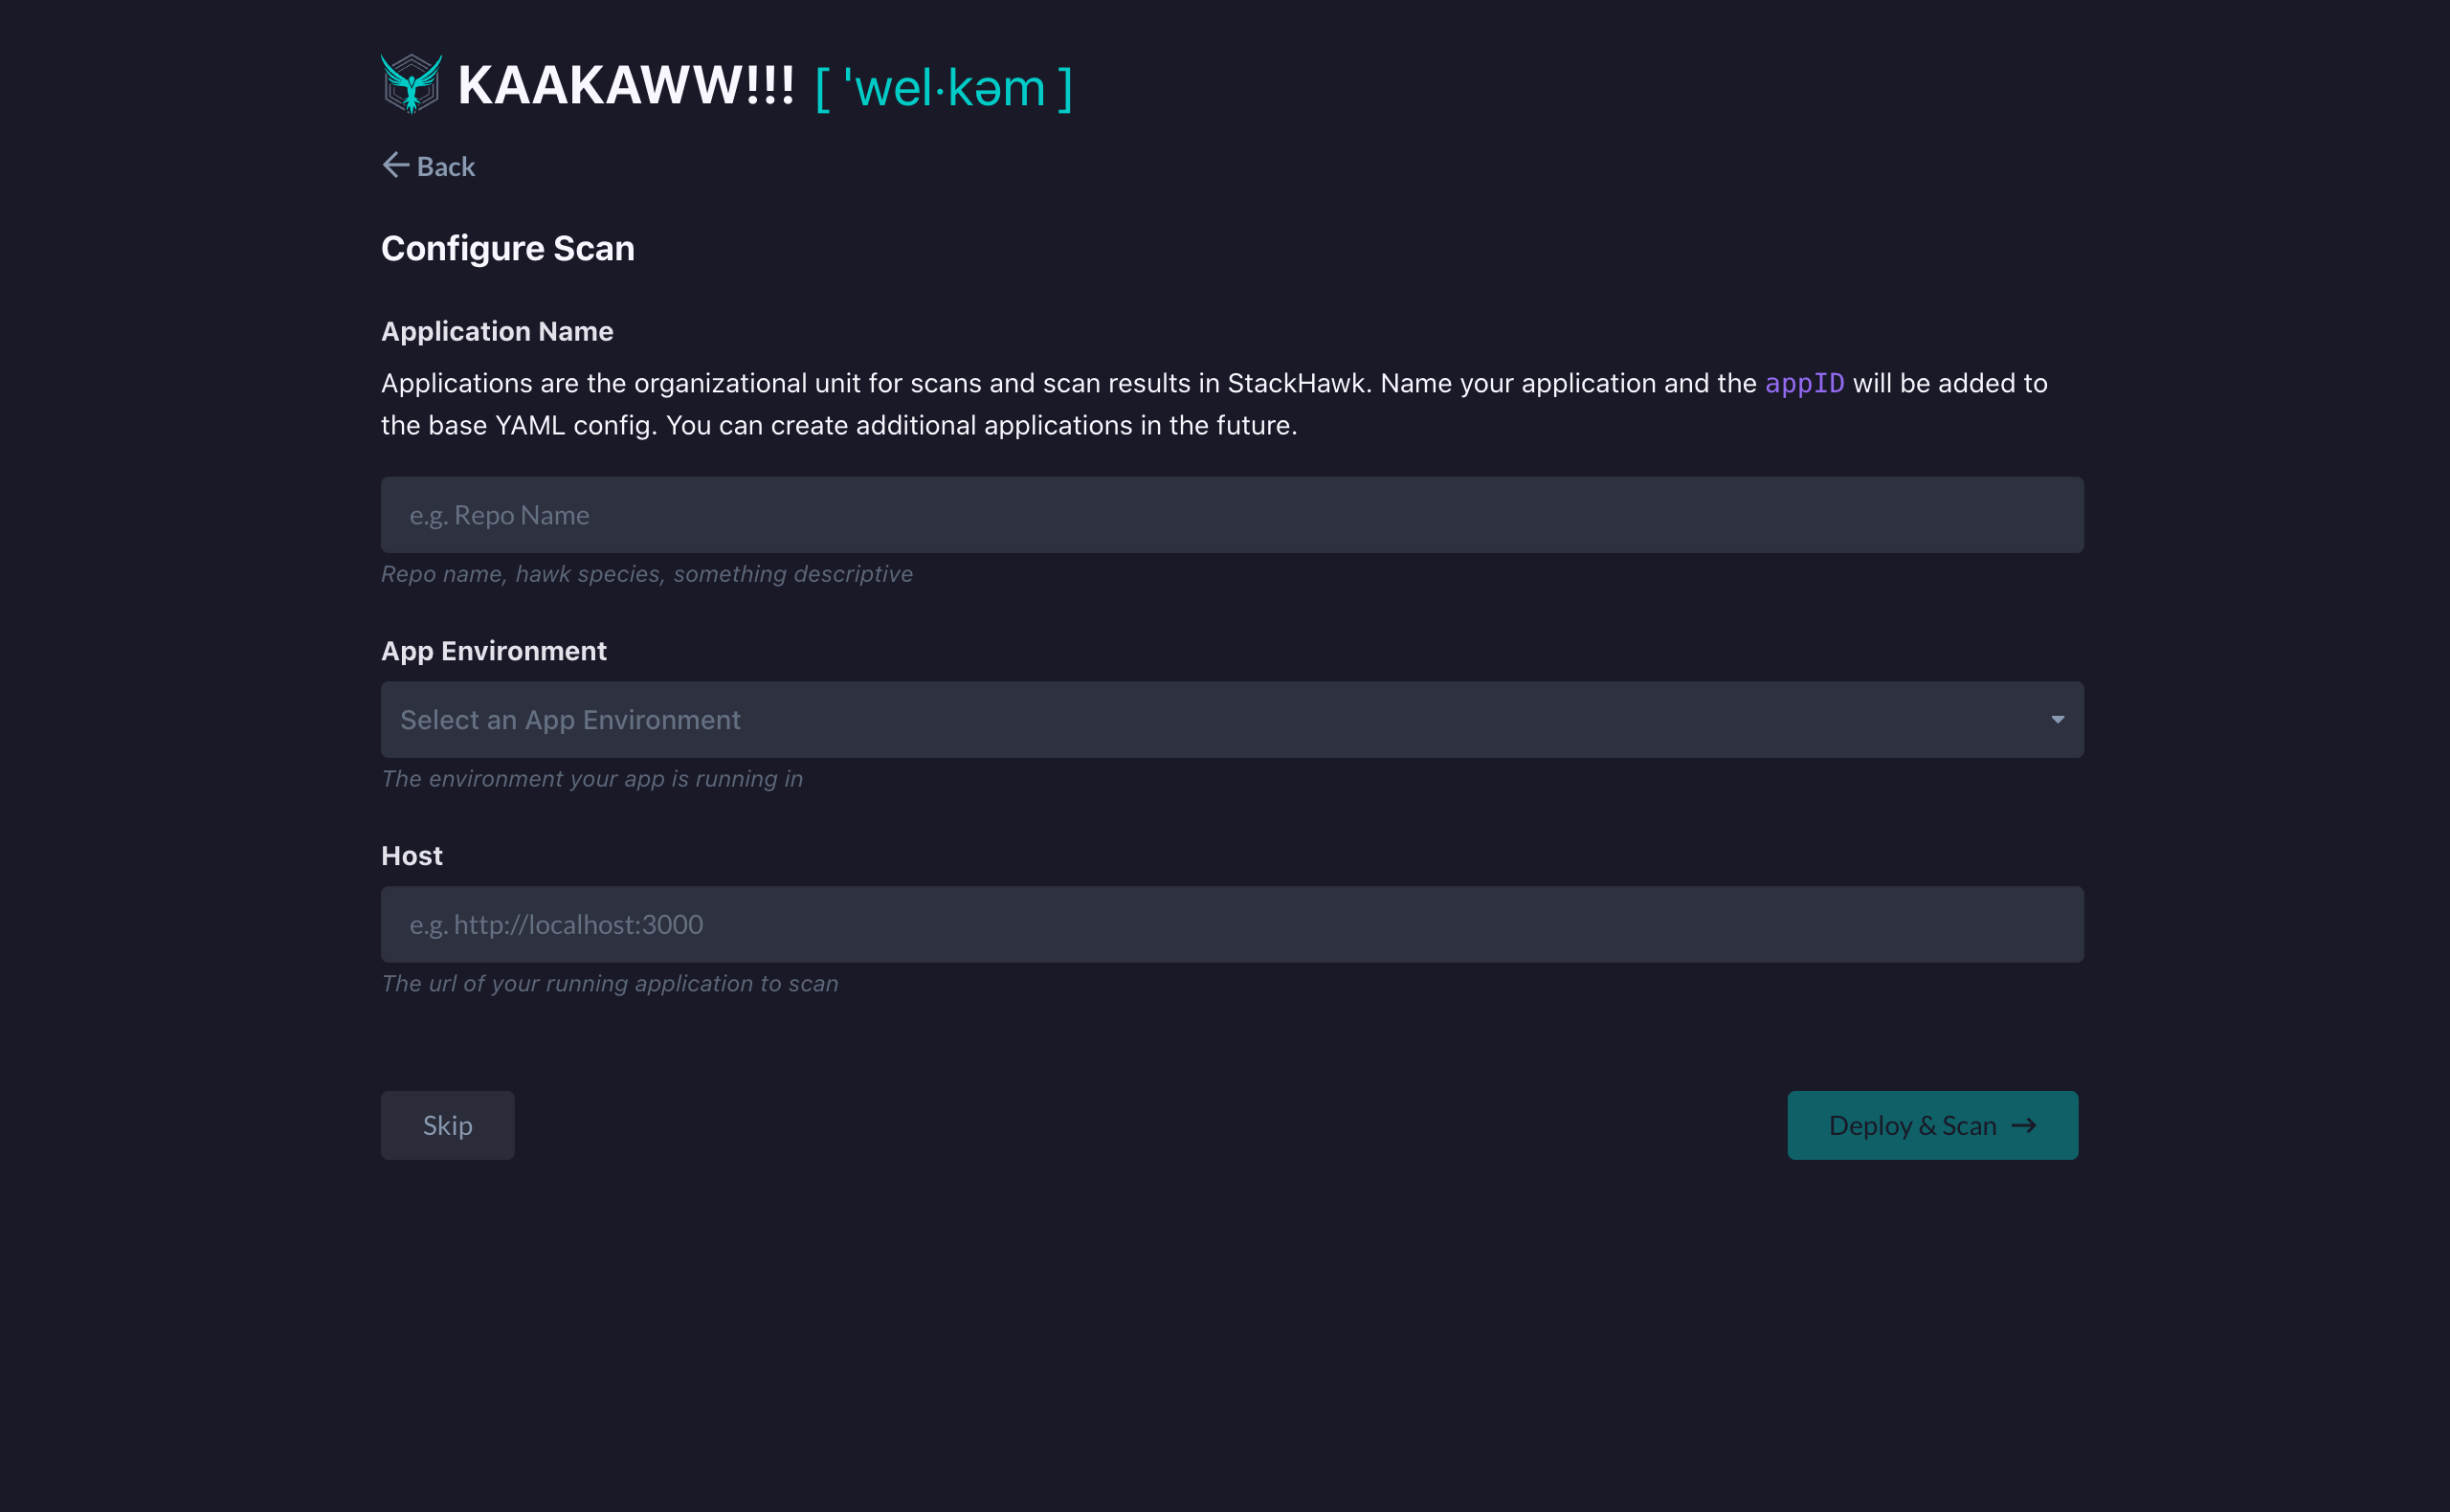
Once you have your API key, you will need to create an applicationID and define your initial environment.

Application Name
Each of your applications will have a unique applicationId, which will ensure that scans and associated findings are organized properly in the platform.
App Environment
StackHawk can run in any environment you choose. We recommend you begin by scanning local/dev or in pre-production, but scans are most effective in CI/CD
Host
Where the running application can be accessed by the scanner (e.g. http://localhost:8080).
Configuration
HawkScan uses a YAML configuration file to supply operational settings to the scanner. The stackhawk.yml configuration should be placed in the same directory as your application codebase.
Below is the minimum configuration required to run a scan.
app:
  applicationId: kkAAAKAW-kAWW-kkAA-WWwW-kAAkkAAAAwWW
  env: Development
  host: http://localhost:8080
If you are looking for more resources, visit our Configuration Page
Run Your First Scan
HawScan runs in a Docker container. Use the following Docker command to initialize the scanner and kick off your first scan:
Bash
source ~/.hawk/hawk.rc
docker run -e API_KEY=${HAWK_API_KEY} --rm -v $(pwd):/hawk:rw -t stackhawk/hawkscan:latest
PowerShell
& "~\.hawk\hawk.ps1"
docker run -e API_KEY=$env:HAWK_API_KEY --rm -v ${PWD}:/hawk:rw -it stackhawk/hawkscan:latest
Once you run your scan, go to your scan dashboard to dive deeper into the results.
