Harness Integration Guide

Harness is a powerful platform for deploying your software in a wide variety of scenarios. In this guide, we will describe the process of adding HawkScan to a Kubernetes deployment pipeline in Harness.
Overview
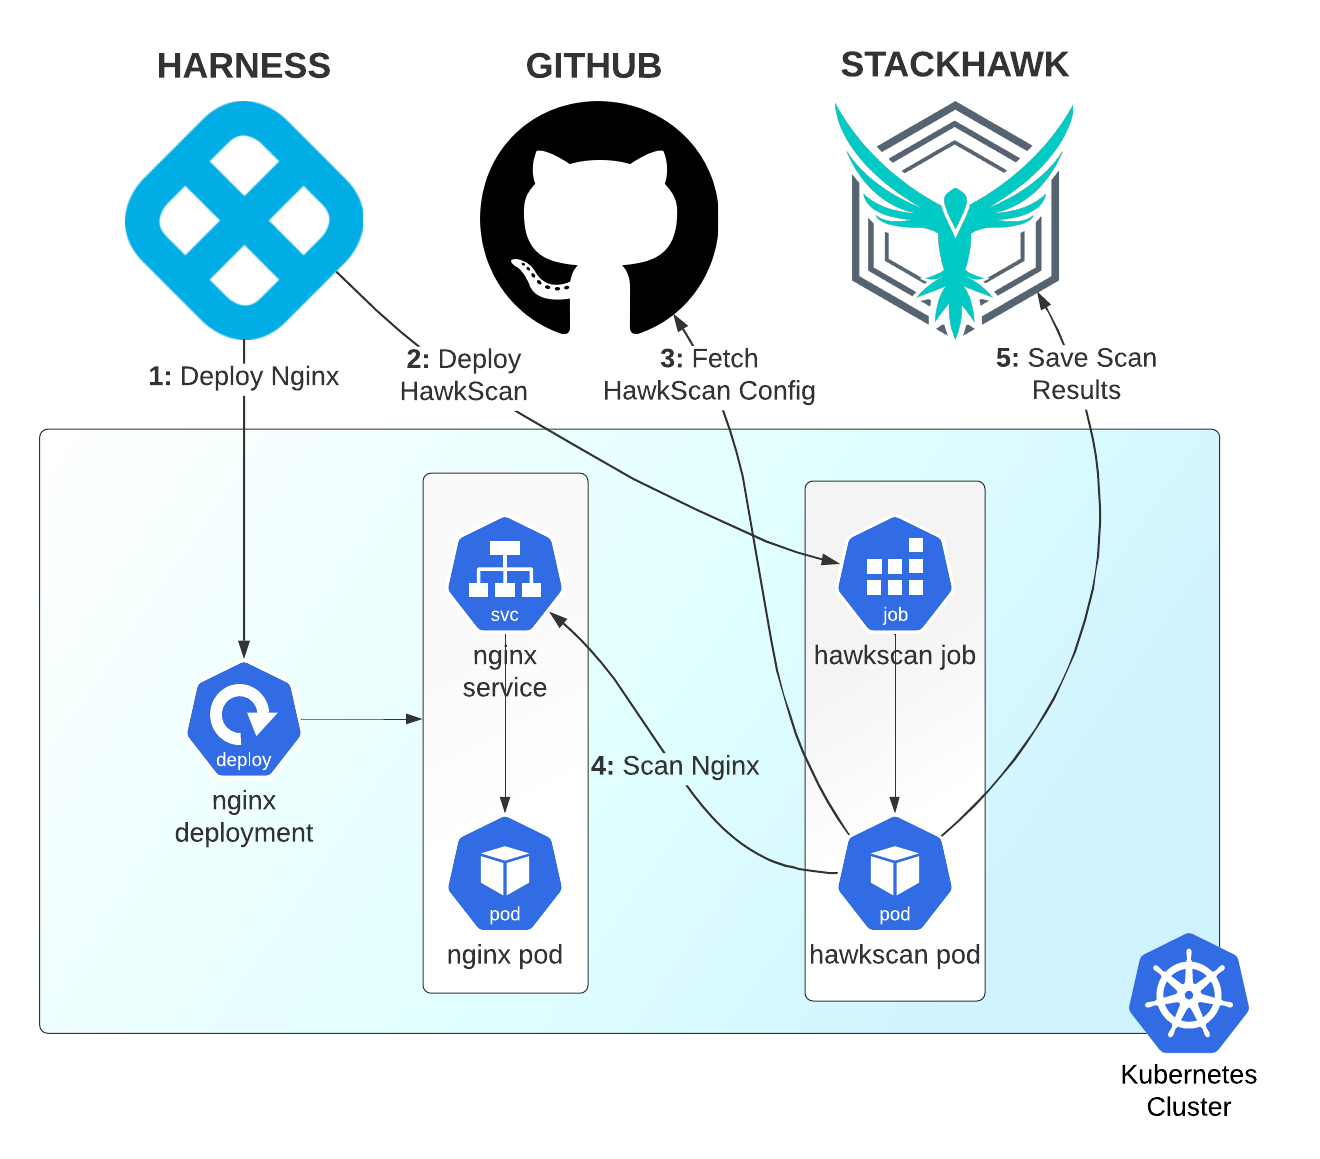
This guide implements a Harness pipeline that runs two workflows, called Nginx Workflow and HawkScan Workflow. The Nginx Workflow deploys Nginx as a test application, simulating a real-world deployment of a service to Kubernetes. And the HawkScan Workflow deploys HawkScan as a Kubernetes Job, configured to scan the Nginx test application at the deployed internal address, http://nginx-svc.develop.
Here are the high-level steps of this Harness pipeline:
- [Nginx Workflow] Harness deploys Nginx to the Kubernetes cluster.
- [HawkScan Workflow] Harness deploys a HawkScan job.
- [HawkScan Workflow] HawkScan fetches its configuration file from your application repo on GitHub.
- [HawkScan Workflow] HawkScan scans Nginx.
- [HawkScan Workflow] HawkScan reports its findings back to the StackHawk platform.
Nginx Workflow Summary
Here’s a summary of the Nginx Workflow and deployment environment.
- A Kubernetes Cluster with 8 GB of memory, running a Harness Delegate limited to 4 GB of memory.
- A Cluster Cloud Provider named Kubicle, which inherits all configurations from the Delegate installed on the Kubernetes cluster.
- A Harness Application named Nginx, which includes:
- An Environment called Development, with its Kubernetes Namespace set to
develop. - An Infrastructure Definition in the Nginx Development Environment for our Kubicle Cloud Deployment.
- A Harness Service called Nginx Service which creates a Kubernetes Deployment with the following components:
- A single Pod running an Nginx container from Docker Hub.
- A Kubernetes Service fronting the pod named
nginx-svclistening on port 80.
- A Workflow called Nginx Workflow to deploy our Nginx Service in the Development Environment.
- An Environment called Development, with its Kubernetes Namespace set to
The rest of this guide assumes that your environment is similar.
For exact details on how you can set up the Nginx Workflow on which the rest of this guide is based, read the Harness Nginx Workflow Setup guide.
Add a HawkScan Workflow
Now let’s create a HawkScan Workflow to scan our Harness Application. Here is a summary of the steps we’ll take:
- Add a HawkScan configuration file to your application Git repository.
- Add your StackHawk API key and GitHub PAT to your Harness Secrets store.
- Create a new Service in the Nginx app called HawkScan Job to run HawkScan as a Kubernetes Job.
- Create a new Workflow called HawkScan Workflow to deploy the HawkScan job and watch the HawkScan container logs.
Add a HawkScan Configuration to your Application GitHub Repository
By default, HawkScan looks for a configuration file called stackhawk.yml at the root of your application’s source repository. Create a minimalist configuration like so:
app:
  applicationId: xxXXXXXX-xXXX-xxXX-XXxX-xXXxxXXXXxXX
  host: http://nginx-svc.develop
  env: Development
Set app.applicationId to the StackHawk application ID for your application. You can find it in StackHawk Applications. And set app.host to http://nginx-svc.develop. Kubernetes DNS will have automatically registered this name to the nginx-svc service in the develop namespace. Commit your change and push it to GitHub so that it is available to be retrieved by HawkScan at run time.
Store your Secrets
Your HawkScan Service will need access to 2 secret bits of information - your StackHawk API key, and your GitHub Personal Access Token (PAT). The StackHawk API key is used by HawkScan to save scan results back to the StackHawk platform. And the GitHub PAT is used by HawkScan to clone your project’s git repo to gain access to your HawkScan configuration file.
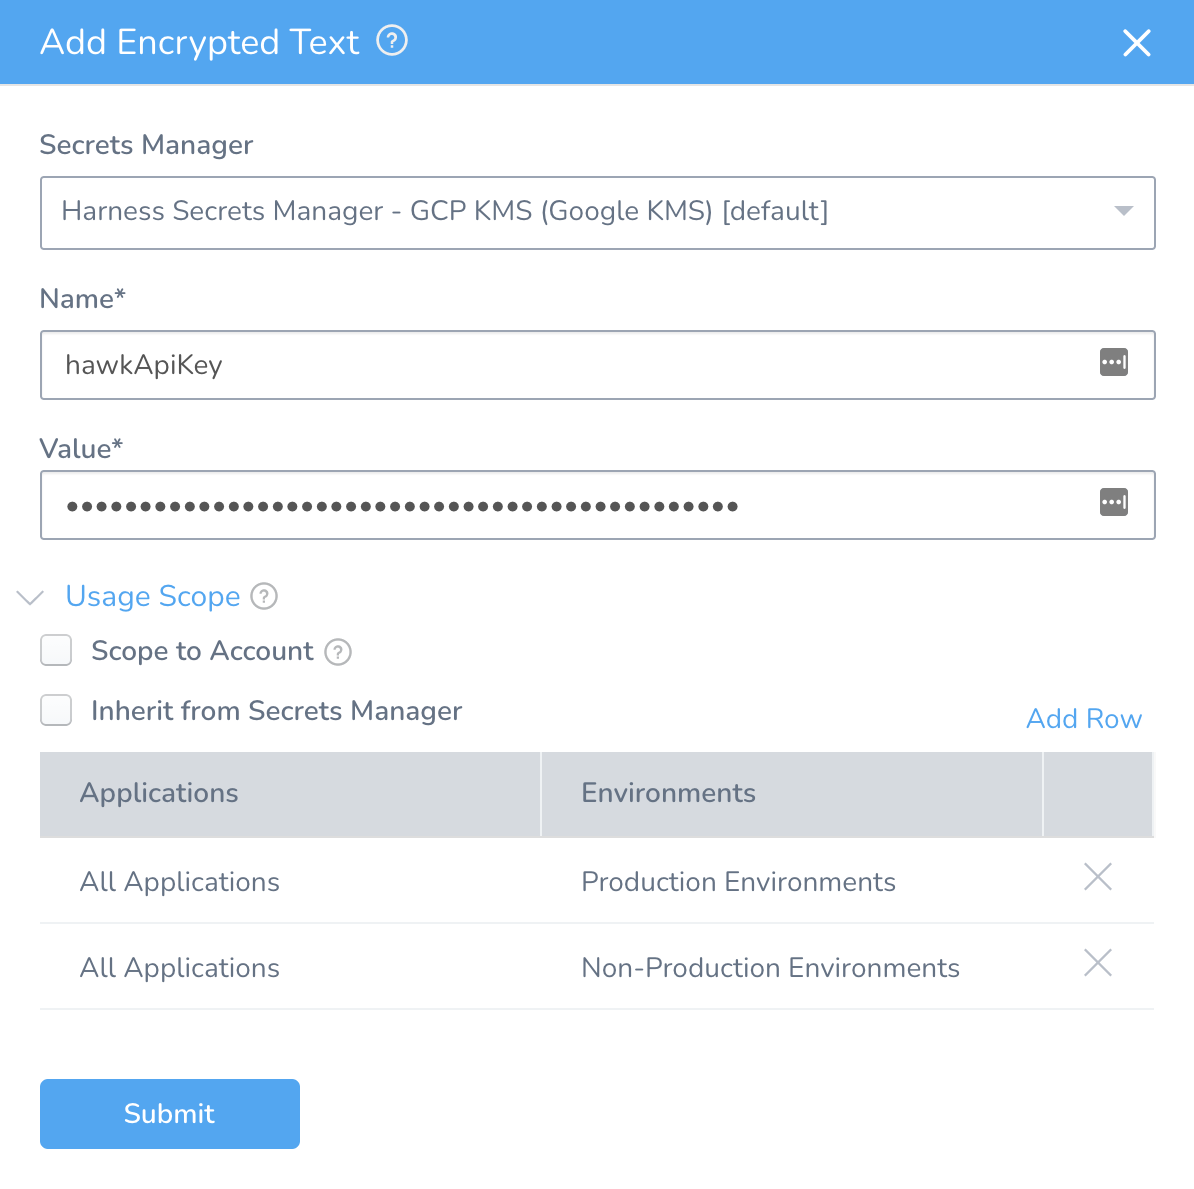
In the Harness console, click on Security in the left pane, and select Secrets Management. Then click Add Encrypted Text to add each secret.
Use the name hawkApiKey for your StackHawk API key, like so.
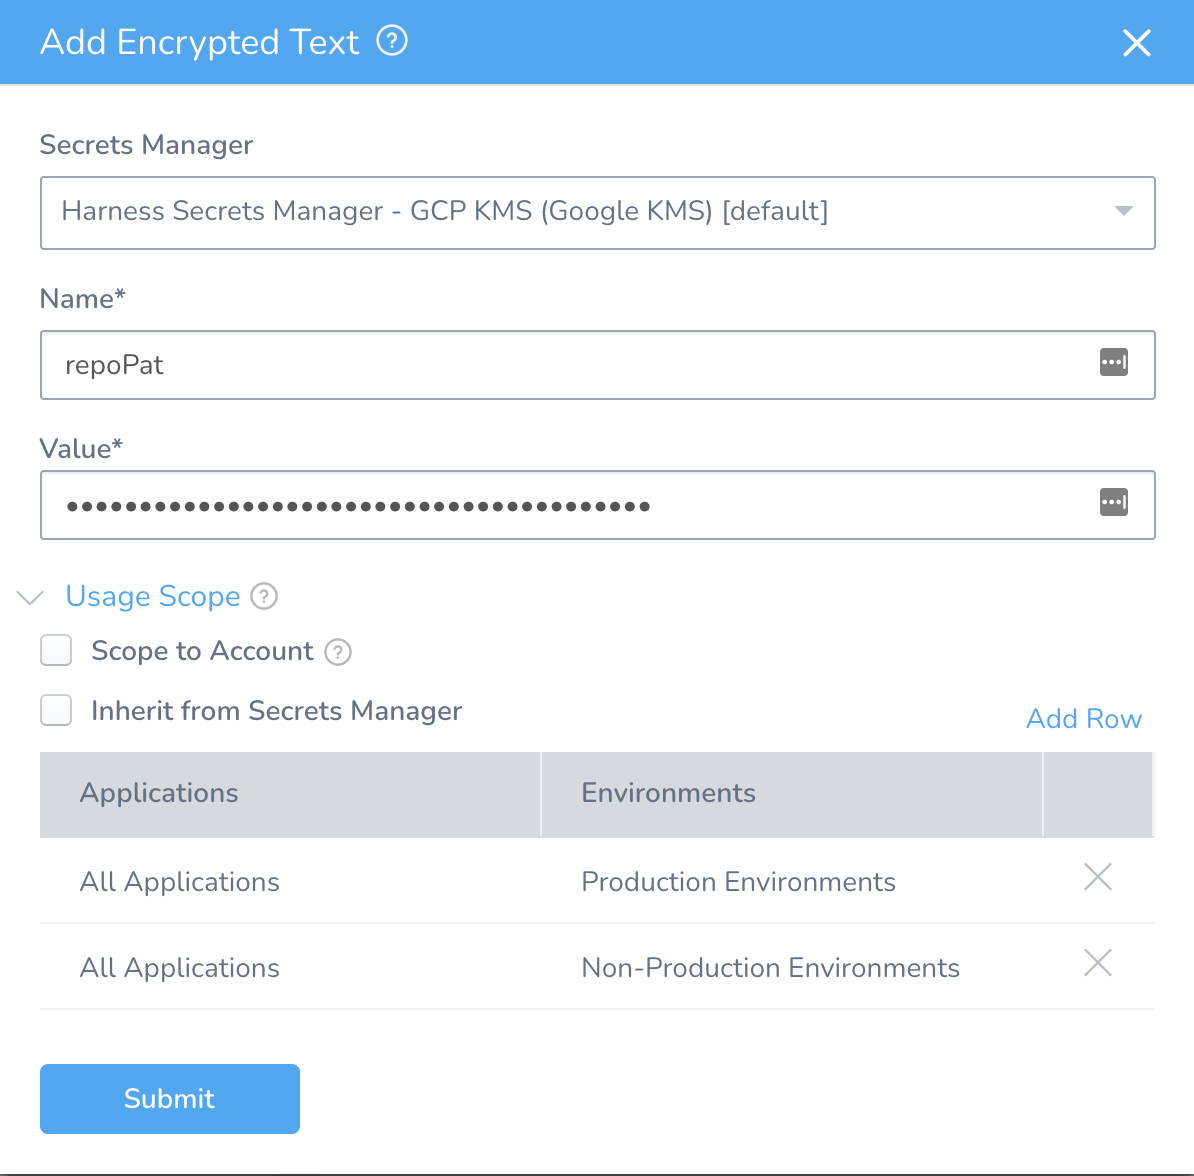
Use the name repoPat for your GitHub PAT secret, like so.
Add the HawkScan Service
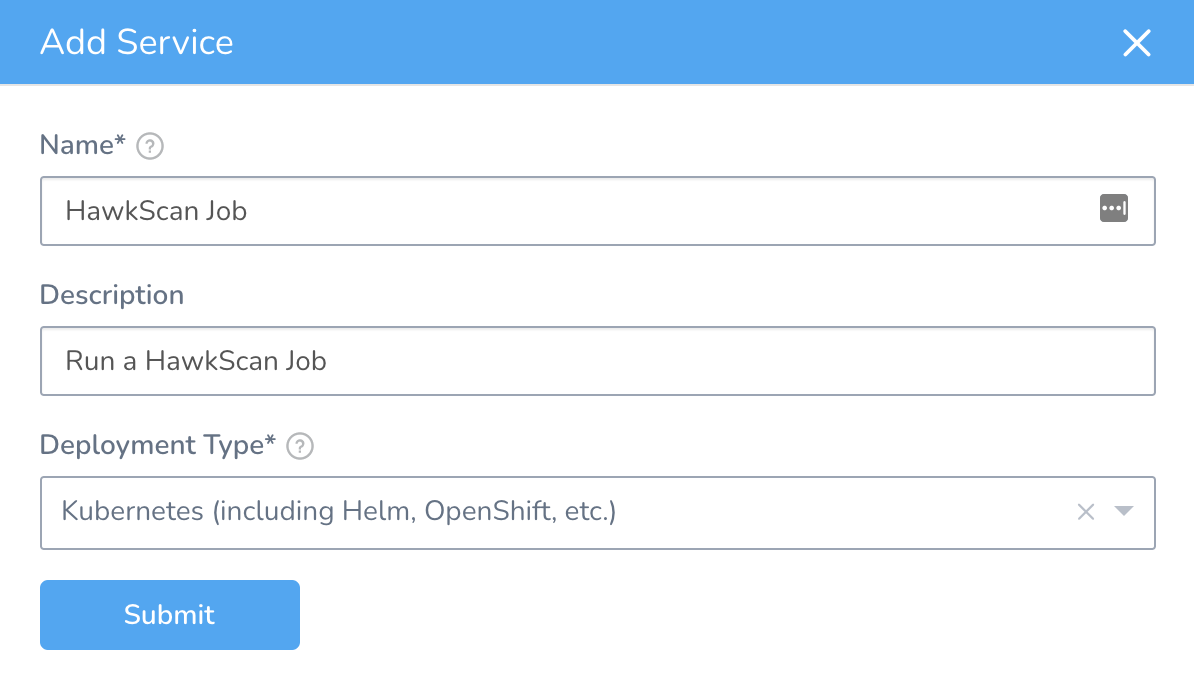
In Harness, go to Setup → Nginx → Services, and click Add Service. Name the Service “HawkScan Job.”
In the Service Overview, click Add Artifact Source → Docker Registry
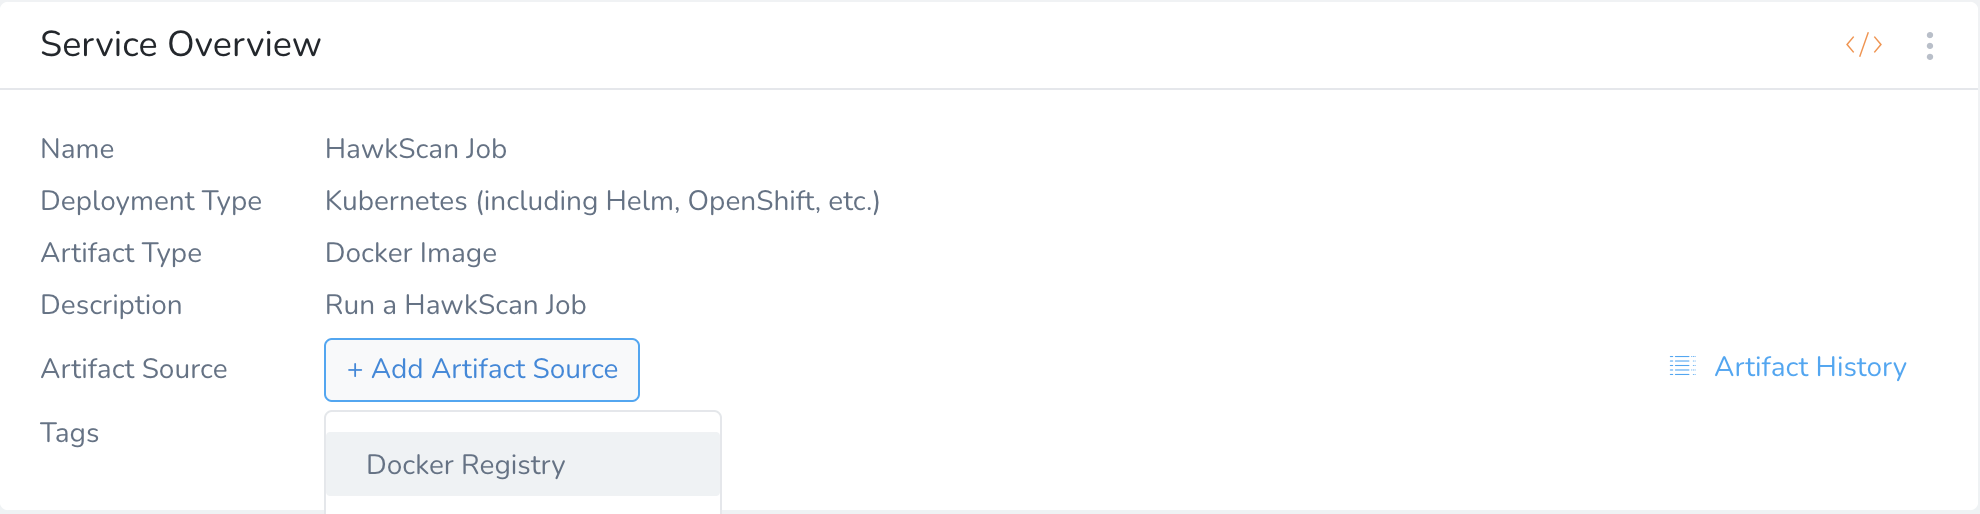
For your Source Server, select Harness Docker Hub. For Docker Image Name, enter stackhawk/hawkscan. Hit Submit to create the artifact source.

In the Service Overview, under Manifests, edit the values.yml file to replace the entire contents with the following:
name: hawkscan
githubOrg: <your github org>
githubRepo: <your application repo name>
image: ${artifact.metadata.image}
namespace: ${infra.kubernetes.namespace}
hawkApiKey: ${serviceVariable.hawkApiKey}
repoPat: ${serviceVariable.repoPat}
Be sure to replace the values for githubRepo and githubOrg with the correct settings for your repo. For instance, if your repo is at https://github.com/kaakaww/test-app, then you should set githubOrg=kaakaww, and githubRepo=test-app.
Again under Manifests, remove all of the default template files in the templates directory, including deployment.yaml, namespace.yaml, and service.yaml. Then, add a new template file, templates/hawkscan.yaml, and populate it with the following content:
apiVersion: batch/v1
kind: Job
metadata:
  name: {{.Values.name}}
spec:
  backoffLimit: 0
  template:
    spec:
      containers:
        - command:
            - /bin/bash
            - '-c'
            - |
                git clone $REPO_URL $REPO_DIR
                cd $REPO_DIR
                shawk
          env:
            - name: API_KEY
              value: {{.Values.hawkApiKey}}
            - name: REPO_DIR
              value: /home/steve/workdir
            - name: REPO_URL
              value: https://{{.Values.repoPat}}@github.com/{{.Values.githubOrg}}/{{.Values.githubRepo}}.git
          image: {{.Values.image}}
          name: {{.Values.name}}
          tty: true
      restartPolicy: Never
  ttlSecondsAfterFinished: 600
In the Service Overview, go to Configuration → Config Variables, and add the following variables:
hawkApiKeyof type Encrypted Text and valuehawkApiKey(from the Secrets Store).repoPatof type Encrypted Text and valuerepoPat(from the Secrets Store).
The templates/hawkscan.yml file, once rendered, runs the HawkScan container as a Kubernetes Job. The spec.template.spec.containers.command statement defines a script that will run when the HawkScan container comes up that clones your repo to make your stackhawk.yml configuration file available to the scanner. Then it runs shawk, which launches the scanner executable.
Add a HawkScan Workflow
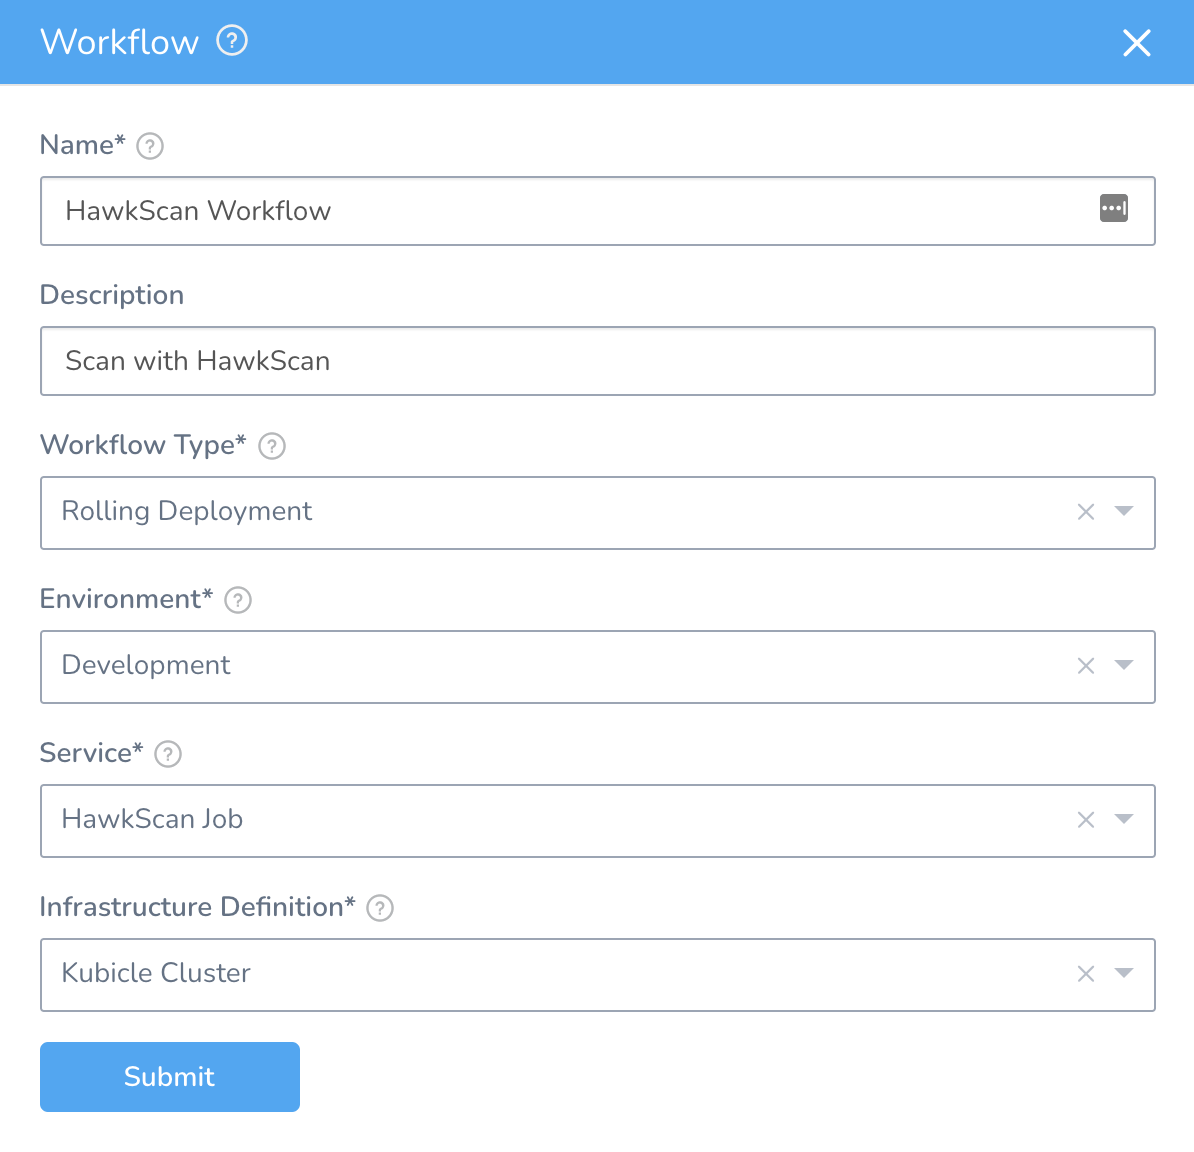
In Harness, go to Setup → Nginx → Workflows, and click Add Workflow.
- Set Workflow Type to Rolling Deployment.
- Set Environment to Development.
- Set Service to HawkScan Job.
- Set Infrastructure Definition to Kubicle Cluster.
-
Hit Submit to create the workflow.
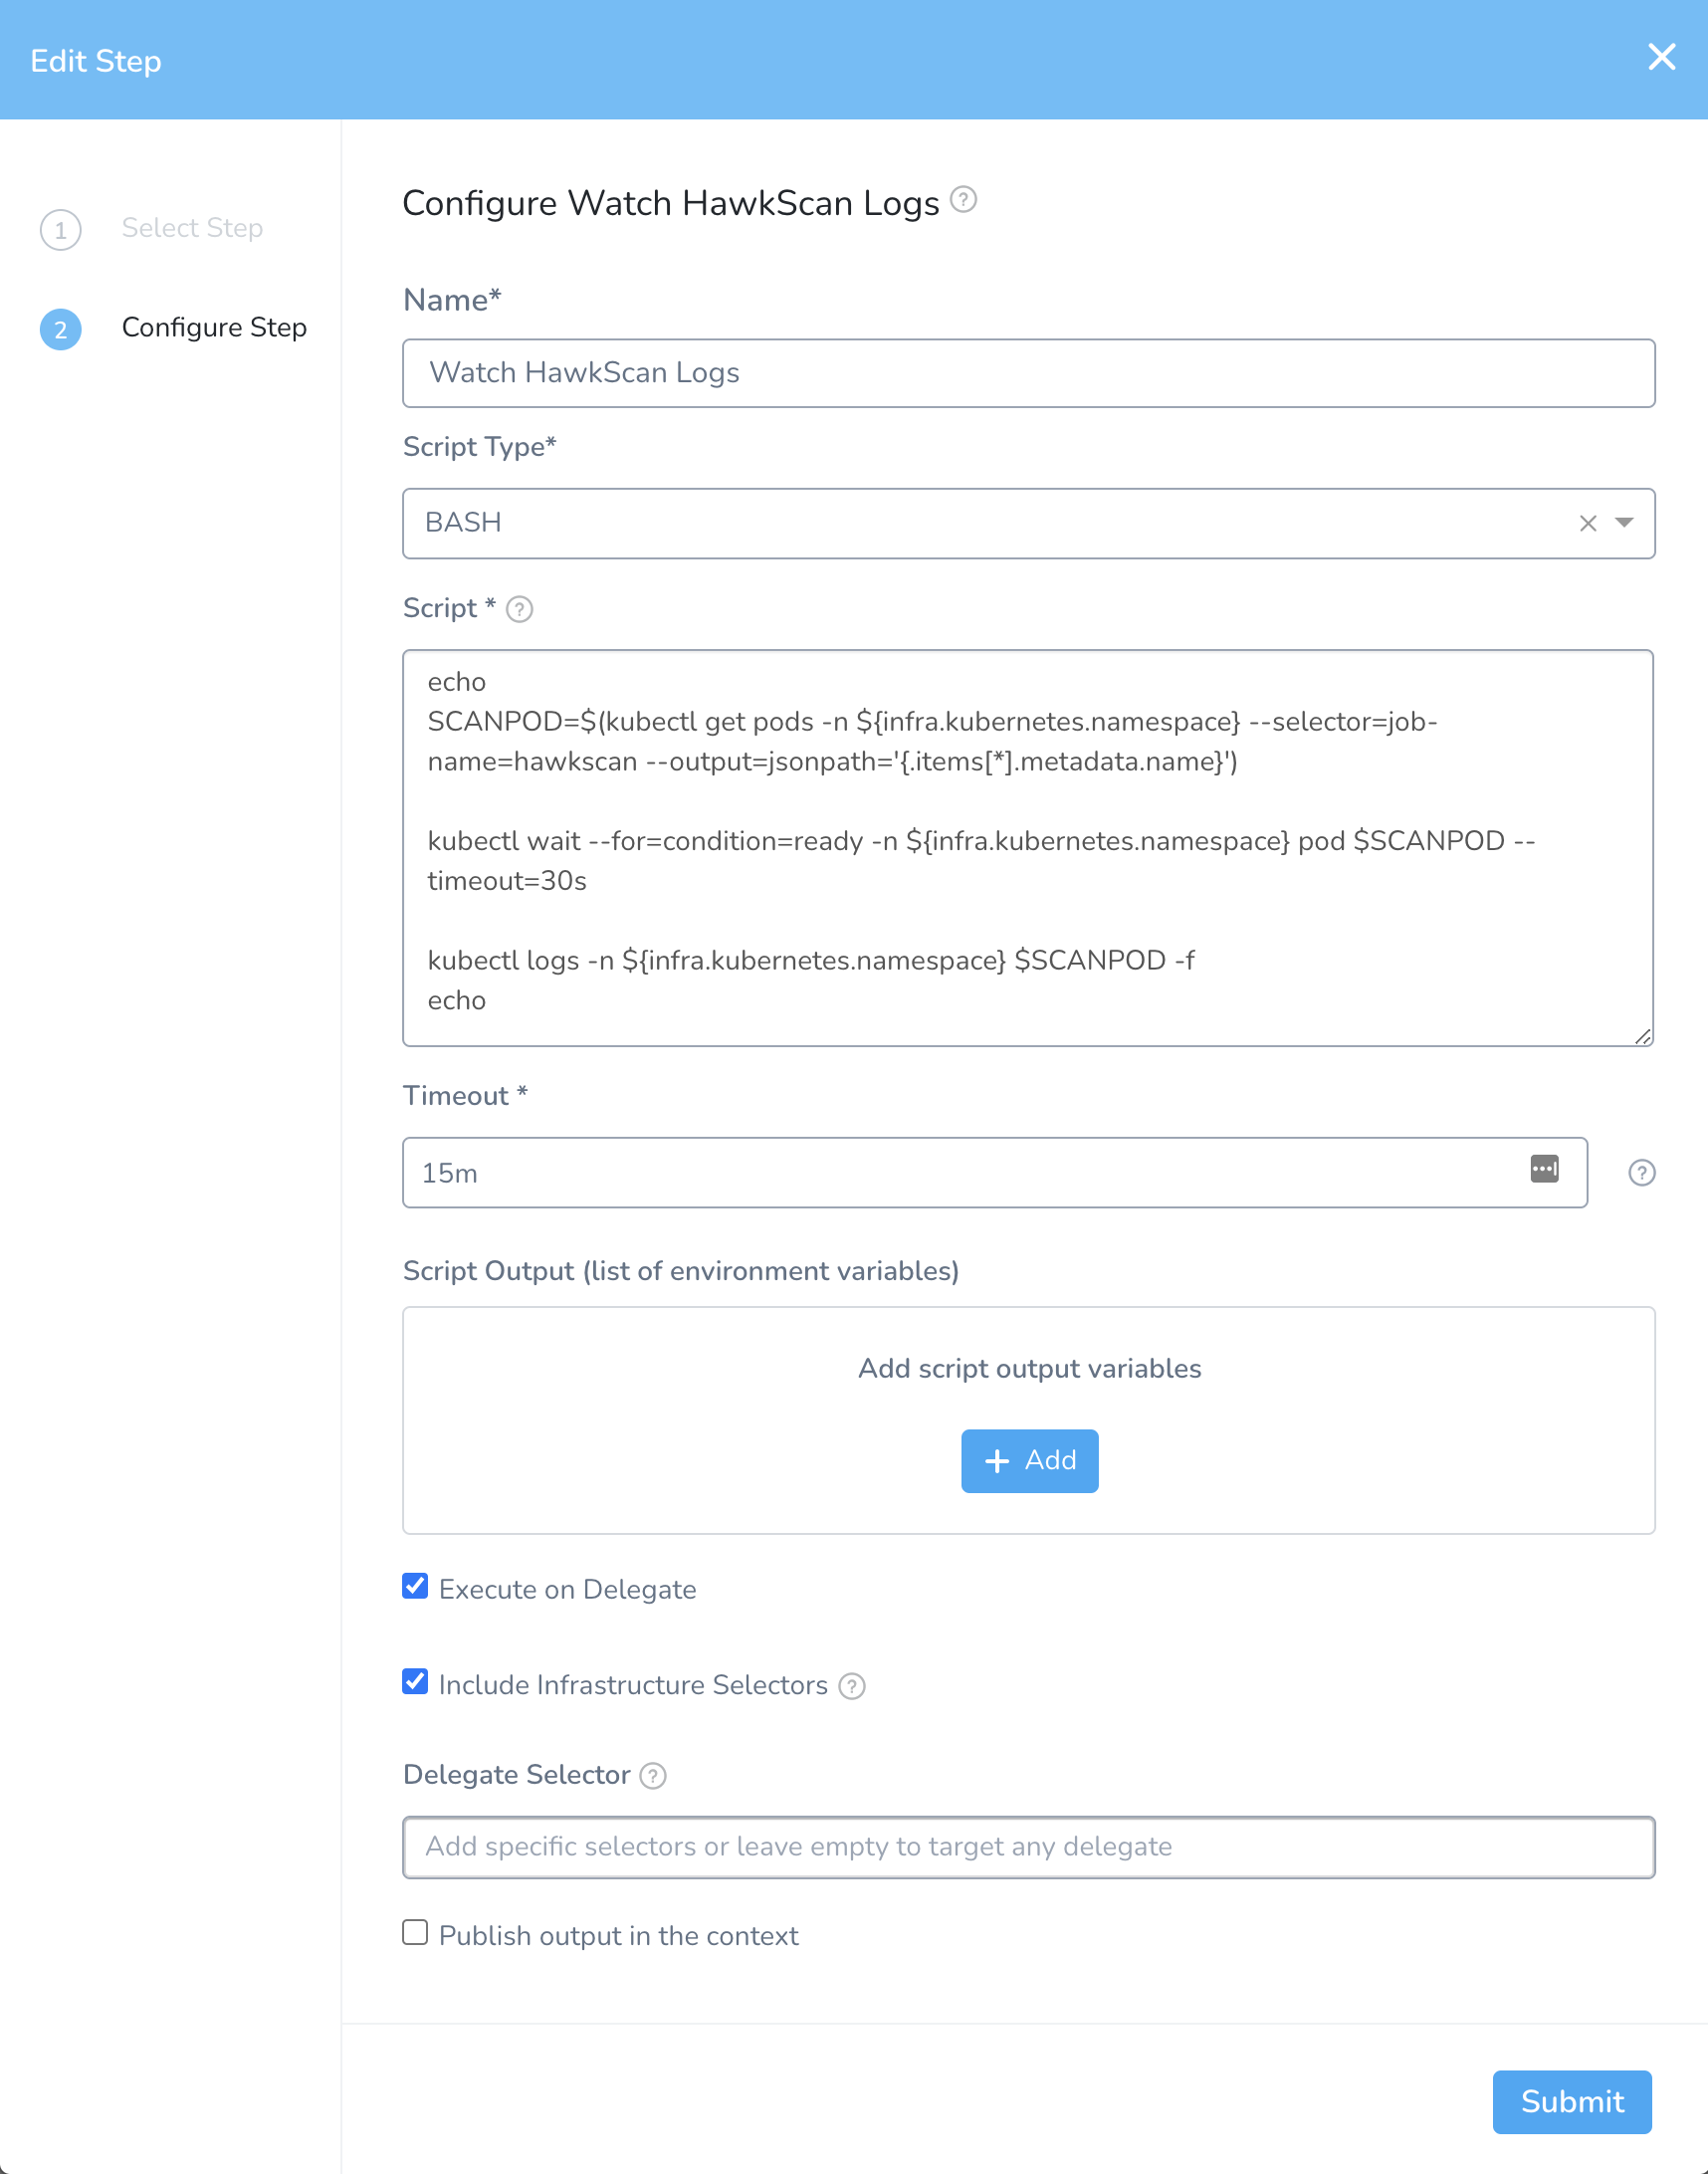
In the HawkScan Workflow, add a Utility: Shell Script step to the Verify section of the Rolling Deployment.
- Name the step “Watch HawkScan Logs.”
- Set the Script Type to BASH.
- In the “Script” field, add the script:
echo
SCANPOD=$(kubectl get pods -n ${infra.kubernetes.namespace} --selector=job-name=hawkscan --output=jsonpath='{.items[*].metadata.name}')
kubectl wait --for=condition=ready -n ${infra.kubernetes.namespace} pod $SCANPOD --timeout=300s
kubectl logs -n ${infra.kubernetes.namespace} $SCANPOD -f
echo
- Set the Timeout to 15m, which should be sufficient for this scan.
-
Hit Submit to create the Shell Script Step.
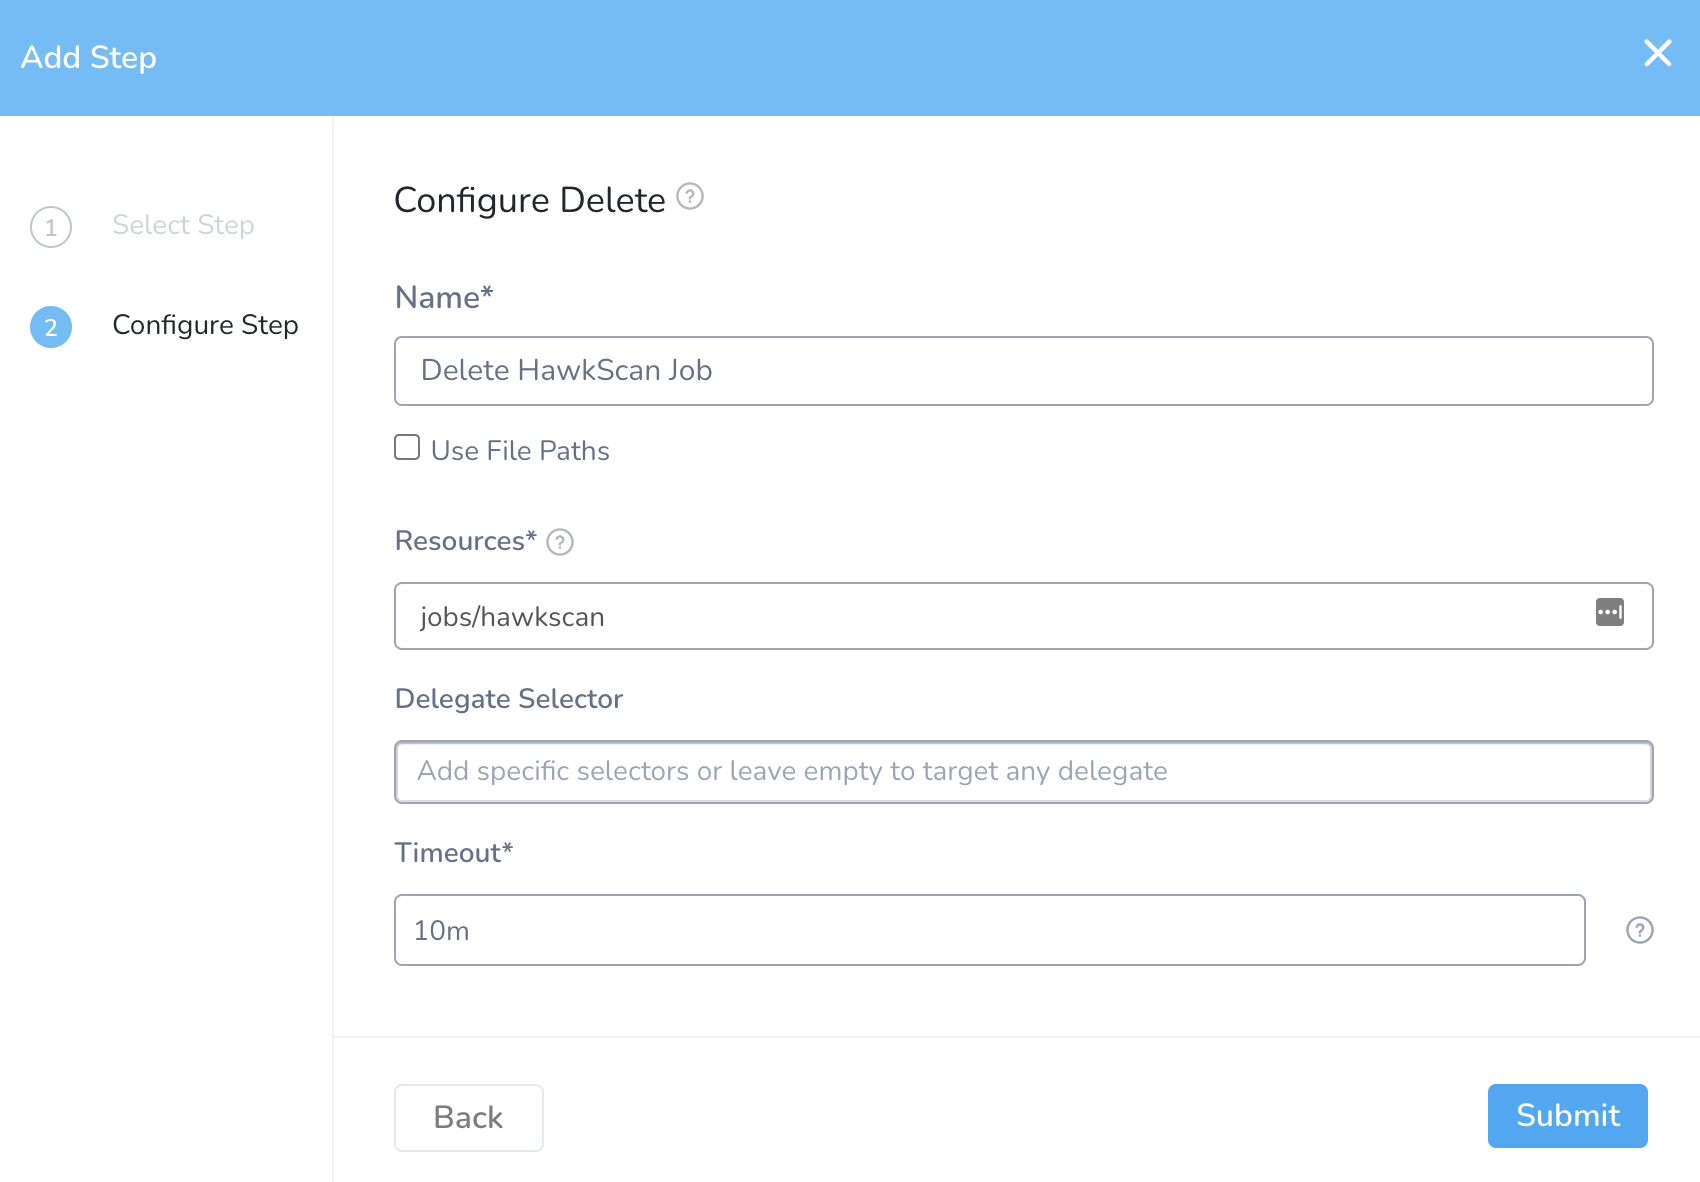
In the HawkScan Workflow, add a Kubernetes: Delete step in the Wrap Up section of the Rolling Deployment
- Name the step “Delete HawkScan Job.”
- Under Resources, specify
jobs/hawkscan. - Leave the timeout at 10 minutes.
-
Hit Submit to create the step.
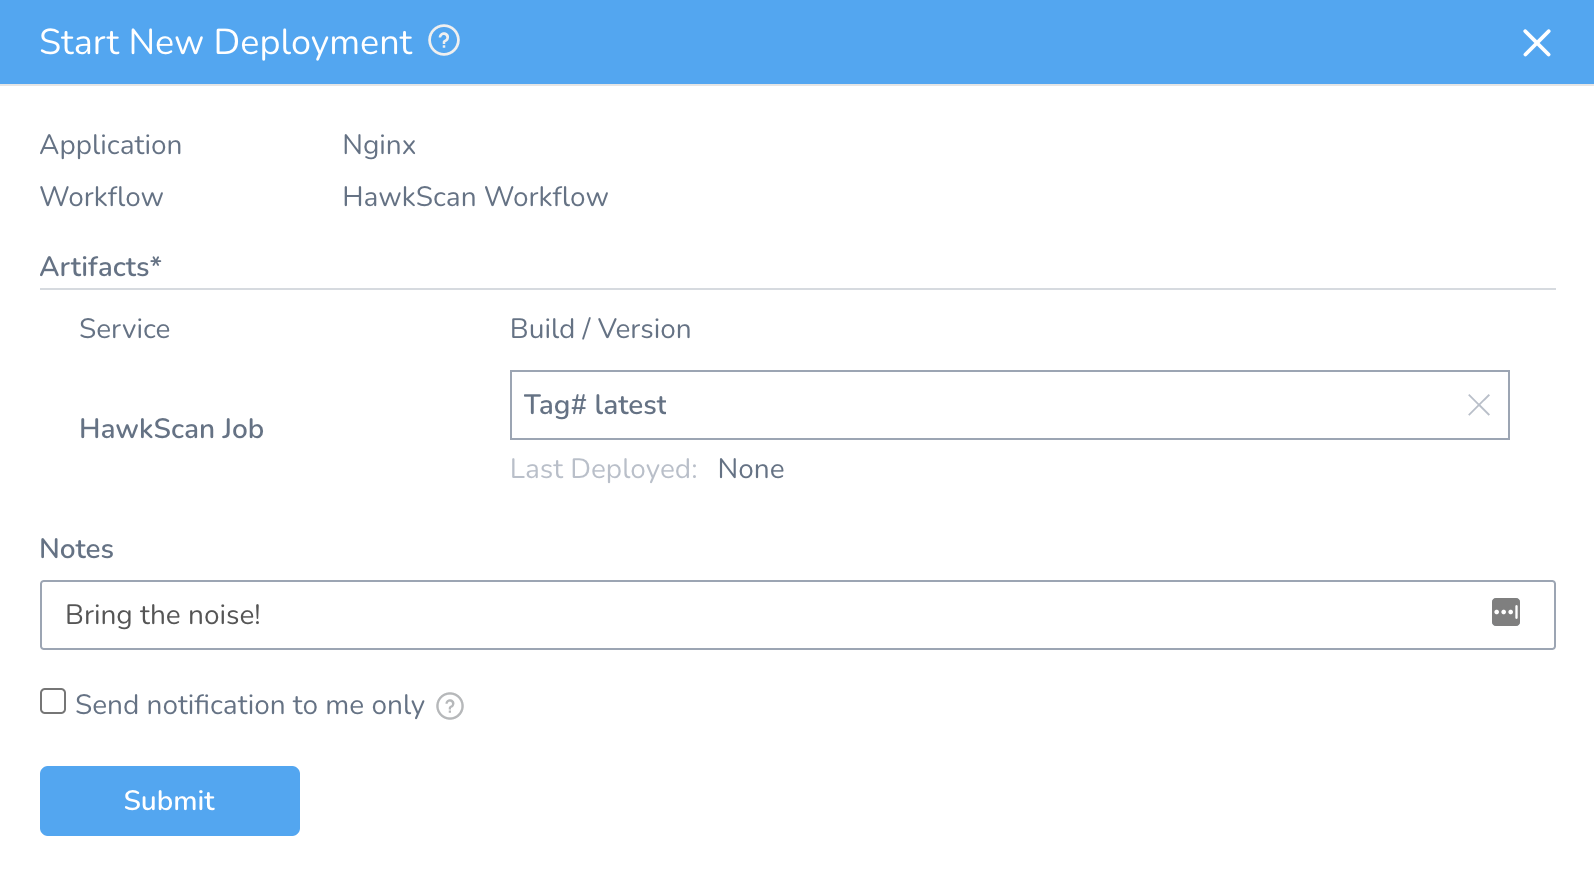
Deploy the HawkScan Workflow
With all the steps in place, hit the Deploy button on the HawkScan Workflow and you should see the scan kick off.
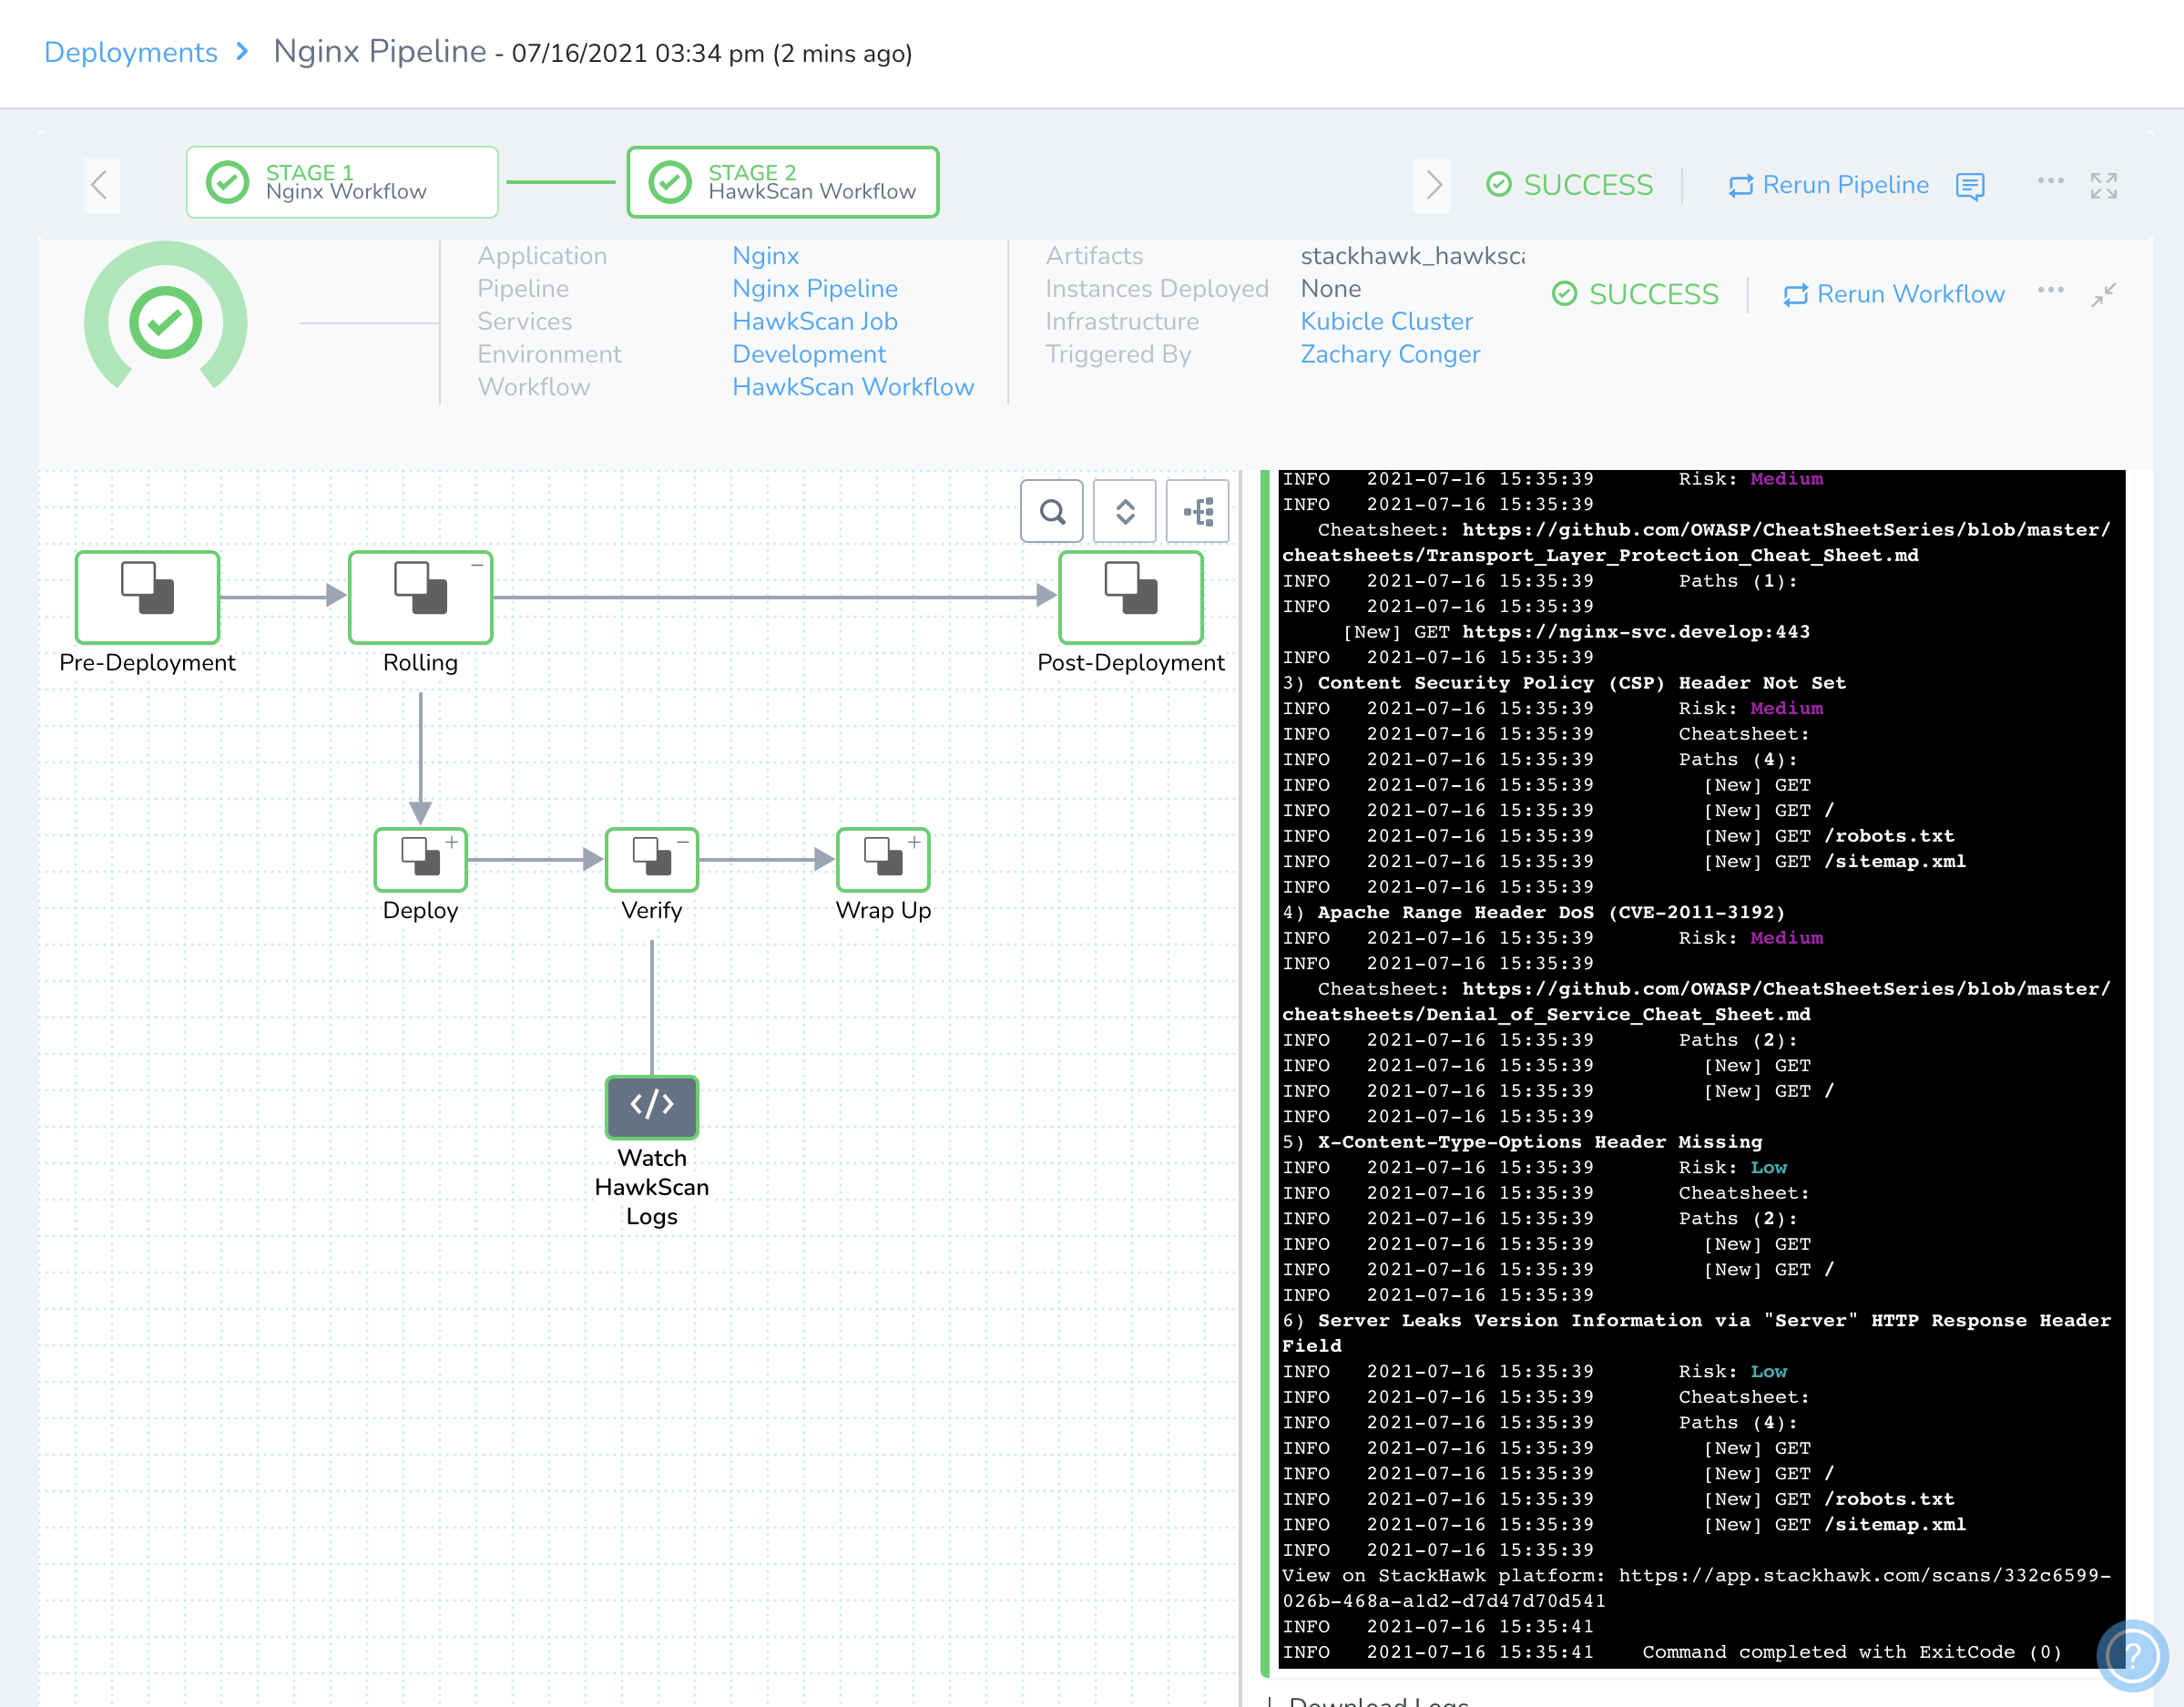
In the deployment live report, you can watch the scan progress from the Watch HawkScan Logs step, as seen below.
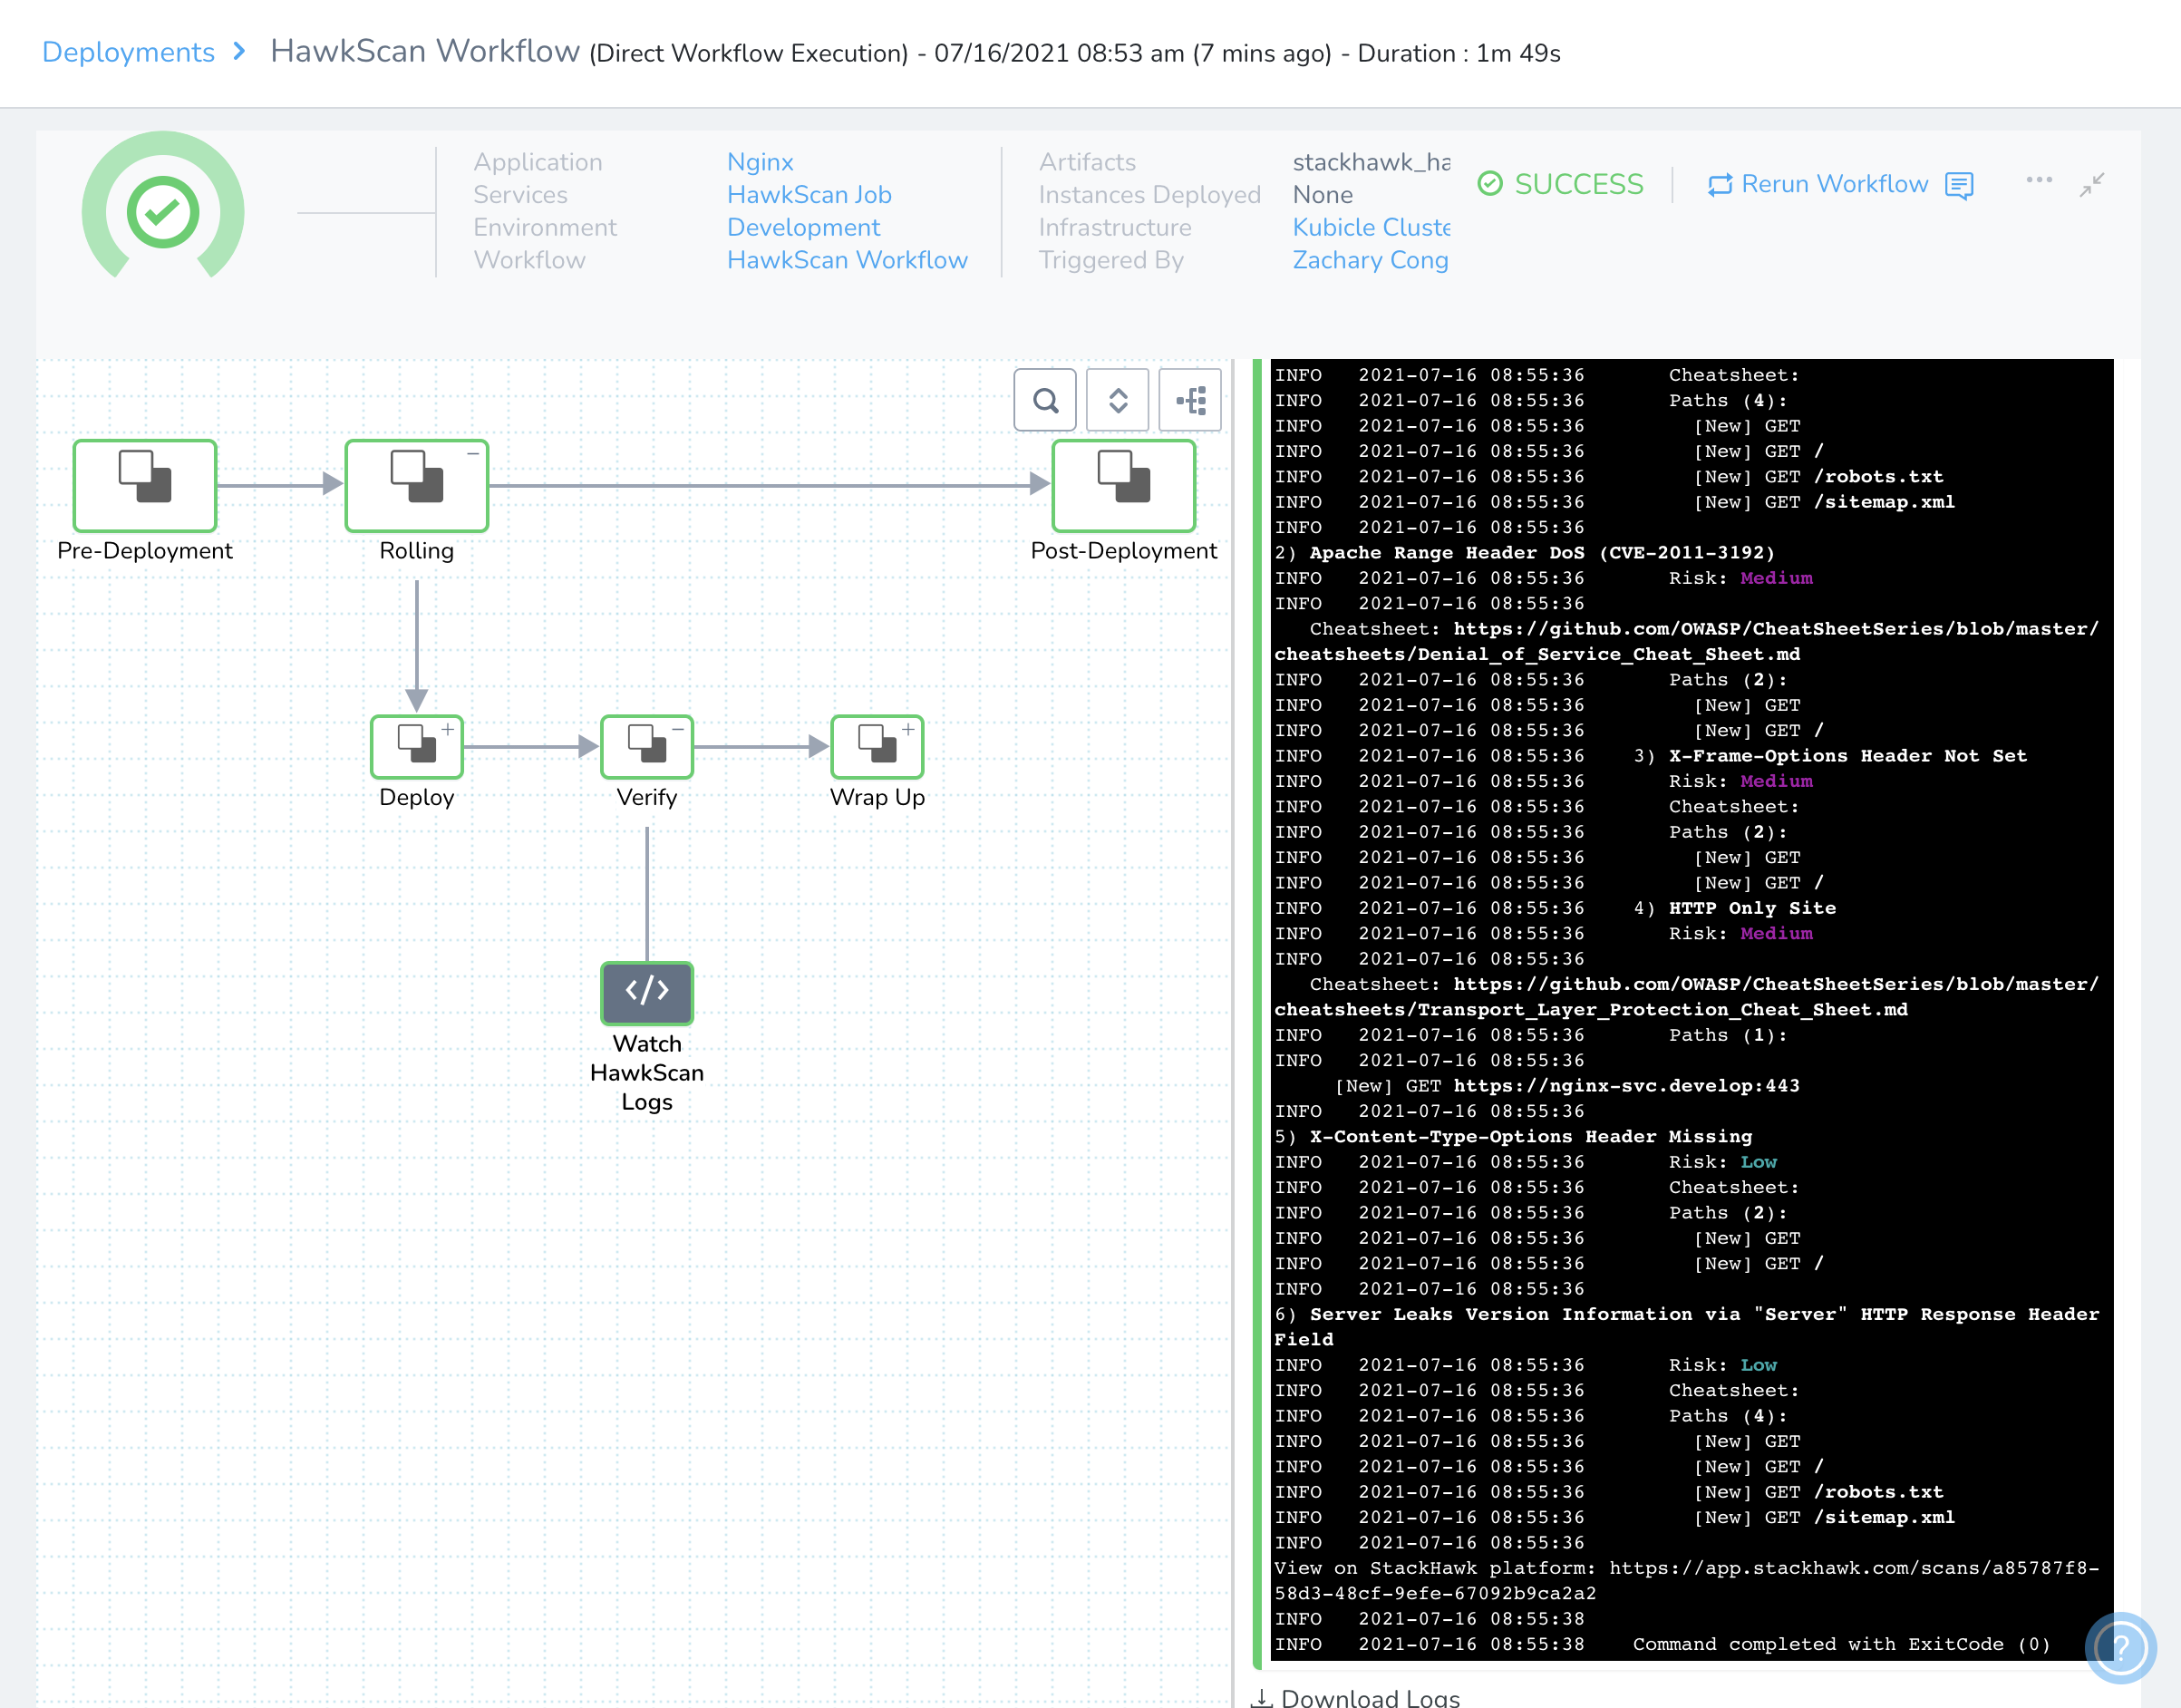
Once the scan begins, you can also watch progress and examine findings from the StackHawk Scans console.
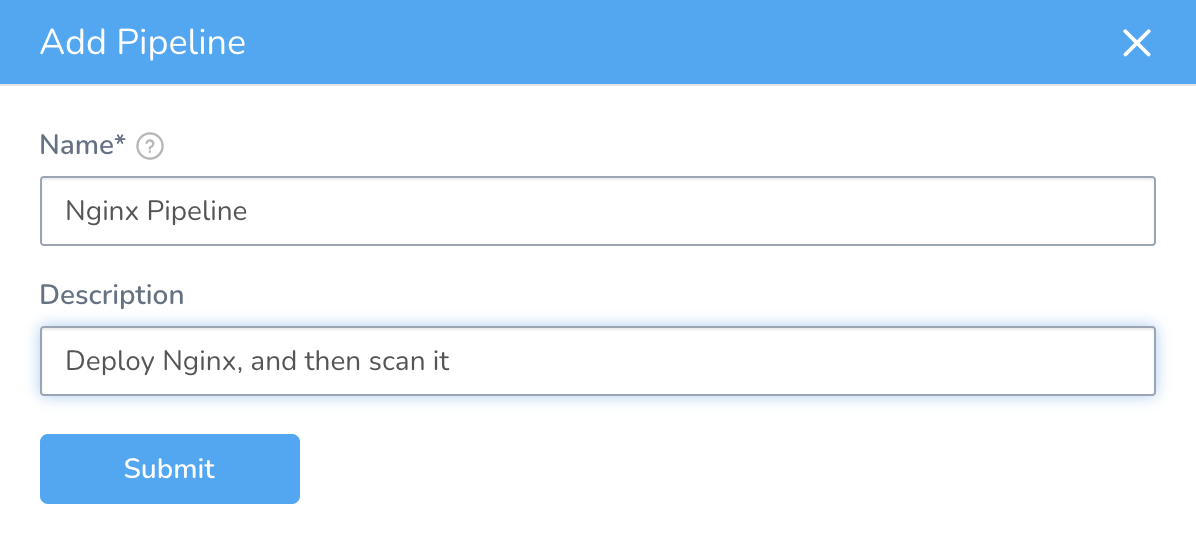
Create an Nginx Deploy and Scan Pipeline
In Harness, go to Setup → Nginx → Pipelines, and click Add Pipeline. Name it “Nginx Pipeline.” Hit Submit to create the pipeline.
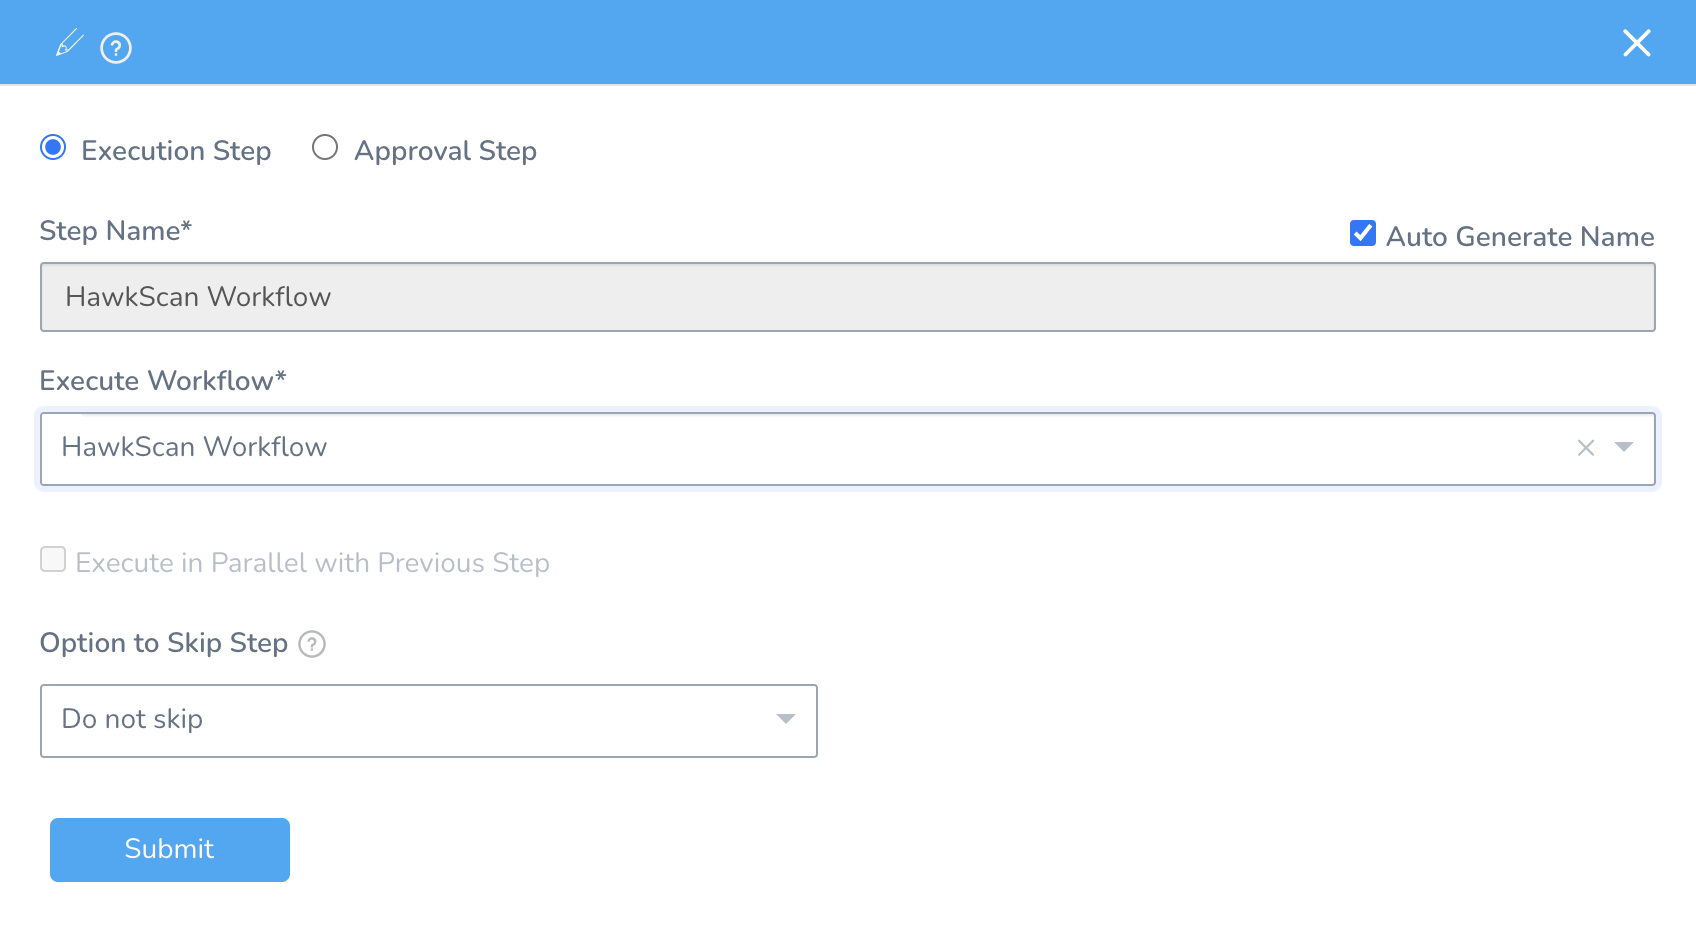
Click the + sign to add a Pipeline Stage. Add the Nginx Workflow as an Execution Step.
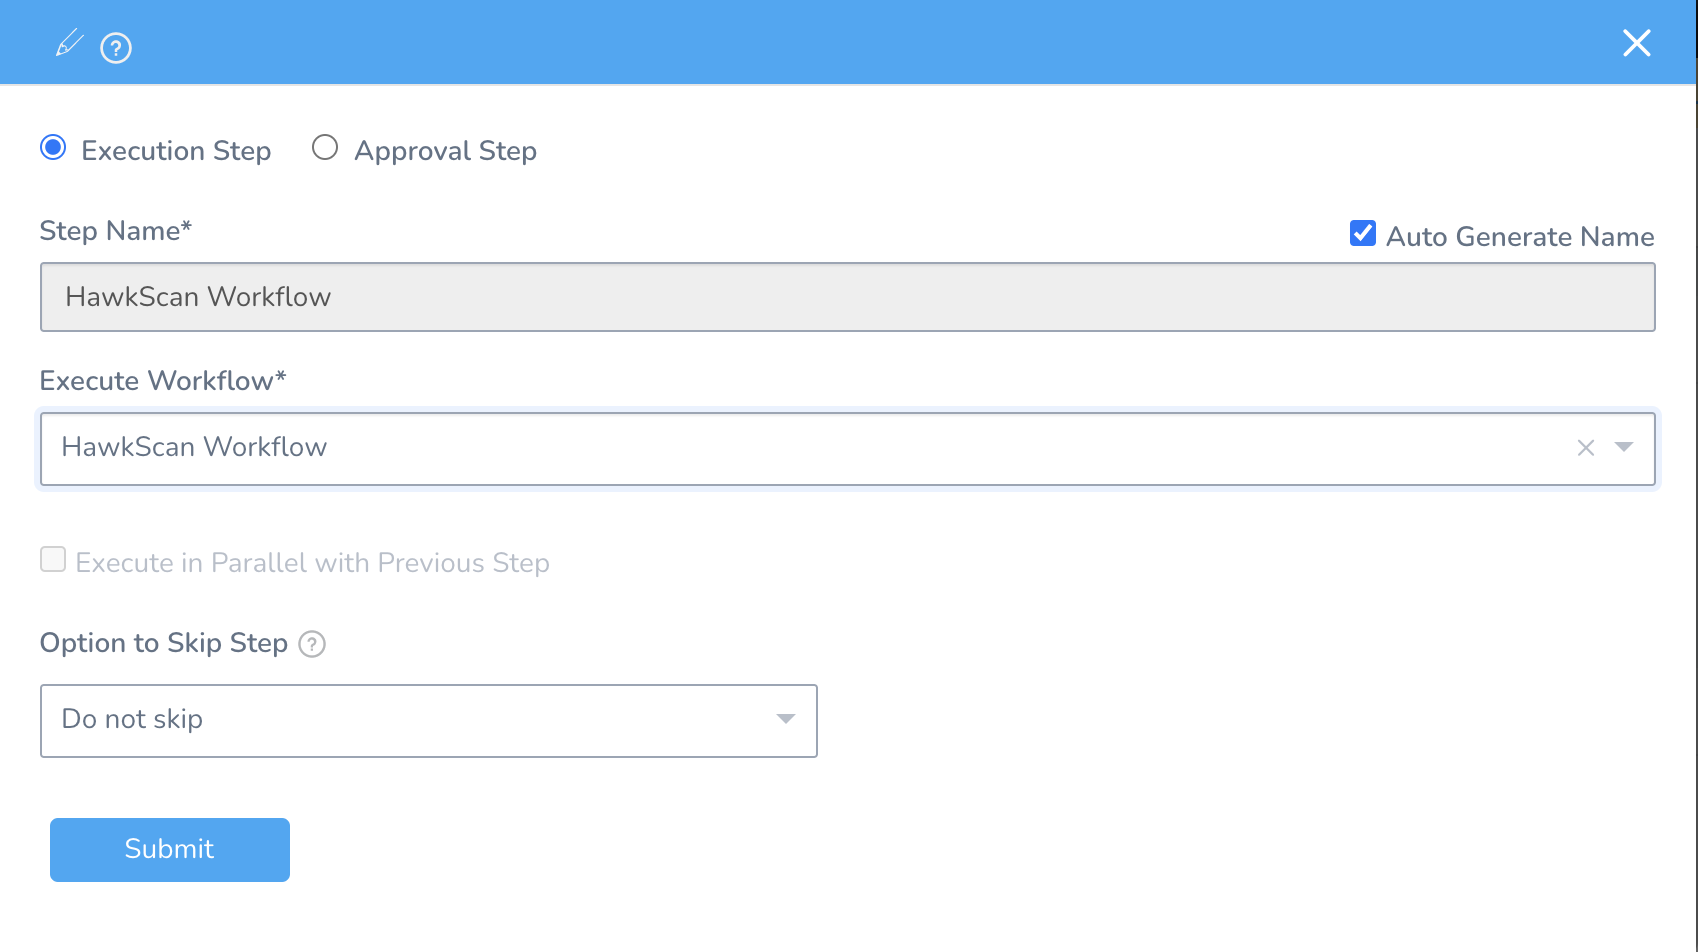
Then add the HawkScan Workflow as a second Pipeline Stage.
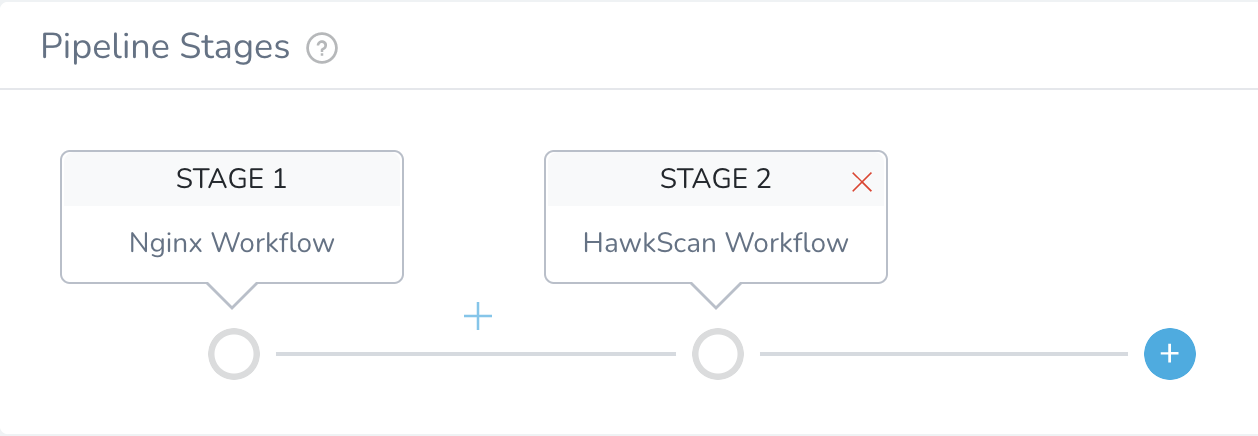
Your completed pipeline should look like this.
Finally, deploy your pipeline…
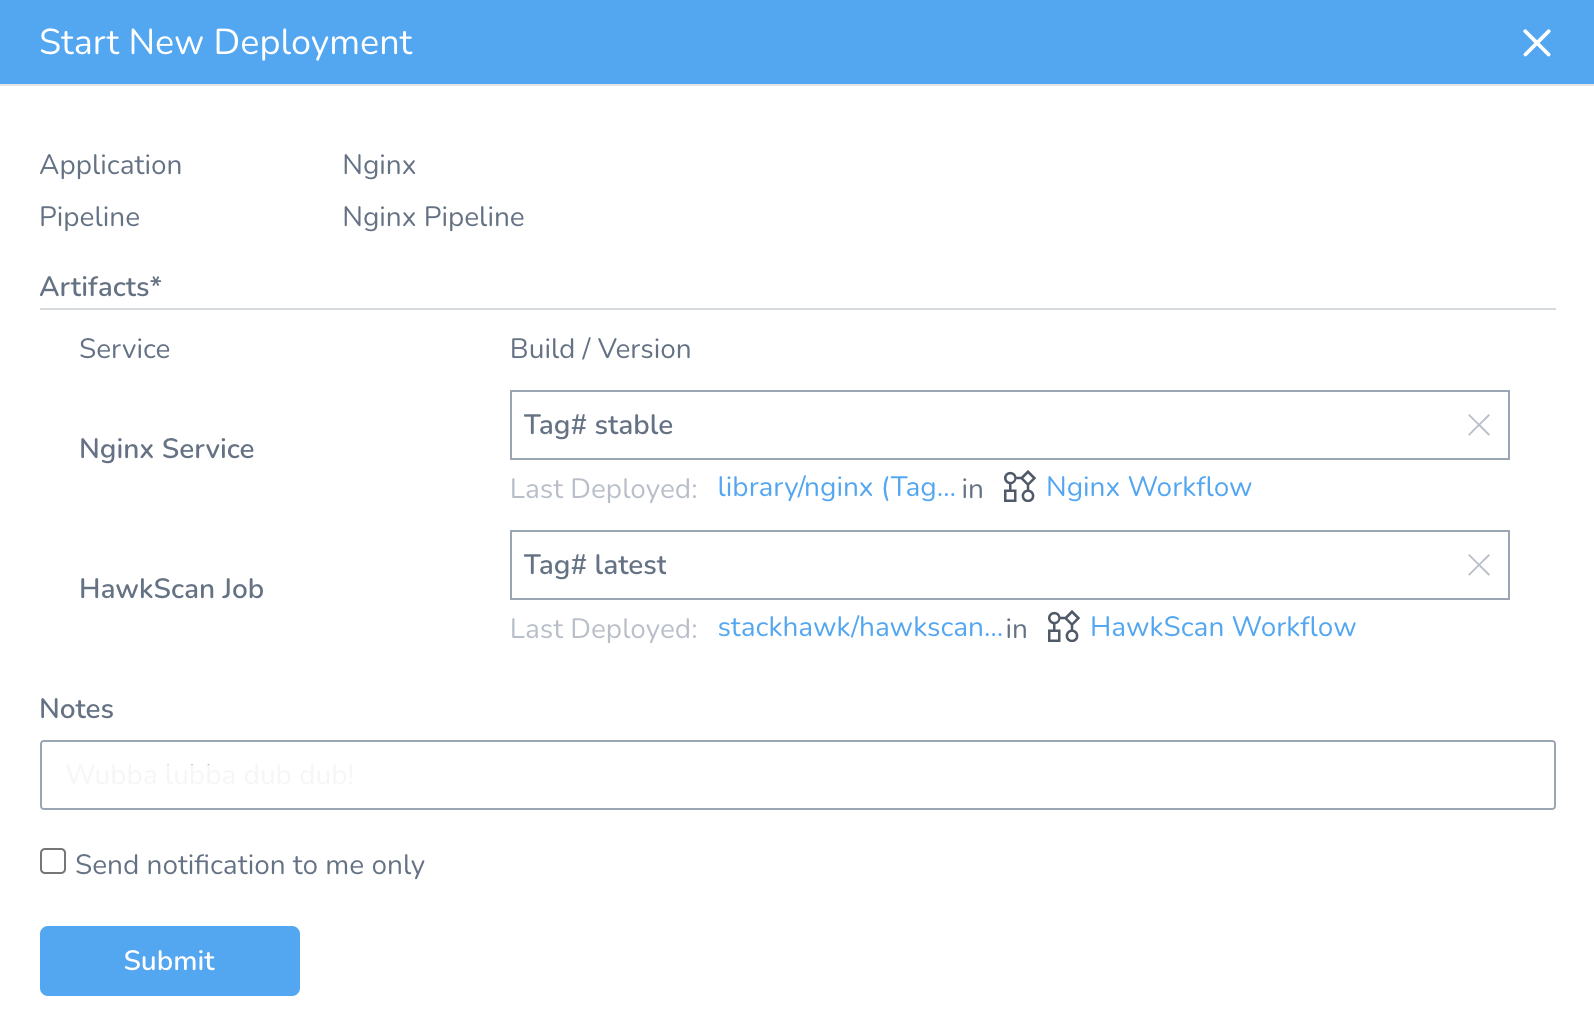
…and you should see Nginx get deployed and then scanned in the Development Environment.
Now you can head over to the StackHawk platform and check your scan results.
Next Steps
Now that you have the basic tools in place for deploying HawkScan with a simple test application, it’s time to bring it to your own project! Try adding a HawkScan workflow to your own application deployment. Tune it up for your OpenAPI or GraphQL app. Configure authenticated scanning, so HawkScan can test your app’s protected sections.