Harness Nginx Workflow Setup

This guide provides the exact details on how you can set up the Nginx Workflow on which our HawkScan Harness Integration Guide is based.
Create a Kubernetes Application Deployment in Harness
Before we begin to deploy HawkScan, we need an application deployed to Kubernetes for it to scan. That’s what we will work on in this guide.
We begin by creating our own Kubernetes cluster. Then we add it to Harness as a Kubernetes Cluster Cloud Provider. And finally we create a Harness Workflow to deploy Nginx as a Kubernetes Deployment. In a bit more detail, here’s the plan:
- Stand up a Kubernetes cluster using Docker Desktop.
- Add a Harness Delegate to our cluster, so Harness can communicate with it.
- Create a Kubernetes Cluster Cloud Provider, inheriting all settings from the Delegate above.
- Create a Harness Application named “Nginx.”
- Create an Environment for Nginx called “Development,” with its Kubernetes Namespace set to “develop.”
- Create an Infrastructure Definition in the Nginx Development Environment for our Kubernetes Cluster Cloud Deployment.
- Create an Nginx Service to define how to run our Nginx test app in our Kubernetes cluster.
- Create a Workflow called “Nginx Workflow” to deploy our Nginx Service in the Development Environment.
Create a Kubernetes Cluster
We used the latest version of Docker Desktop for Mac, and enabled Kubernetes within it. The process is similar for Docker Desktop for Windows. Once you have installed Docker Desktop:
- Configure Docker Desktop to use 8GB of RAM (Preferences → Resources → Advanced → Memory).
- Enable Kubernetes (Preferences → Kubernetes → Enable Kubernetes).
If you have a Linux host, you can follow this guide using K3s. When you install it, you should disable the Traefik ingress controller so it does not prevent your Nginx test app from coming up and listening on port 80.
Create a Harness delegate for your Kubernetes cluster
In Harness, go to Setup → Harness Delegates → Install Delegate. For Download Type, select Kubernetes YAML, and name your delegate “kubicle.”
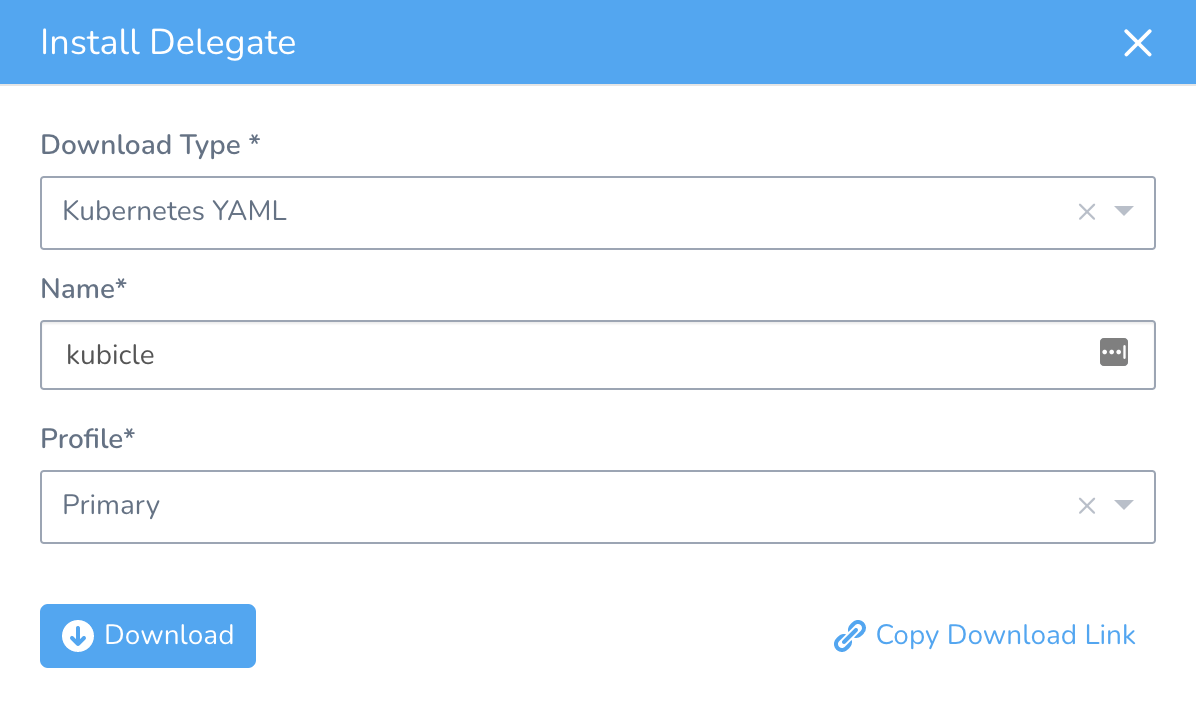
Download the Delegate Kubernetes YAML. It comes with a memory setting which requires 8 GB to be free on the cluster. This is a good setting for production clusters, but since our test cluster is resource-constrained, we need to reduce that limit to 4 GB. So edit the Delegate YAML and replace the string memory: "8Gi" with memory: "4Gi". Finally, apply the Delegate YAML to your cluster using kubectl.
kubectl apply -f ./harness-delegate.yaml
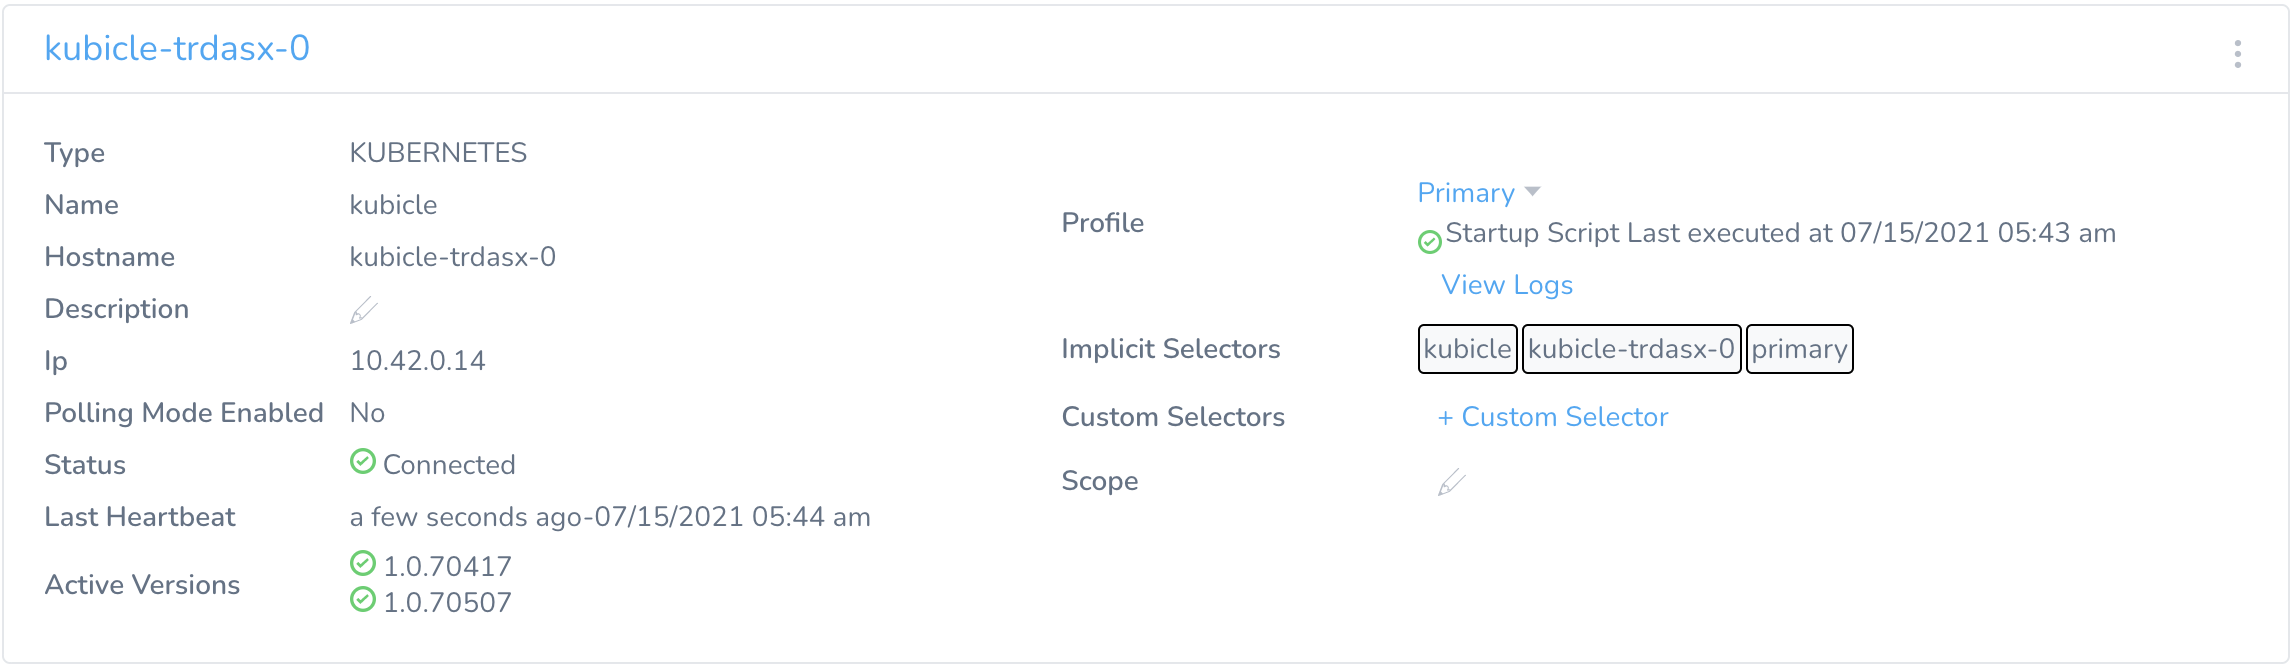
From the Setup → Harness Delegates page, check the status of your delegate. If it’s working, it should show up and report “Status: ✅ Connected.”
Add your Kubernetes Cluster to Harness as a Cloud Provider
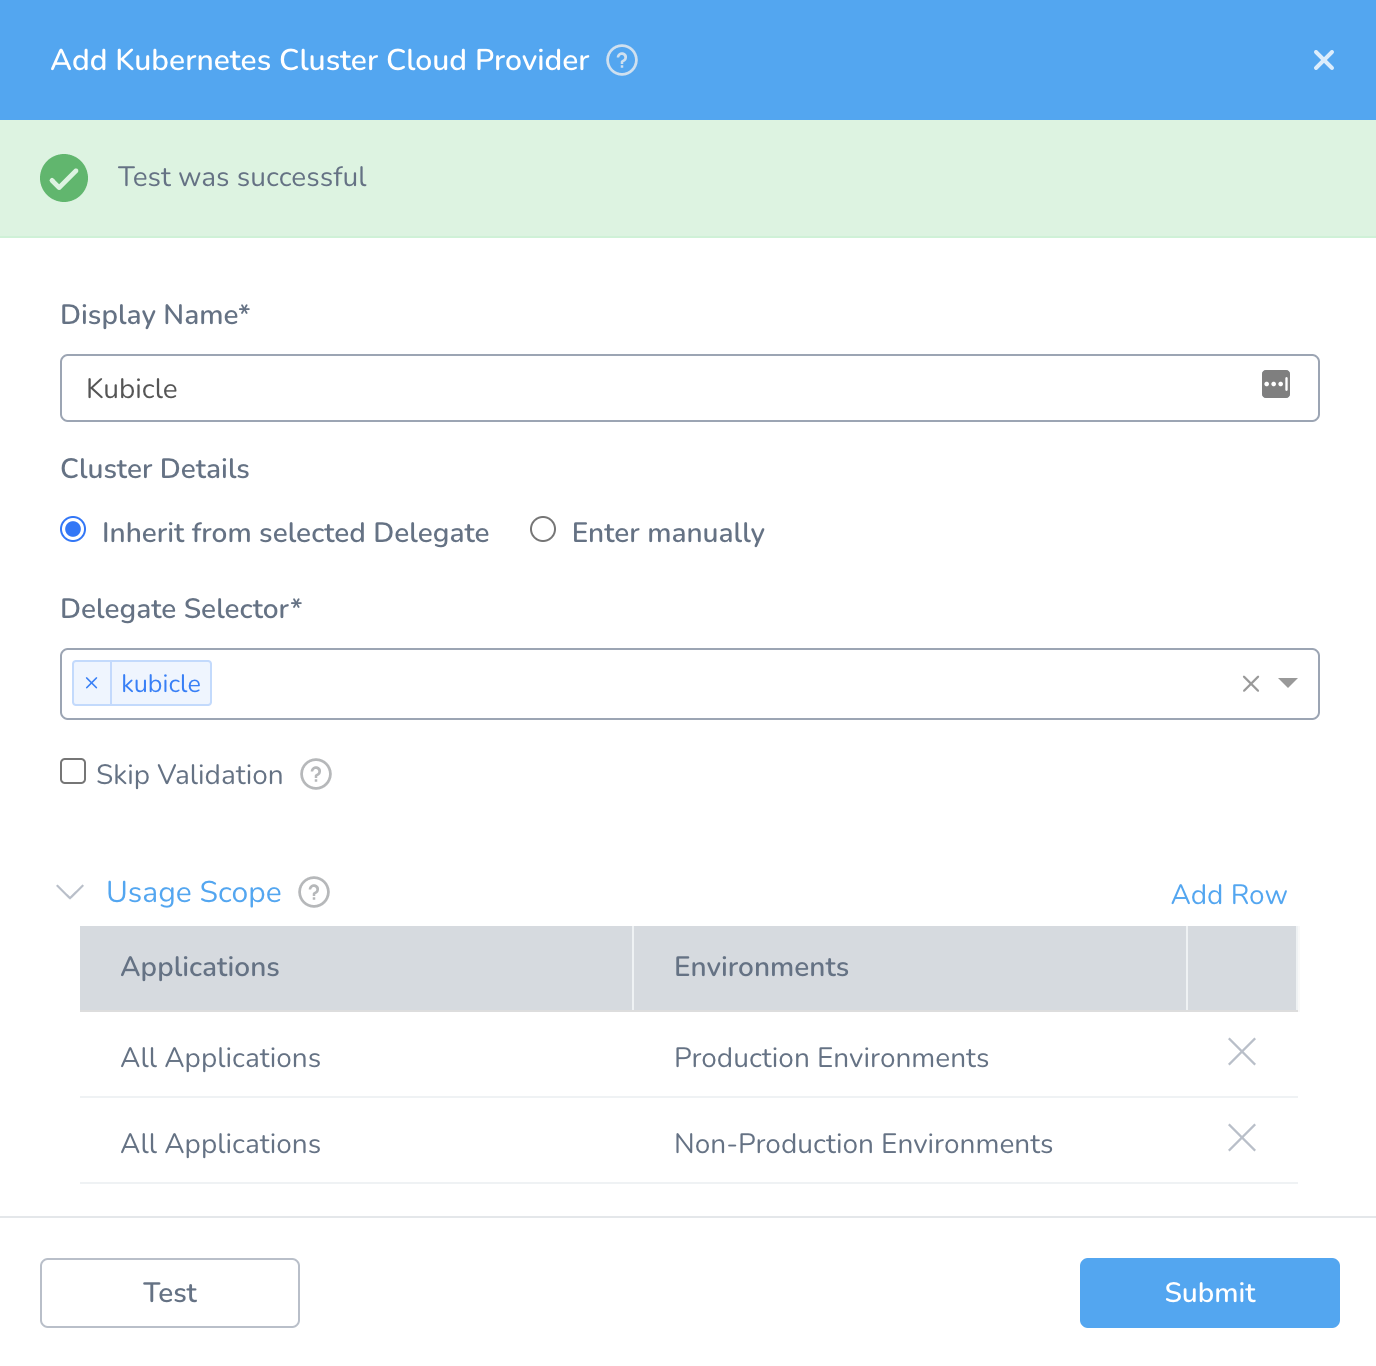
In Harness, go to Setup → Cloud Providers → Add Cloud Provider, and select Kubernetes Cluster. Give your Cloud Provider the display name, “Kubicle”. Under Cluster Details, select “Inherit from selected Delegate,” and select the “kubicle” delegate. Hit the Test button to make sure it works, and then hit Submit to create the Cloud Provider.
Create a Harness Application named Nginx
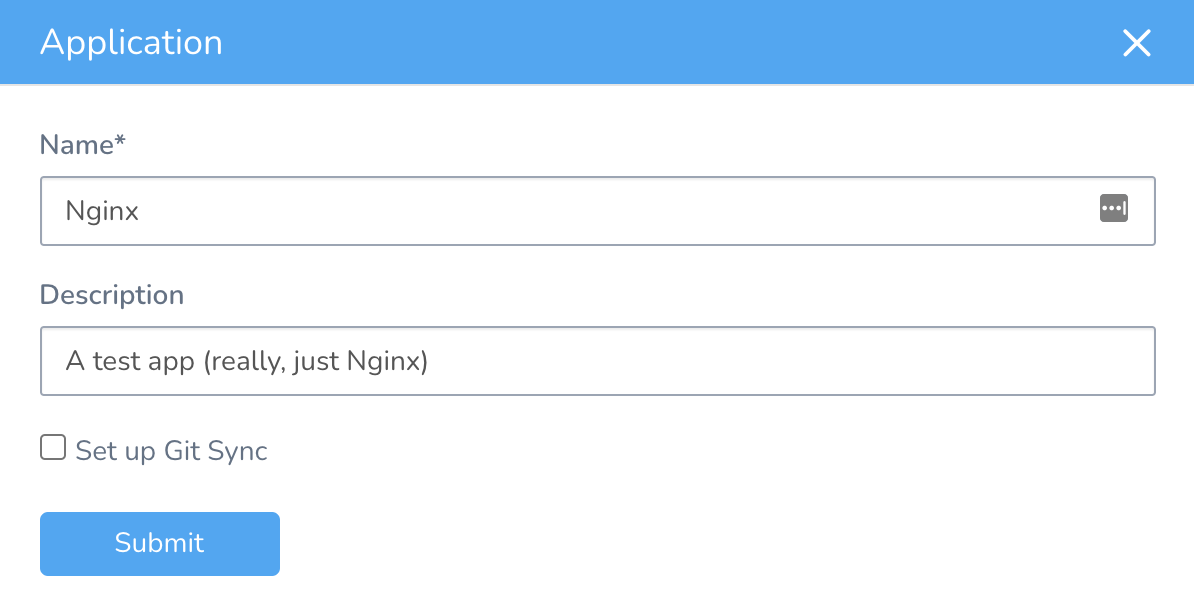
In Harness, go to Setup and click on Add Application. Name your Application “Nginx.”
Create a Harness Environment in Nginx named Development
In Harness, go to Setup → Nginx → Environments, and click Add Environment. Name the environment “Development.” Set the environment type to Non-Production.
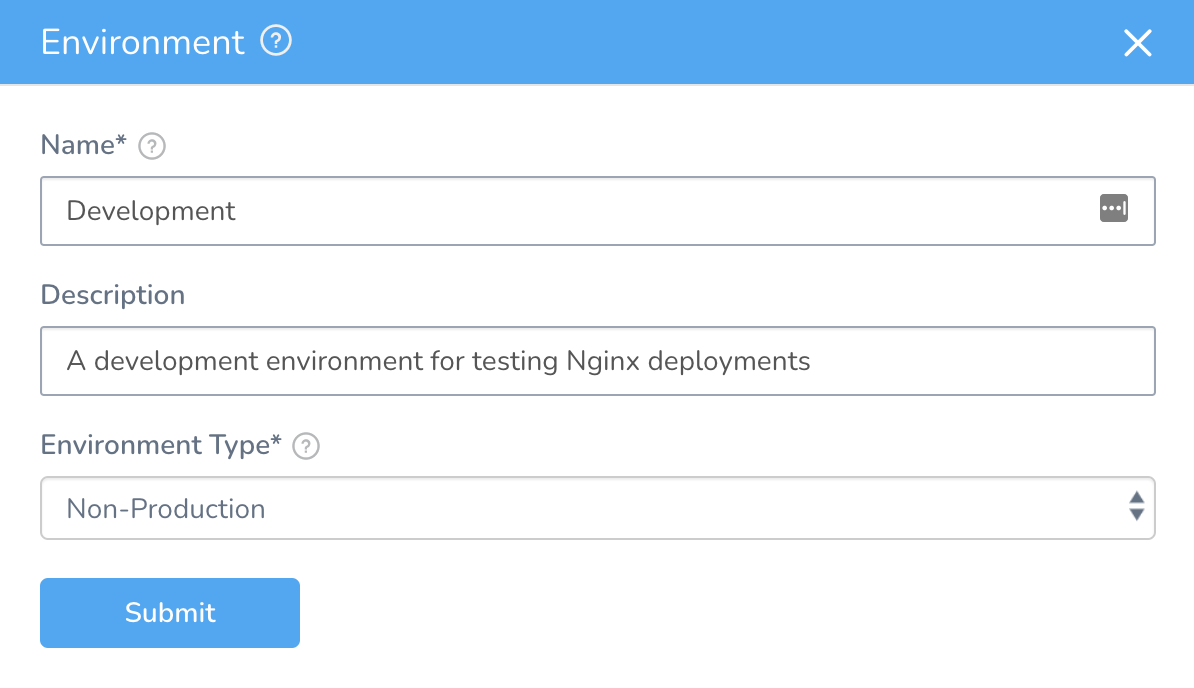
Hit Submit to create the environment.
Add Kubicle as an Infrastructure Definition in the Nginx Development Environment
In Harness, go to Setup → Nginx → Environments → Development, and click Add Infrastructure Definition.
- Name the cluster Kubicle Cluster.
- Set the Cloud Provider Type to Kubernetes Cluster.
- Set the Deployment Type to Kubernetes.
- Select “Use Already Provisioned Infrastructure.”
- Set the Cloud Provider to “Kubernetes Cluster: Kubicle.”
-
Set the namespace to “develop.”

Hit Submit to create the Infrastructure Definition.
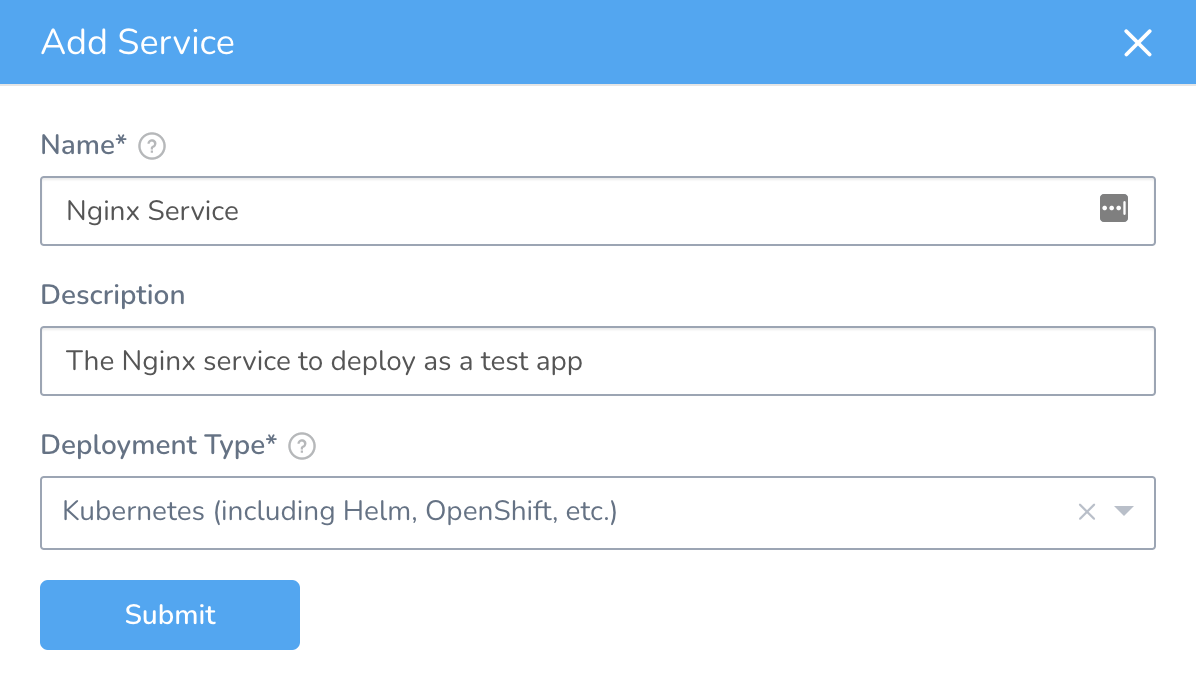
Create a Service in Nginx named Nginx Service
In Harness, go to Setup → Nginx → Services, and click Add Service. Name the service “Nginx Service.” Set the Deployment Type to Kubernetes, and hit Submit.
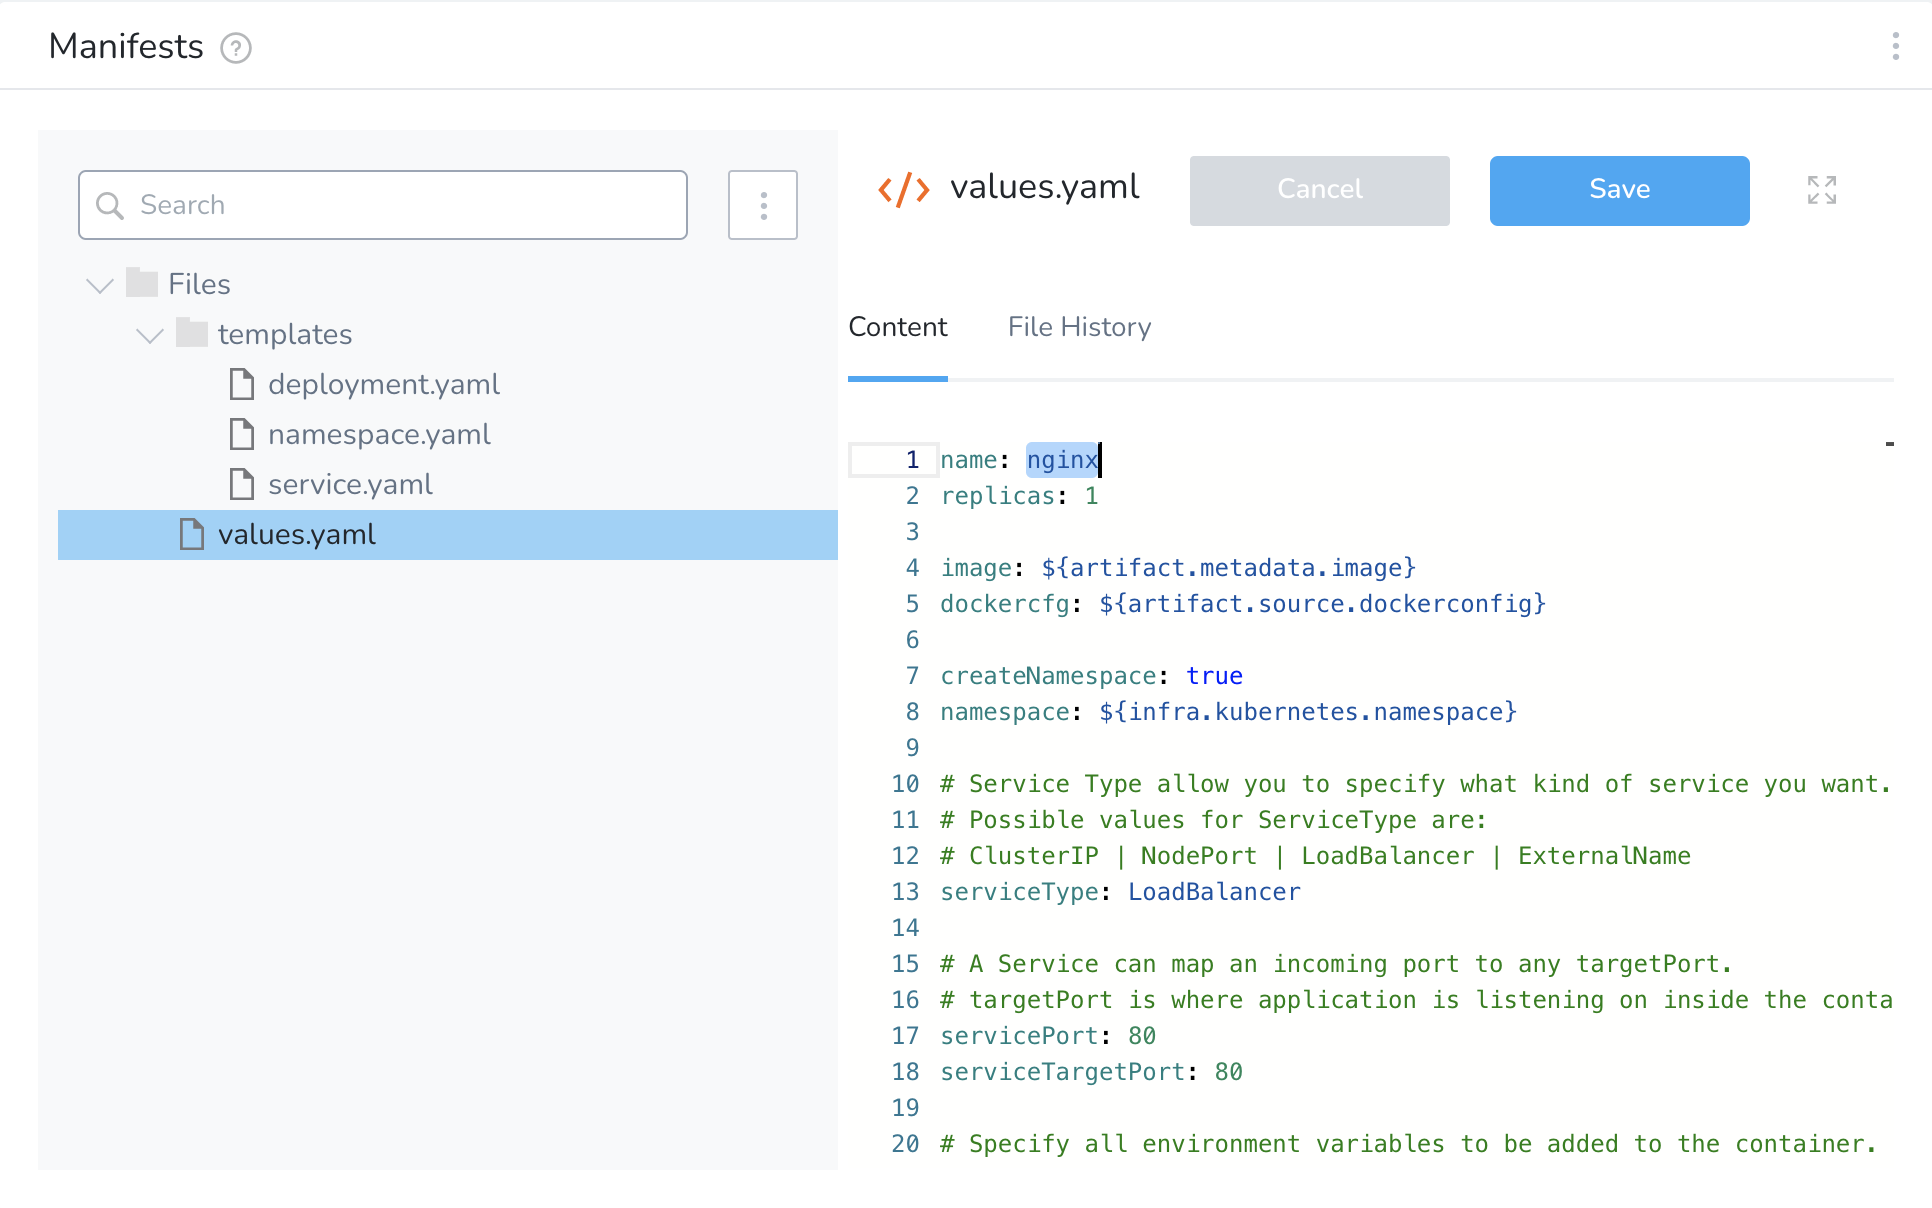
In the Service Overview, click Add Artifact Source → Docker Registry

In the Service Overview, under Manifests, edit the values.yaml file to change the name from harness-example to nginx.
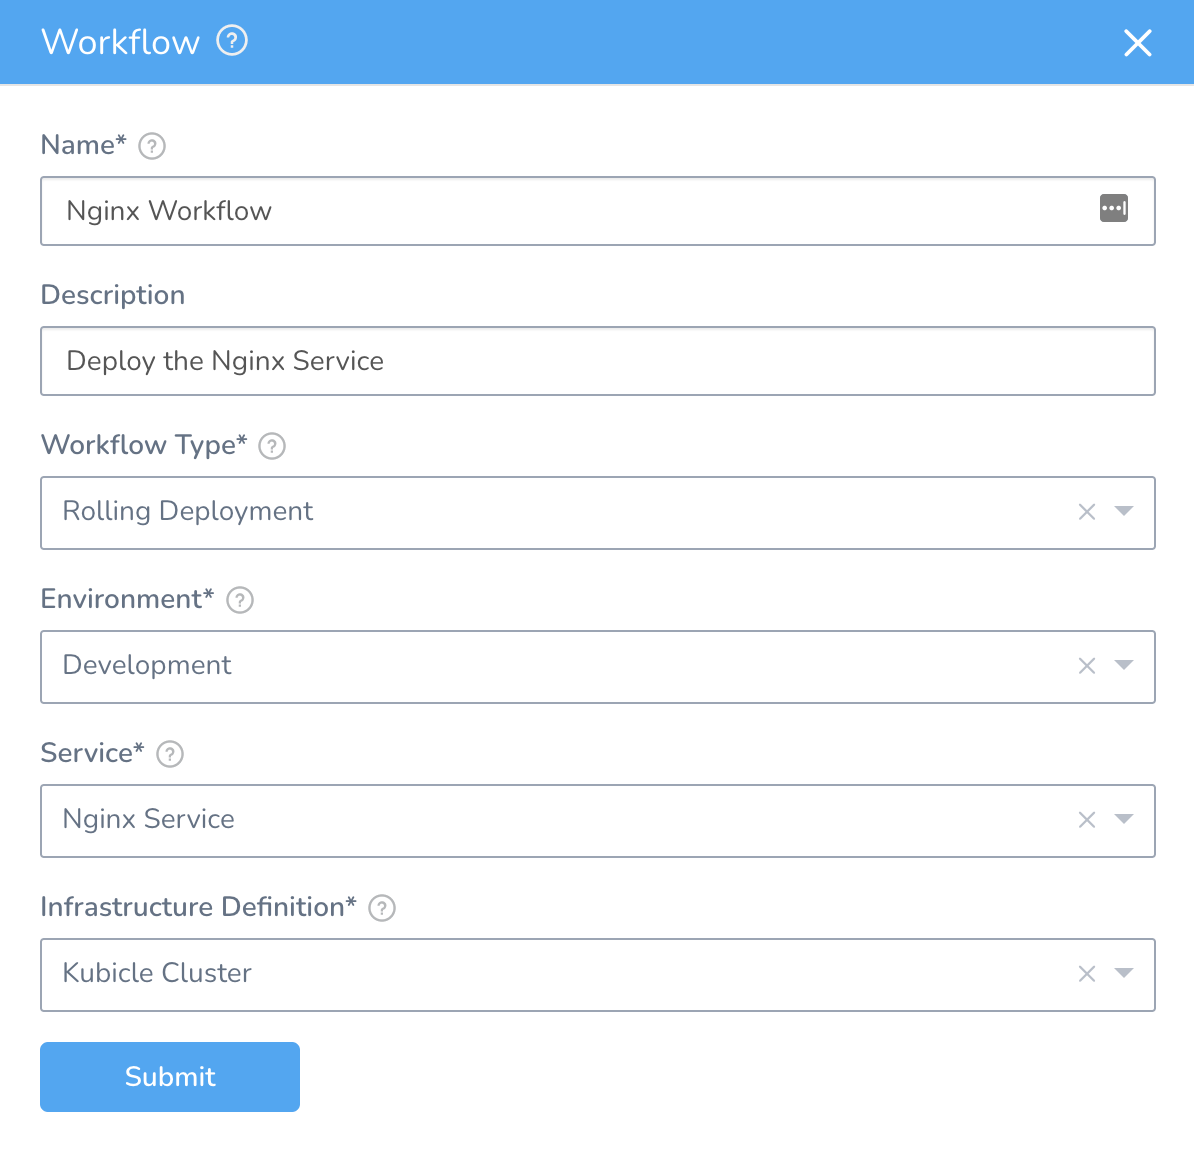
Create a Workflow in the Nginx App to deploy Nginx Service
In Harness, go to Setup → Nginx → Workflows, and click Add Workflow
- Name the workflow “Nginx Workflow.”
- Set Workflow Type to Rolling Deployment.
- Set Environment to Development.
- Set Service to Nginx Service.
- Set Infrastructure Definition to Kubicle Cluster.
-
Hit Submit to create the Workflow.
Deploy the Nginx Workflow
In Harness, go to Setup → Nginx → Workflows → Nginx Workflow, and click Deploy. Select the “stable” tag to deploy the latest stable version of the Nginx container.
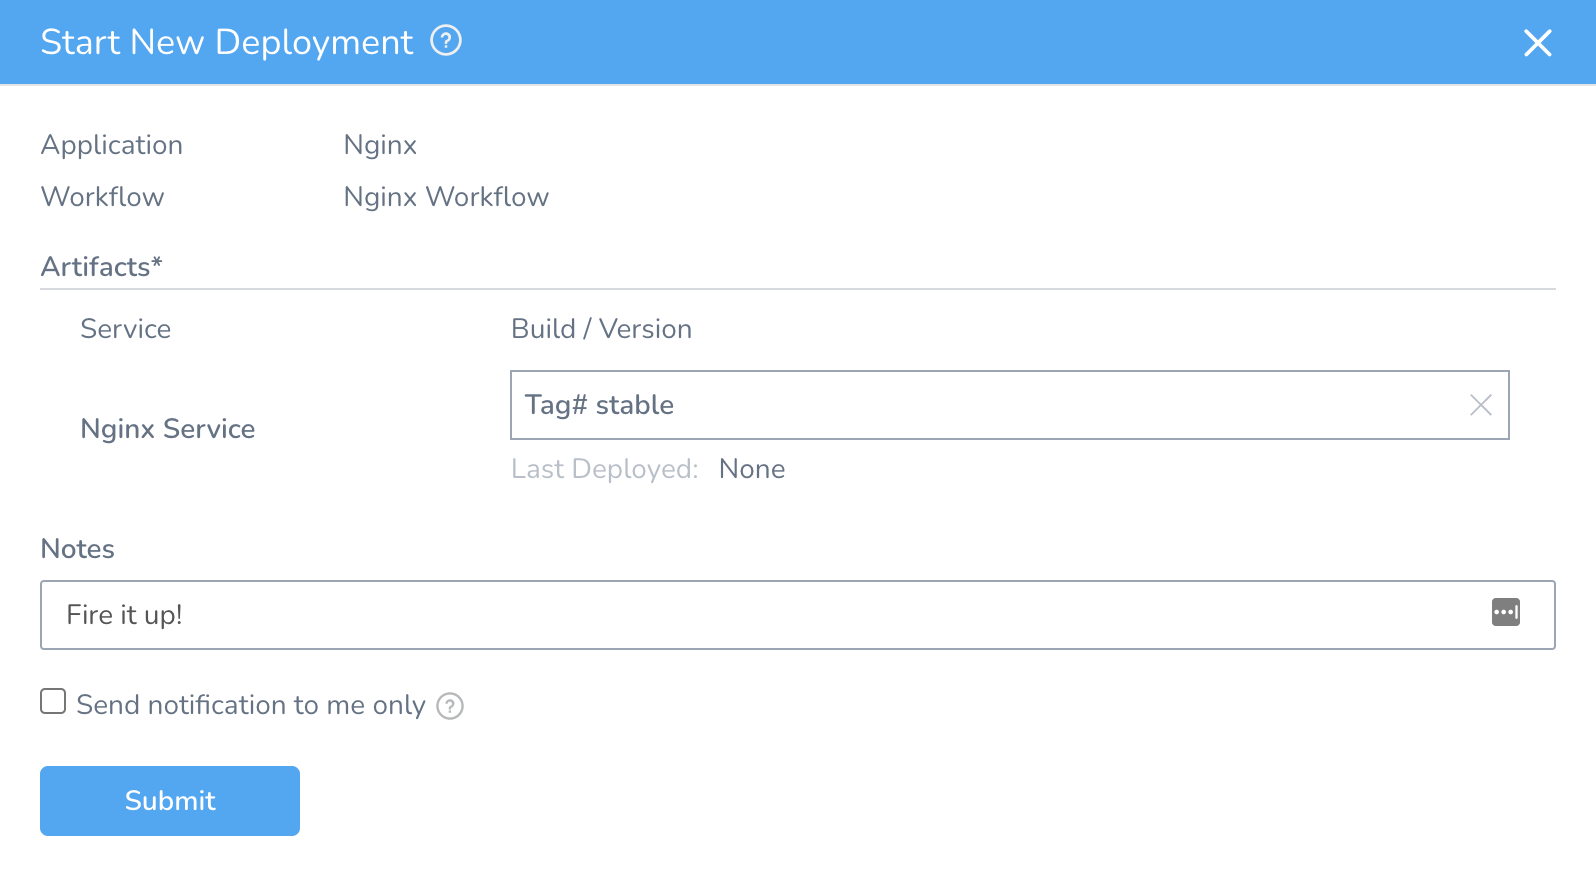
Hit Submit. When the workflow runs, we can see that our Nginx deployment is applied to our Kubernetes cluster. This automatically creates our Development environment namespace, “develop,” and starts an Nginx pod and an Nginx service in that namespace.
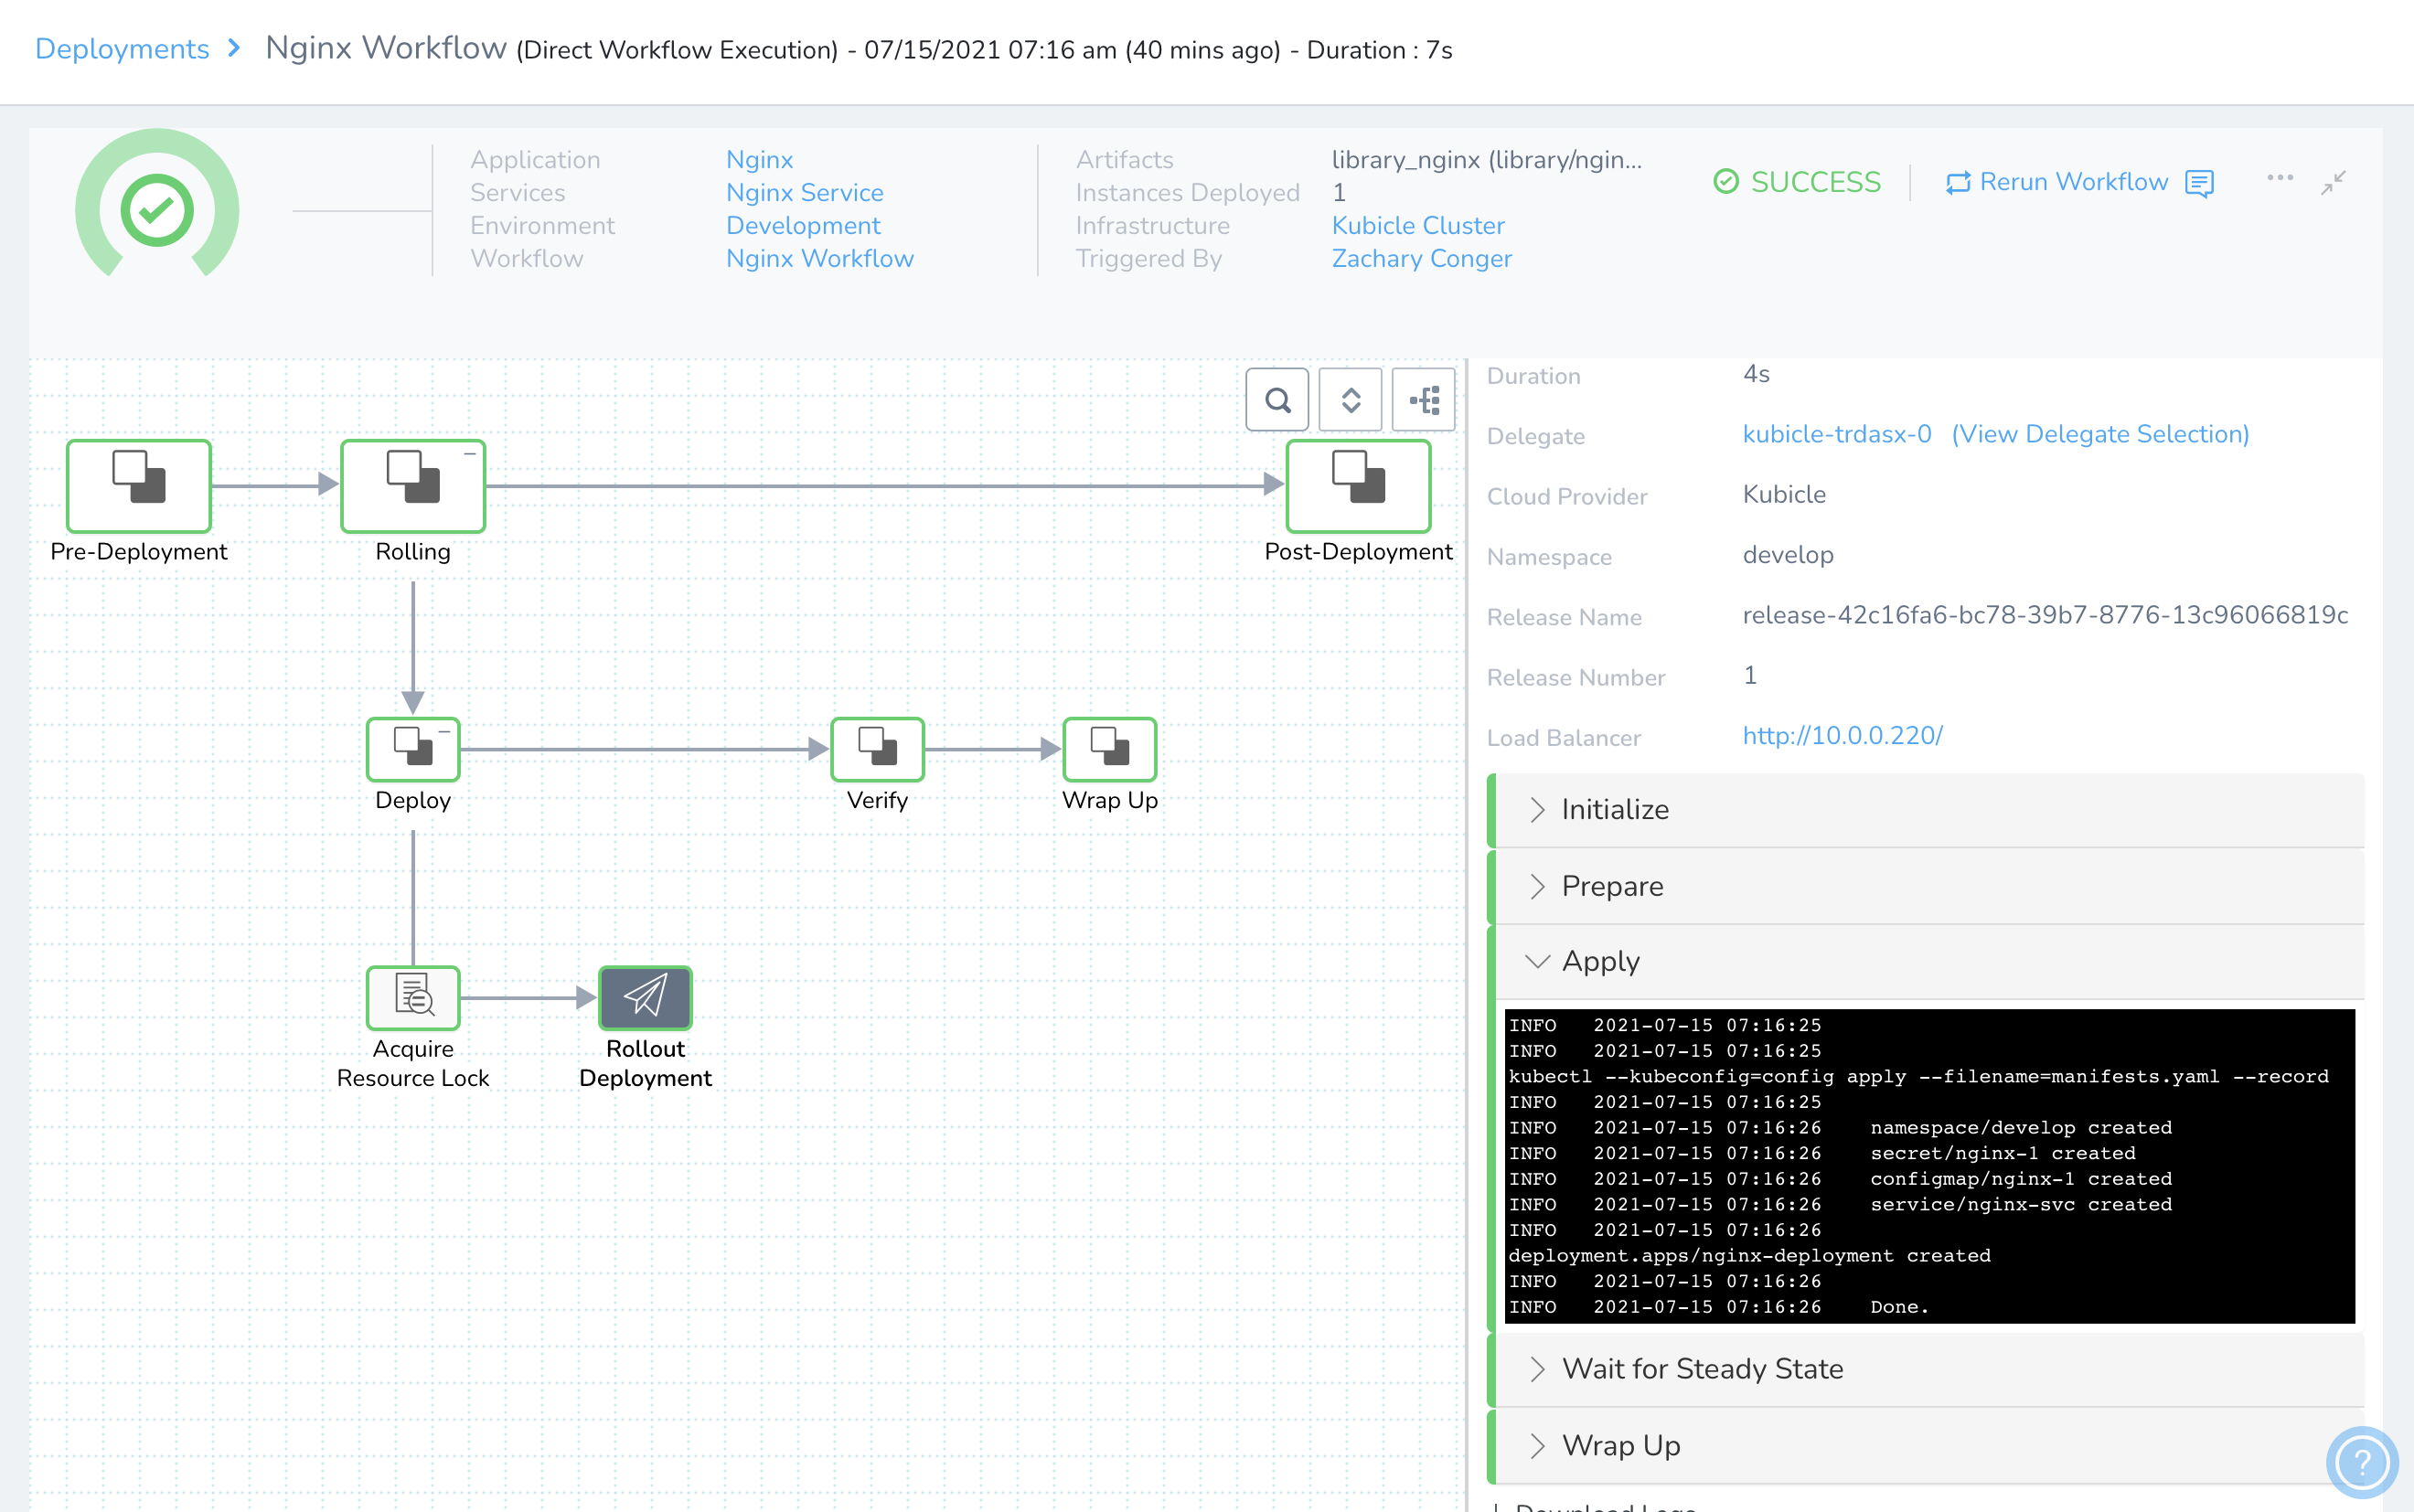
Check your Kubernetes cluster with kubectl to confirm that the service and pod came up as indicated in the deployment detail screen above.
% kubectl get pods,services -n develop
NAME                                   READY   STATUS    RESTARTS   AGE
pod/nginx-deployment-96b6f4bcf-xkg8l   1/1     Running   0          3m

NAME                TYPE           CLUSTER-IP      EXTERNAL-IP   PORT(S)        AGE
service/nginx-svc   LoadBalancer   10.43.152.230   10.0.0.220    80:30939/TCP   3m
Next Steps
Now that you have Harness deploying Nginx to your Kubernetes cluster as a test app, head back to the HawkScan Harness Integration Guide to learn how to scan that app!